The installation process is demonstrated on an SN2100 system, but applies to the SN2010 series as well.
This rail kit is not included with the SN2100/SN2010 systems, and can be purchased separately.
This section is relevant to short-depth systems that allow such form of installation only.
|
Kit Part Number |
Kit Legacy Part Number |
Rack Size and Rack Depth Range |
|---|---|---|
|
930-9BRKT-00JI-000 |
MTEF-KIT-E |
Rack installation static kit for SN2100/SN2010 systems short depth 1U half-width switches, allows installation of a single switch into standard depth racks. |
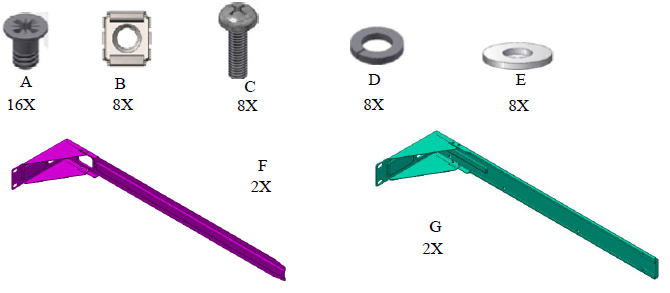
The following parts are included in the rail kit (see figure below):
-
16 flat head 4-40 screws (A)
-
8 M6 spring steel cage nuts (B)
-
8 M6 pan head screws (C)
-
8 M6 spring washers (D)
-
8 M6 flat washers (E)
-
2 rack mount blades (F)
-
2 system brackets (G)
|
Rack Rail Kit Parts
|
To mount the system into the rack:
At least two people are required to safely mount the system in the rack.
-
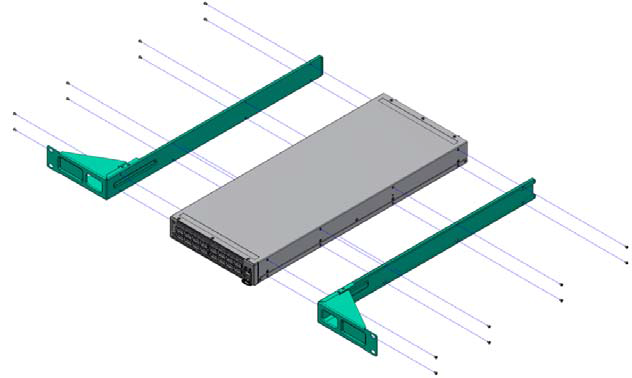
Attach the 2 system rails to the system’s sides using 8 flat head 4-40 screws (A) in each side.
Attaching the Brackets to the System’s Sides
-
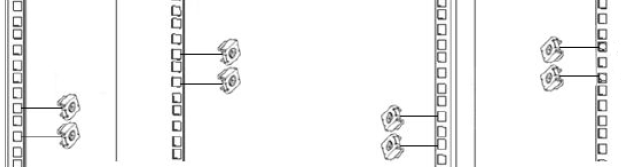
Install 8 cage nuts of the relevant type - square or round holes, according to your rack type.
Installing the Cage Nuts
While your installation partner is supporting the system’s weight, perform steps 3 and 4:
-
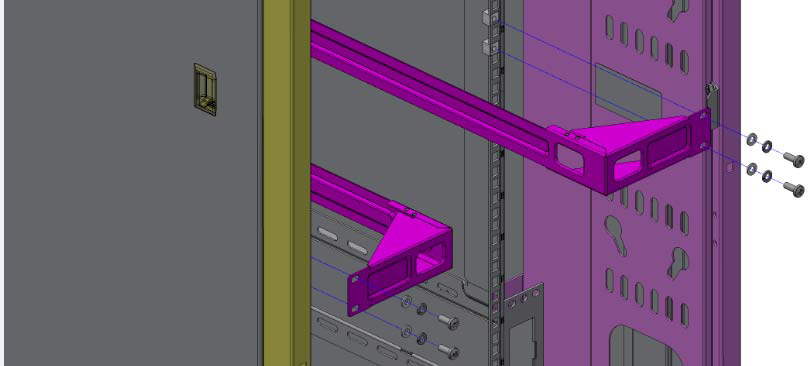
On the rear side of the cabinet, install the two blades (F) in the selected rack unit, using four M6 screws and washers (C+D+E). Do not tighten the screws yet.
Attaching the Blades to the Rack
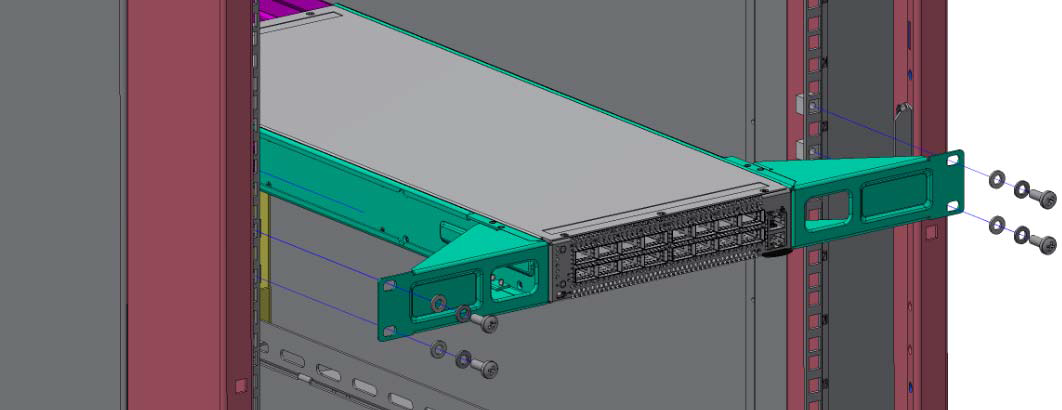
-
Mount the system into the rack enclosure by sliding the rails in the rack. Secure the brackets to the rack’s posts by inserting four M6 screws and washers (C+D+E) in the designated cage nuts - 2 in each side. Tighten all screws.
Attaching the Brackets to the Rack
Last updated: