Created on Mar 12, 2024
Introduction
This guide outlines configuring the NVIDIA® BlueField®-3 DPU to NIC Mode on VMware ESXi version 8.0.x.
References
-
Enable SSH from the vSphere Client - Getting Started with ESXCLI 8.0 (vmware.com)
-
Using ESXi Shell in ESXi 6.x, 7.x and 8.x (2004746) (vmware.com)
Hardware and Software Requirements
-
A server platform with an adapter card utilizing an NVIDIA BlueField-3 device
-
Administrator privileges are necessary for installation on the target machine
Setup
The setup involves an ESXi 8.0 server with one or more NVIDIA BlueField-3 adapter cards.
The setup includes:
VMware ESXi server, vSphere Cluster and vCenter install and configuration is out of the scope of this post.
Option 1 - Using the BIOS Menu on DELL and Lenovo Servers
On a Dell server:
-
-
Enter the server's BIOS menu.
-
Click Device Settings:
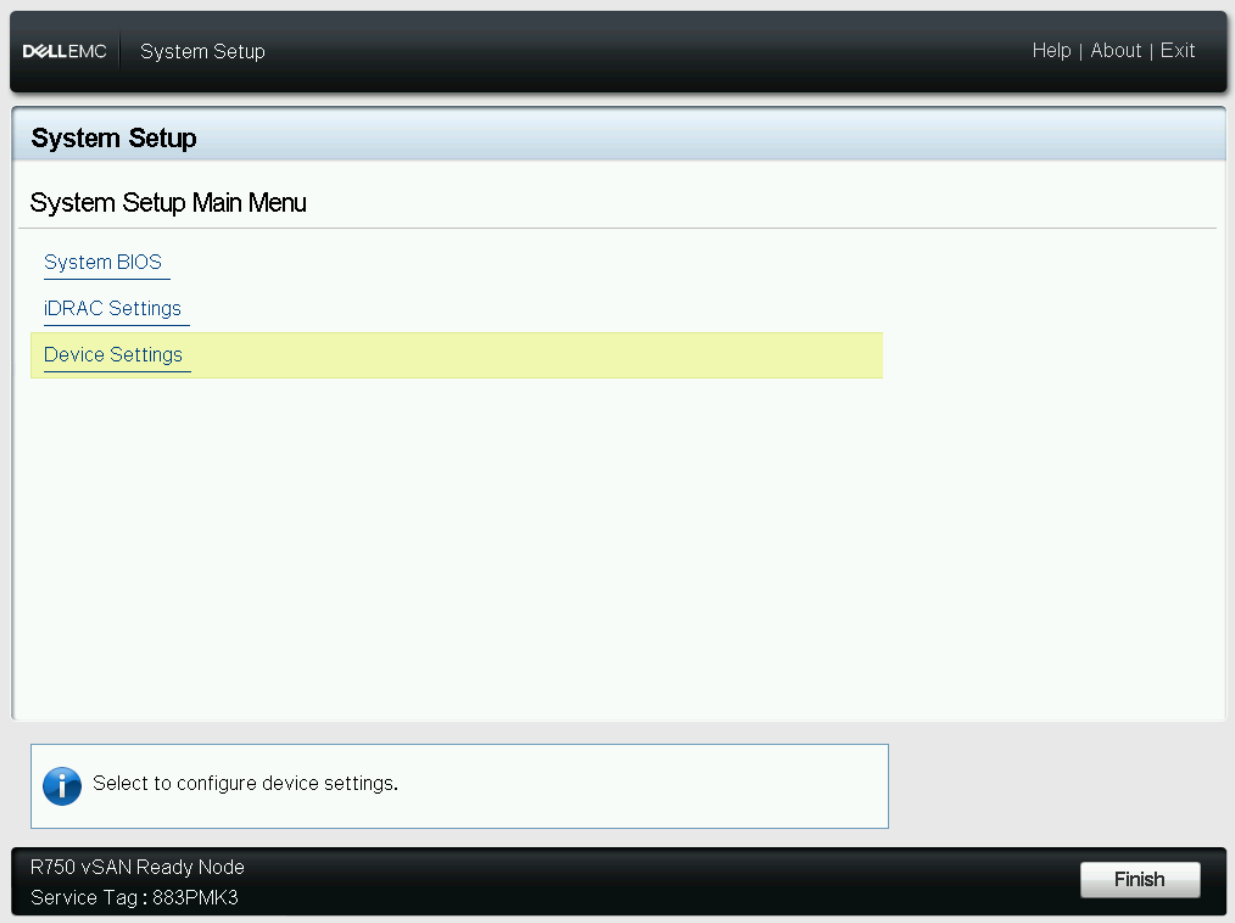
-
Select the desired BlueField device(s).
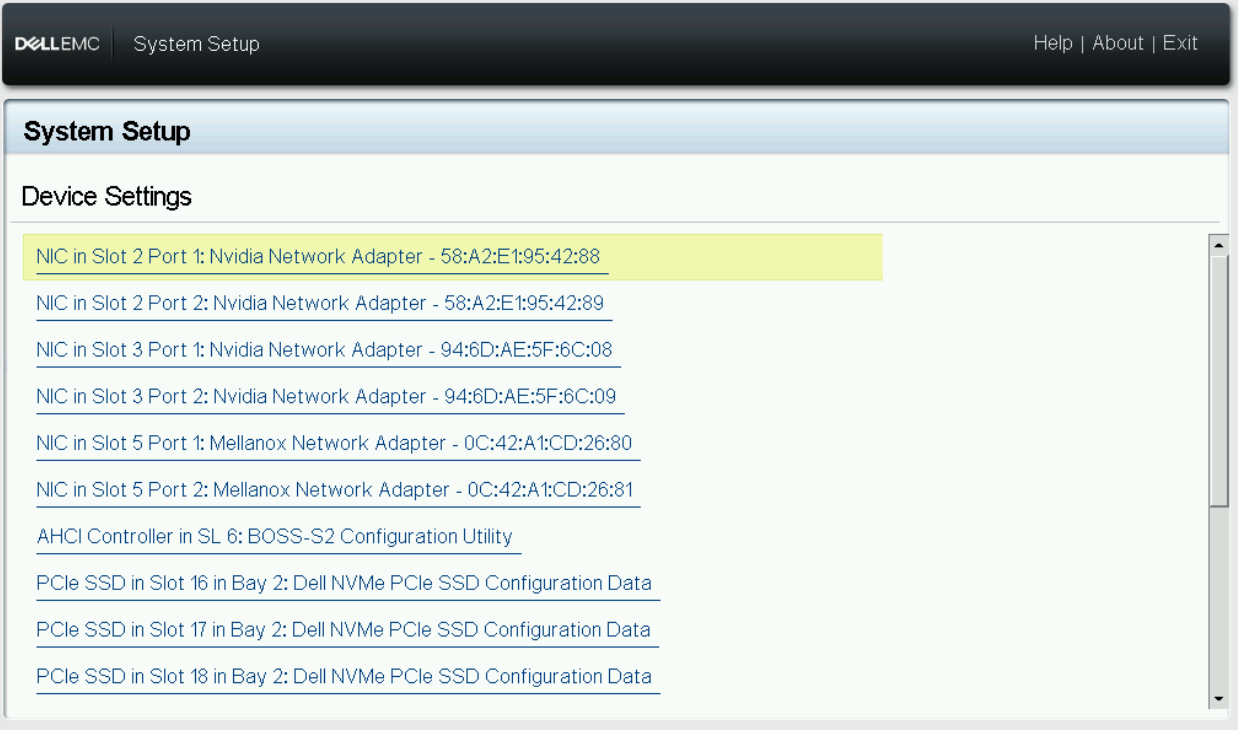
-
Verify that the Chip Type is a BlueField device (BlueField-3) and the VMware Distributed Services Engine (DPU) is Disabled.
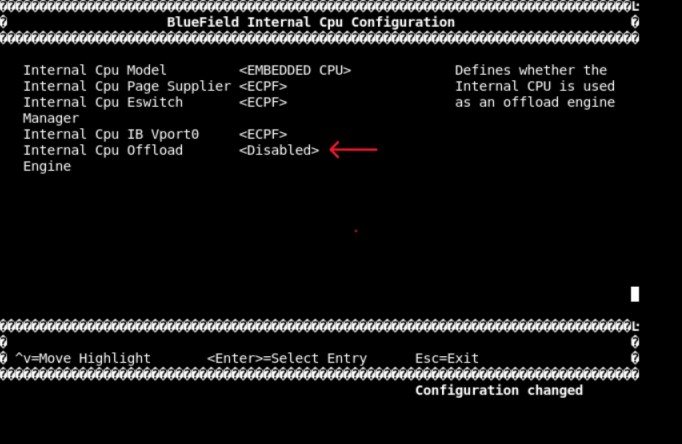
Click BlueField Internal Cpu Configuration.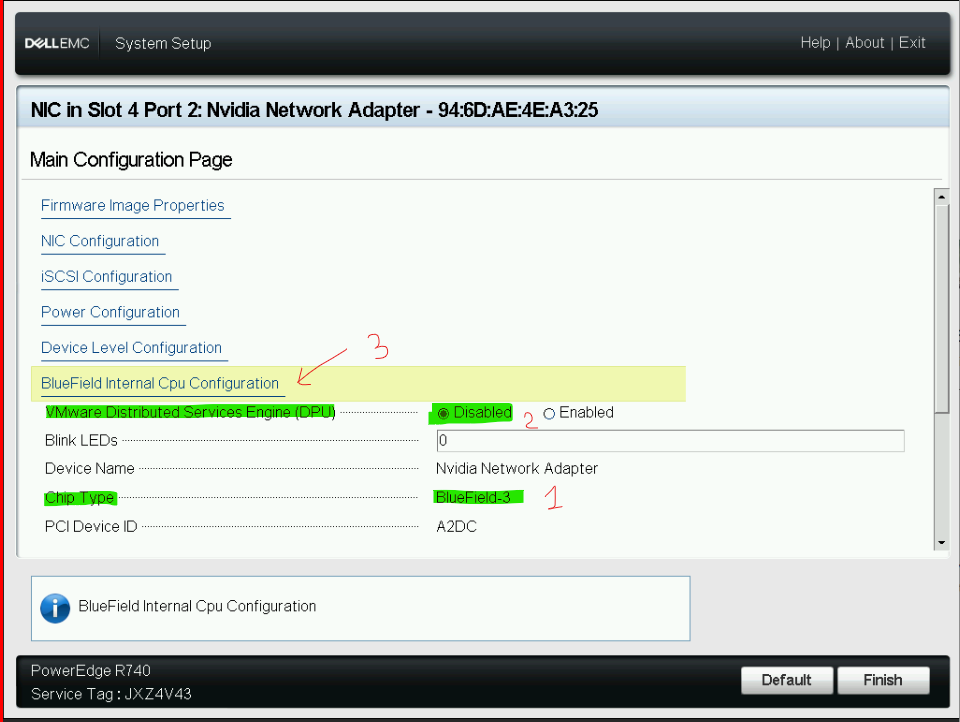
-
Set Internal Cpu Offload Engine setting to Disable (disable is NIC mode).
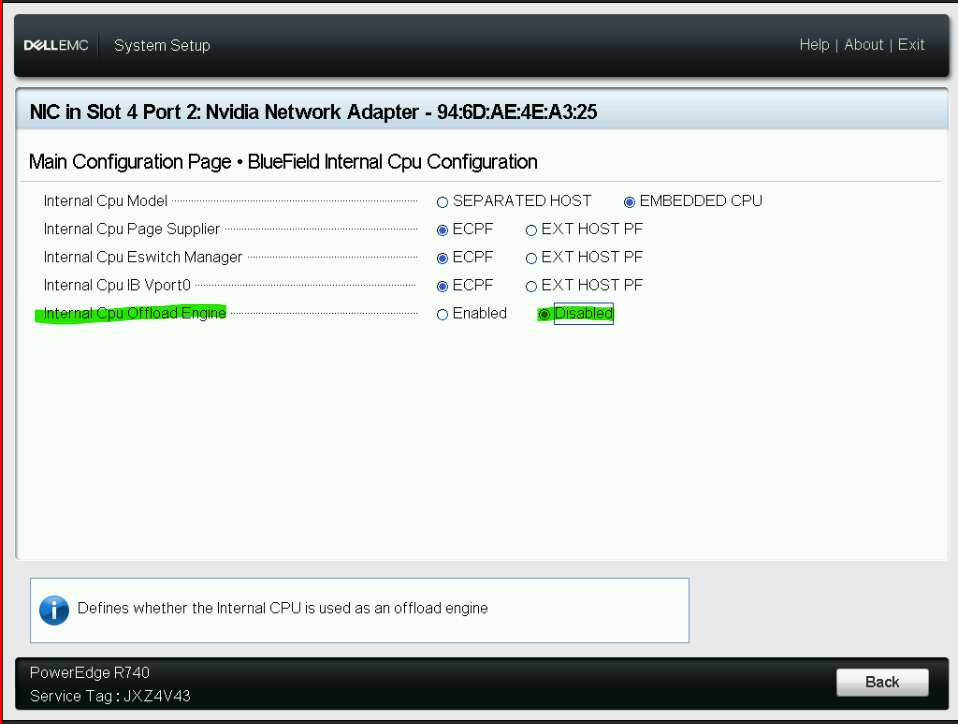
-
Repeat steps b-d for all necessary BlueField devices in the server.
-
Save BIOS settings.
-
Power cycle the server.
-
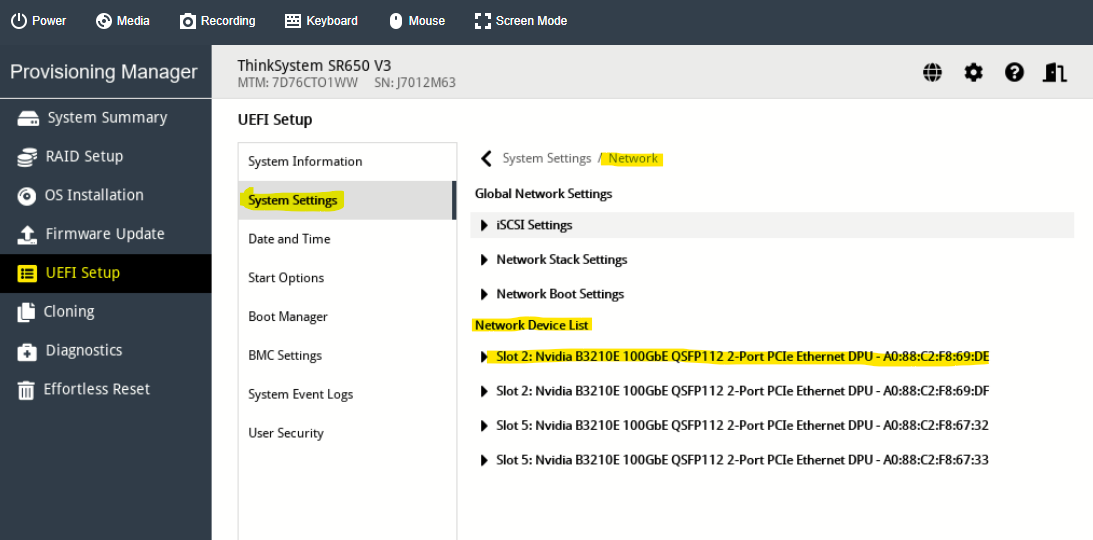
On a Lenovo server:
-
-
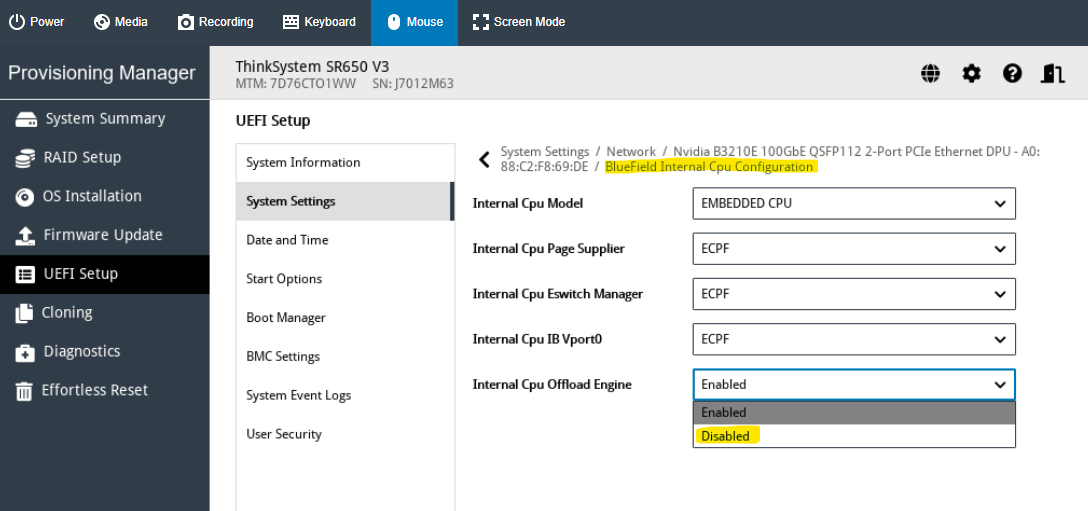
Enter the server's BIOS menu.
-
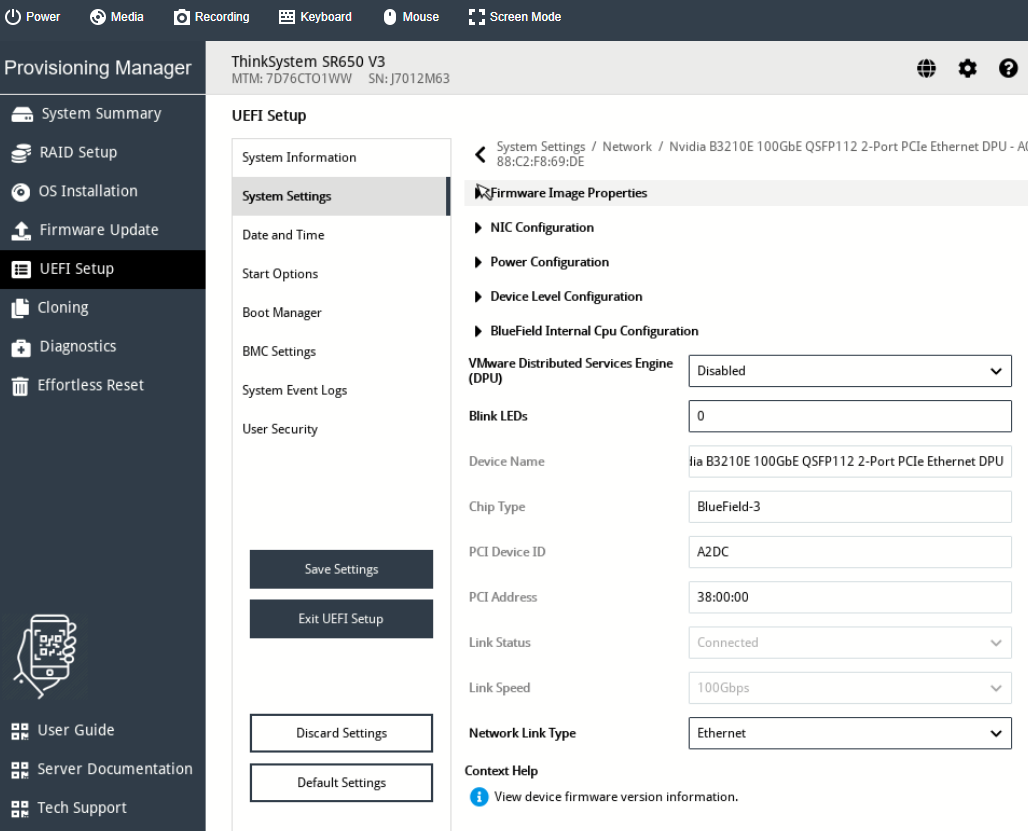
Select the desired BlueField device(s).
-
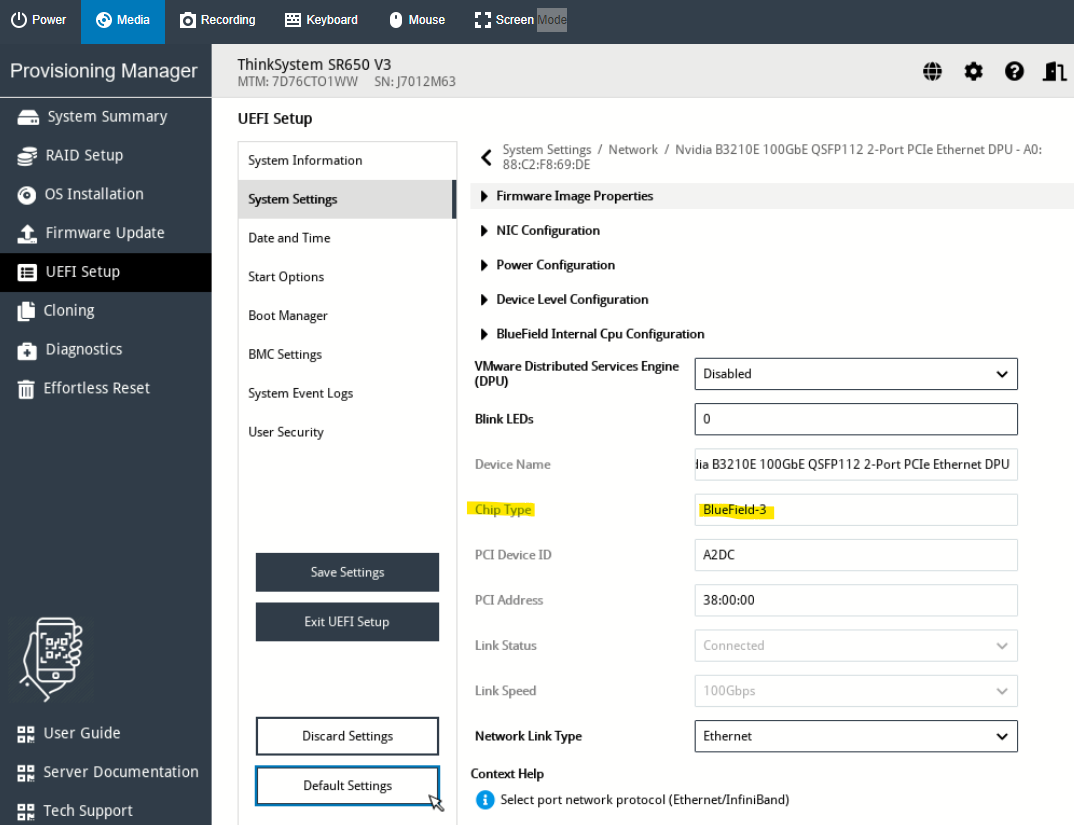
Verify that the Chip Type is a BlueField device (e.g., BlueField-3) and the VMware Distributed Services Engine (DPU) is Disabled.
-
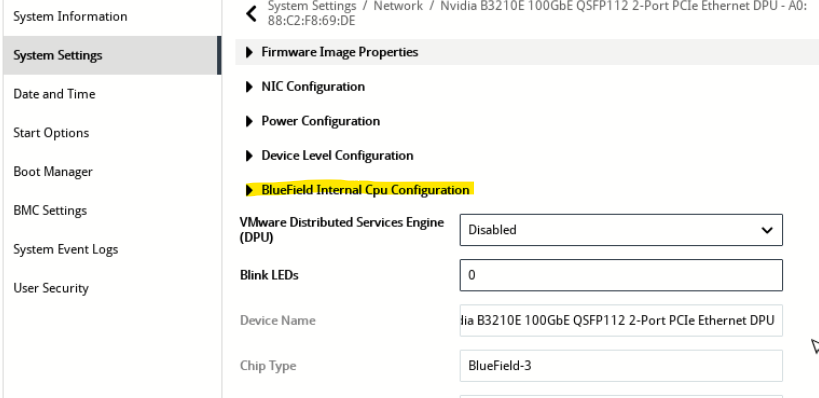
Click BlueField Internal Cpu Configuration.
-
Set Internal Cpu Offload Engine setting to Disable (i.e., NIC mode).
-
Repeat steps b-d for all necessary BlueField devices in the server.
-
Save BIOS settings.
-
Power cycle the server.
-
Option 2 - Using the ESXi Server Console
-
Enable SSH from the vSphere Client to the desired ESXi server.
-
Access the remote ESXi Shell.
-
Enter Maintenance Mode with ESXCLI.
-
Locate the physical NVIDIA network device.
ESXi console
[root@qa-esxio-lnv-06:~] lspci |grep -i melExample output:
ESXi console
0000:38:00.0 Ethernet controller: Mellanox Technologies MT43244 Family [BlueField-3 integrated ConnectX-7] 0000:38:00.1 Ethernet controller: Mellanox Technologies MT43244 Family [BlueField-3 integrated ConnectX-7] 0000:38:00.2 Ethernet controller: Mellanox Technologies MT42822 Family [BlueField Auxiliary Comm Channel] 0000:38:00.3 DMA controller: Mellanox Technologies MT43244 BlueField-3 SoC Management Interface 0000:a8:00.0 Ethernet controller: Mellanox Technologies MT43244 Family [BlueField-3 integrated ConnectX-7] 0000:a8:00.1 Ethernet controller: Mellanox Technologies MT43244 Family [BlueField-3 integrated ConnectX-7] 0000:a8:00.2 Ethernet controller: Mellanox Technologies MT42822 Family [BlueField Auxiliary Comm Channel] 0000:a8:00.3 DMA controller: Mellanox Technologies MT43244 BlueField-3 SoC Management Interface -
Check the NIC link status from the ESXi service console.
ESXi console
[root@qa-esxio-lnv-06:~] esxcli network nic listExample output:

-
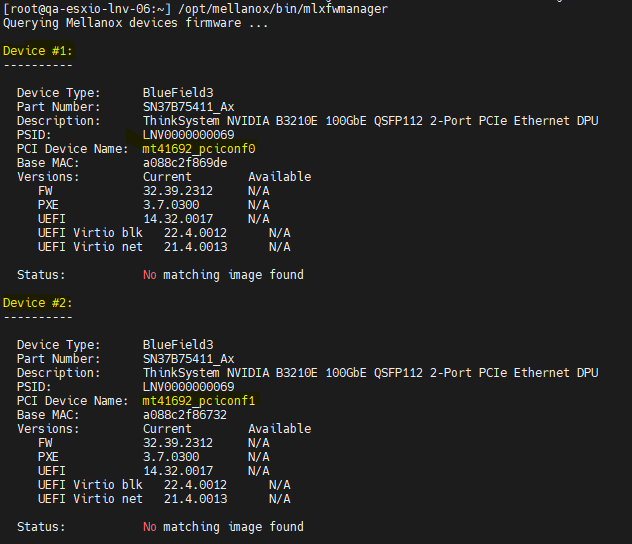
Query NVIDIA device firmware.
ESXi console
[root@qa-esxio-lnv-06:~] esxcli network nic listExample output:
If the following is printed:
/opt/mellanox/bin/mlxfwmanager
-E- No devices found or specified, mst might be stopped, run 'mst start' to load MST modules
Then the device is in DPU mode, so MFT does not recognize it.
-
Verify whether each device is in DPU mode by ensuring that
INTERNAL_CPU_OFFLOAD_ENGINEis enabled.ESXi console
[root@qa-esxio-lnv-06:~] /opt/mellanox/bin/mlxconfig -d mt41692_pciconf0 q | grep -i offload INTERNAL_CPU_OFFLOAD_ENGINE ENABLED(0) [root@qa-esxio-lnv-06:~] /opt/mellanox/bin/mlxconfig -d mt41692_pciconf1 q | grep -i offload INTERNAL_CPU_OFFLOAD_ENGINE ENABLED(0) -
Enter device recovery mode and reboot the server.
ESXi console
[root@qa-esxio-lnv-06:~] esxcli system module parameters set -m nmlx5_core -p mst_recovery=1 [root@qa-esxio-lnv-06:~] reboot -f -
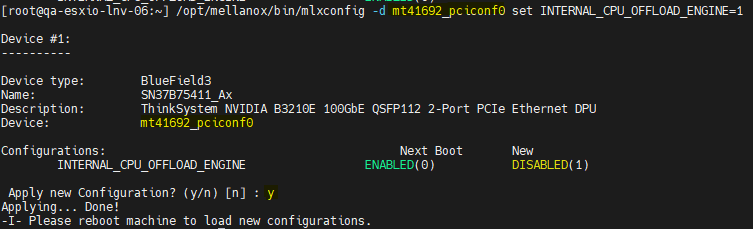
Configure the desired device to NIC mode.
ESXi console
[root@qa-esxio-lnv-06:~] /opt/mellanox/bin/mlxconfig -d mt41692_pciconf0 set INTERNAL_CPU_OFFLOAD_ENGINE=1Example output
-
Power cycle the system after switching to NIC mode.
-
Verify that
INTERNAL_CPU_OFFLOAD_ENGINEisDISABLEDafter power cycling the system.ESXi console[root@qa-esxio-lnv-06:~] /opt/mellanox/bin/mlxconfig -d mt41692_pciconf0 q | grep -i offloadExample output:

Option 3 - Move to NIC Mode from the DPU UEFI Menu
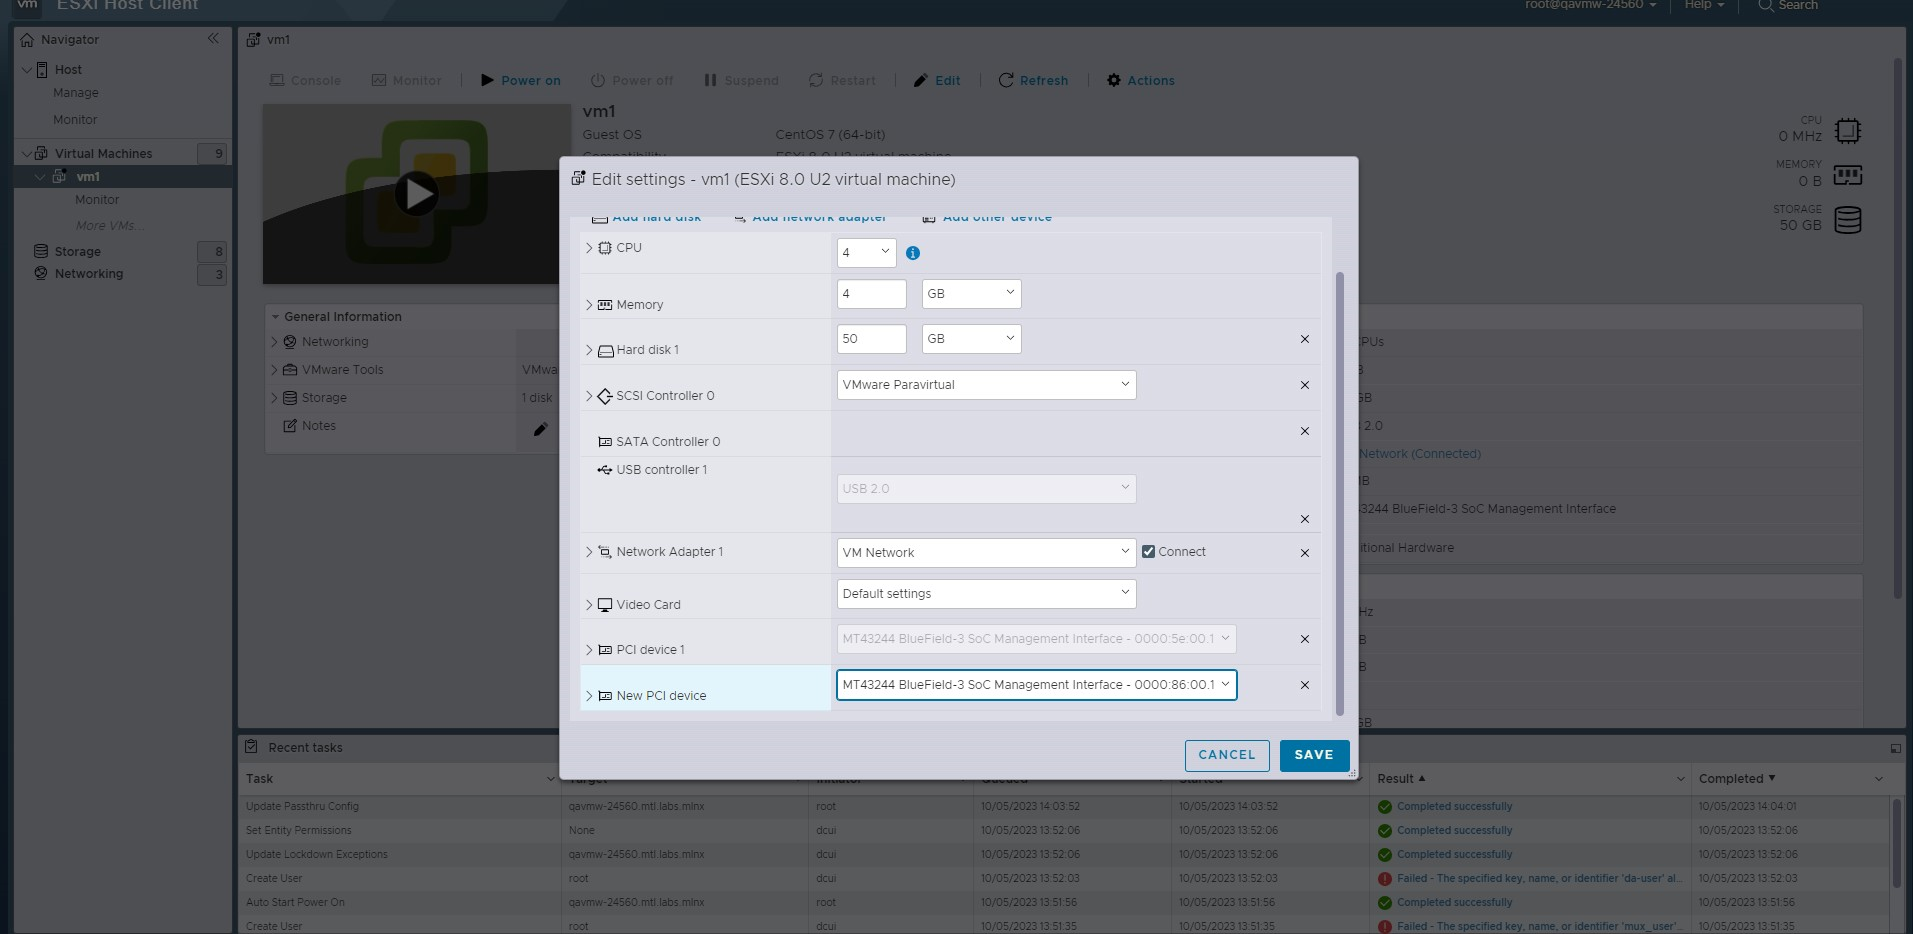
We will add a DPU to a VM as a passthrough PCI device and will connect to DPU UEFI to configure DPU in NIC Mode.
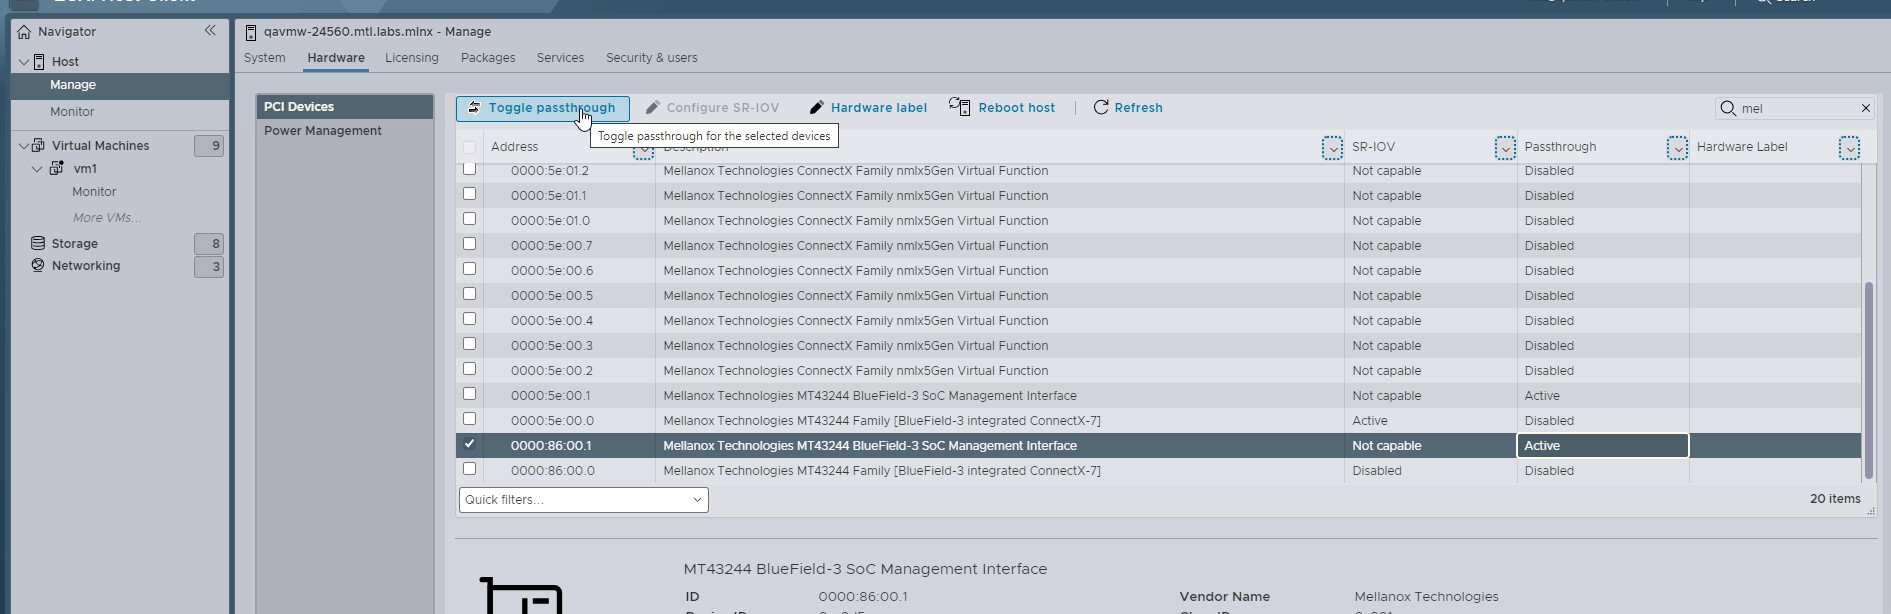
-
Change the management interfaces to passthrough.
-
Create a virtual machine (VM) and assign the PCIe passthrough devices.
-
Power on the VM.
-
Deploy Linux OS from PXE.
-
Install the driver to get RShim and MFT:
Installing
minicomis necessary.-
For RedHat, run:
ESXi console
yum install minicom yum install pv yum install gcc-gfortran -
For Ubuntu, run:
ESXi console
apt install minicom apt install pv -
For SLES, use
yastorzypper. For example:ESXi console
zypper -i minicom
zypper -i pv
-
-
Connect to DPU via minicom:
If you have multiple DPUs on your setup, this means that you have one RShim per DPU (e.g.,
rshim0for DPU#1,rshim1for DPU#2, etc.)Open as many threads on VNC to get access to each DPU using the following formula:
minicom -D /dev/rshim<N>/consoleWhere
<N>represents the index associated with each DPU.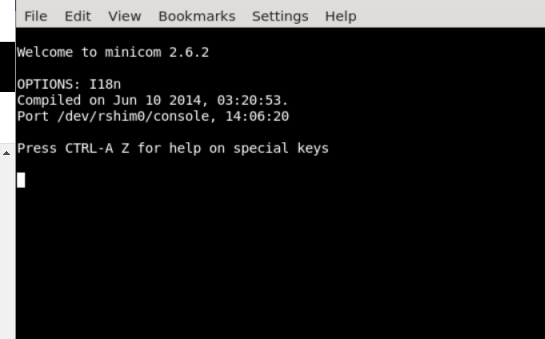
-
Open a new SSH connection to the same VM and reset each DPU from the host:
ESXi console
echo "SW_RESET 1" > /dev/rshim<N>/misc -
Navigate to the console for your DPU and press the
ESCbutton key on the keyboard. -
Define a new password for the DPU.
The default password for the UEFI BIOS is
bluefield.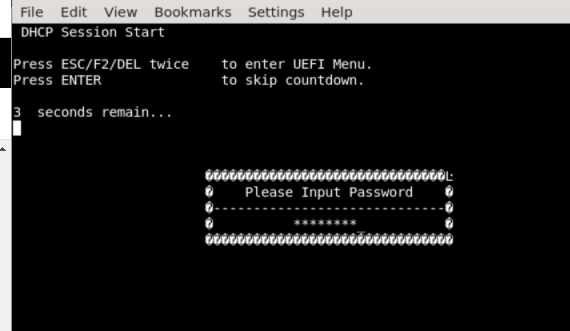
-
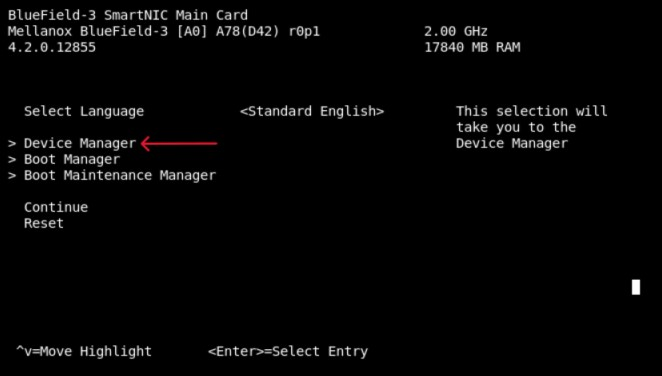
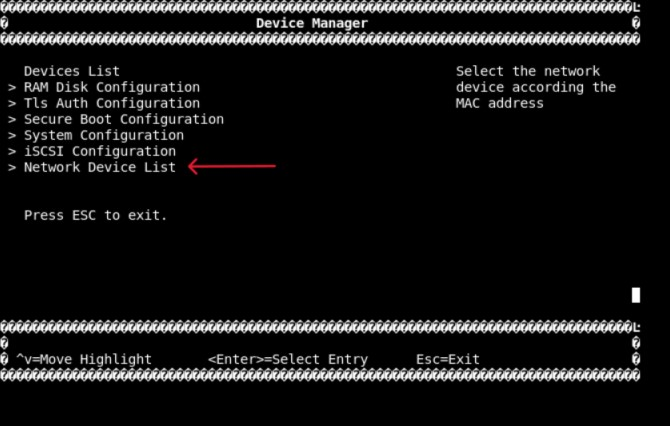
Select
Device Manager.
-
Select
Network Device List.
-
Select the network device that presents the uplink (i.e., select the device with the uplink MAC address).
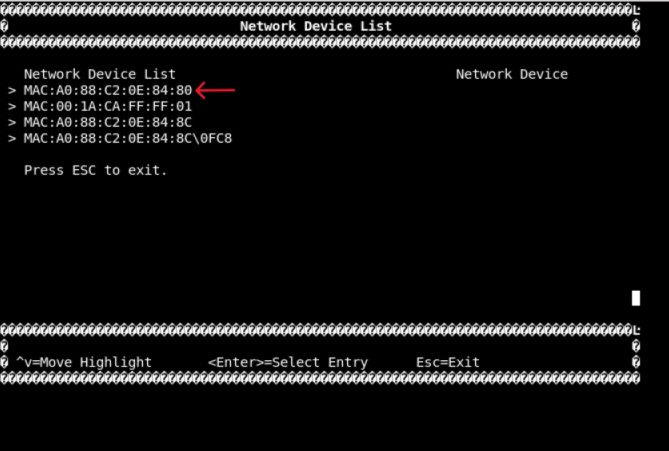
-
Select
NVIDIA Network adapter - $<uplink-mac>.
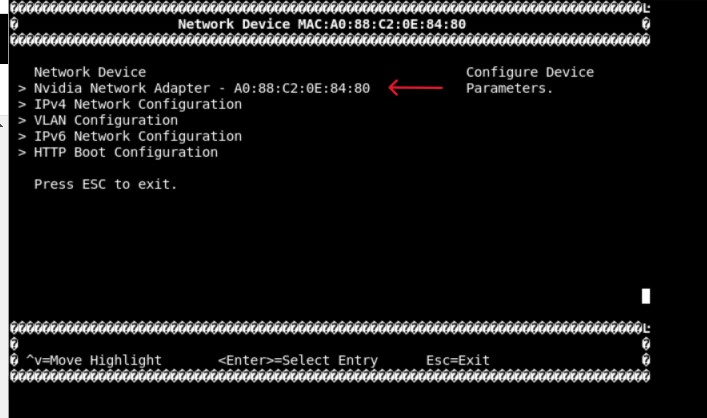
-
Select
BlueField Internal Cpu Configuration.
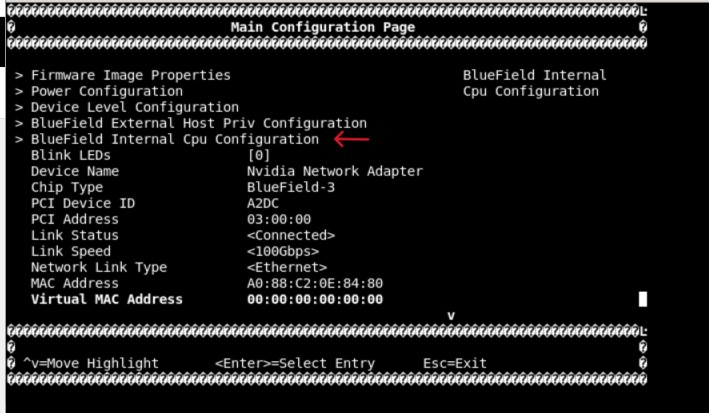
-
Set NIC mode by setting
Internal CPU Offload EnginetoDisabled.
To set DPU mode, set
Internal CPU Offload EnginetoEnabled. -
Power cycle the system.
Author
|
|
Boris Kovalev
Boris Kovalev has worked for the past several years as a Solutions Architect, focusing on NVIDIA Networking/Mellanox technology, and is responsible for complex machine learning, Big Data and advanced VMware-based cloud research and design. Boris previously spent more than 20 years as a senior consultant and solutions architect at multiple companies, most recently at VMware. He has written multiple reference designs covering VMware, machine learning, Kubernetes, and container solutions which are available at the NVIDIA Documents website. |

Last updated: