Created on Aug 8, 2019
Introduction
This document instructs how to enable PVRDMA in VMware vSphere 6.5/6.7 with NVIDIA ConnectX network cards.
This guide assumes that the following software and drivers have been pre-installed:
-
VMware ESXi 6.7 Update 2, build 13006603
-
vCenter 6.7 Update 2, build 13007421
-
Distributed Switch 6.6.0
-
ConnectX® Ethernet Driver for VMware® ESXi Server 4.17.13.1-1vmw.670.2.48.13006603
-
CentOS 7.6
References
Components Overview
vSphere Distributed Switch
A vSphere Distributed Switch provides centralized management and monitoring of the networking configuration of all hosts that are associated with the switch. You must set up a distributed switch on a vCenter server system, and its settings will be propagated to all hosts that are associated with the switch.
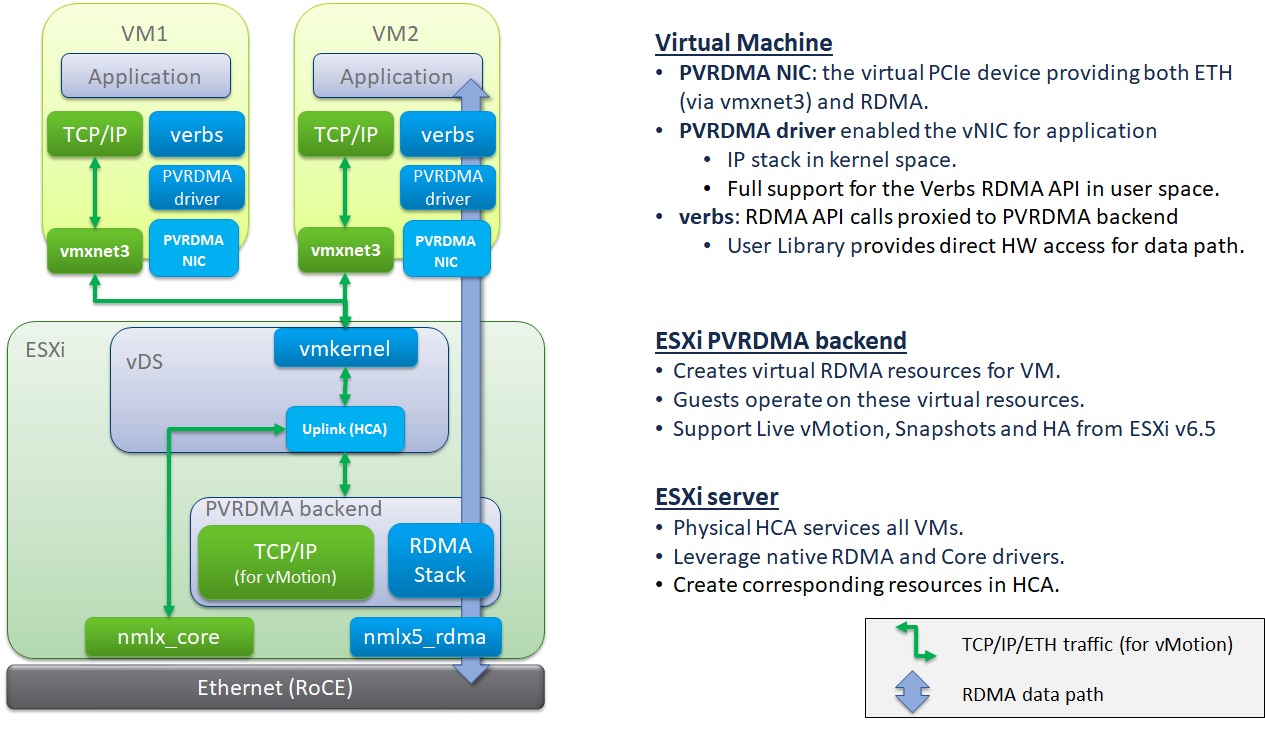
Paravirtual RDMA (PVRDMA)
Direct Memory Access (DMA) - A device's capability to access the host memory directly, without the intervention of the CPU.
Remote Direct Memory Access (RDMA) - The ability to accessing memory (read, write) on a remote machine without interrupting the CPU(s) processes on the system.
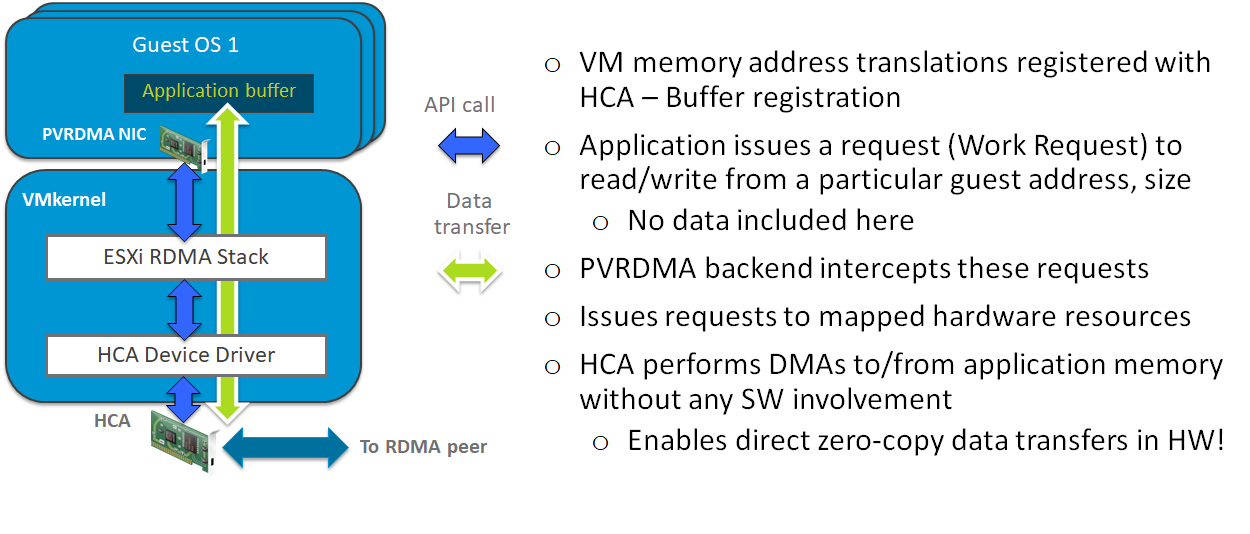
RDMA Advantages:
-
Zero-copy - Allows applications to perform data transfers without involving the network software stack. Data is sent and received directly to the buffers without being copied between the network layers.
-
Kernel bypass - Allows applications to perform data transfers directly from the user-space without the kernel's involvement.
-
CPU offload - Allows applications to access a remote memory without consuming any CPU time on the remote server. The remote memory server will be read without any intervention from the remote process (or processor). Moreover, the cache of the remote CPU will not be filled with the accessed memory content.
PVRDMA Architecture
Accelerating VM Data
Solution Overview
Setup
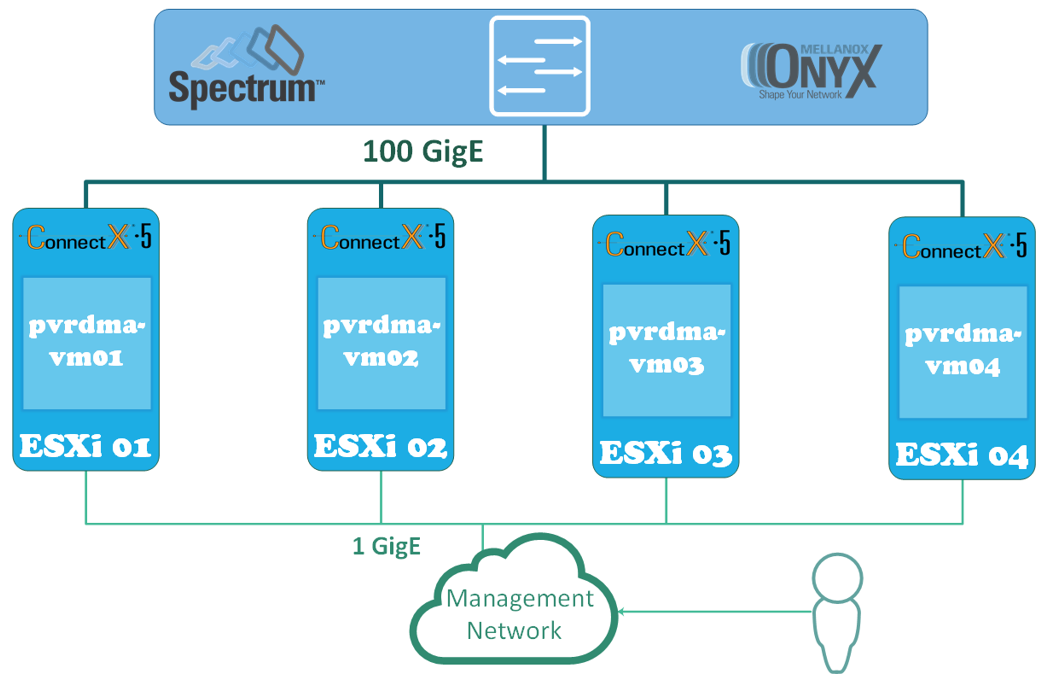
Solution Logical Design
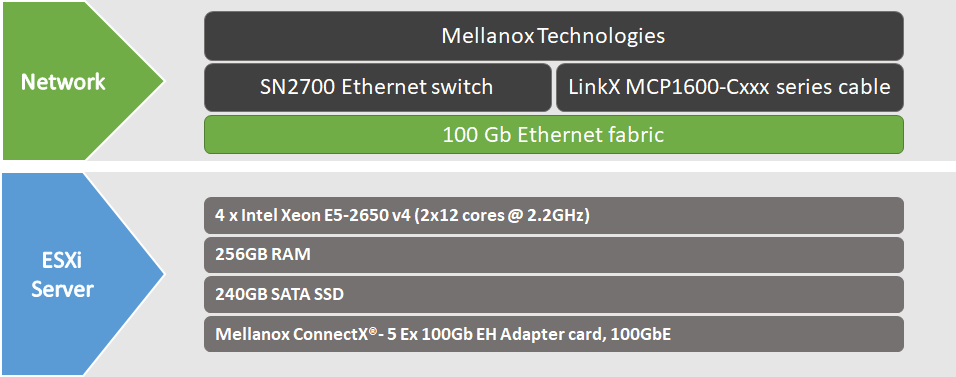
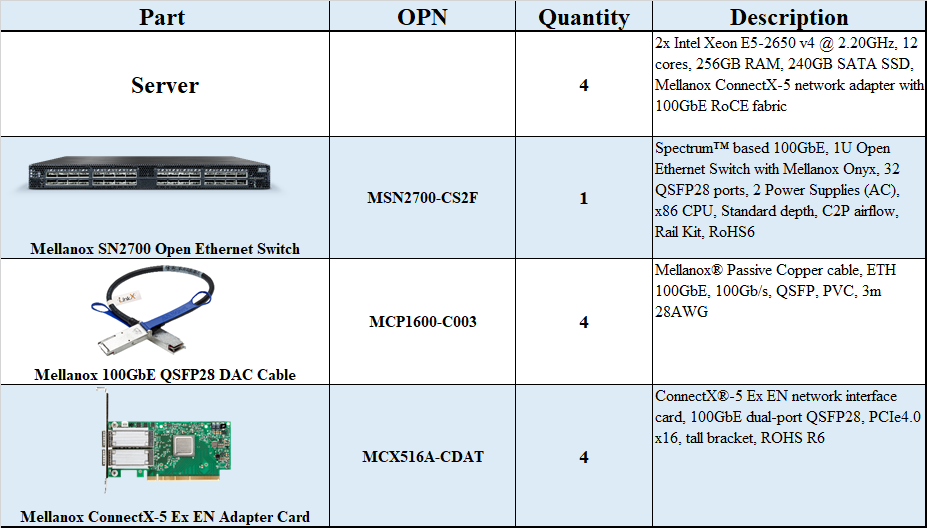
Bill of Materials
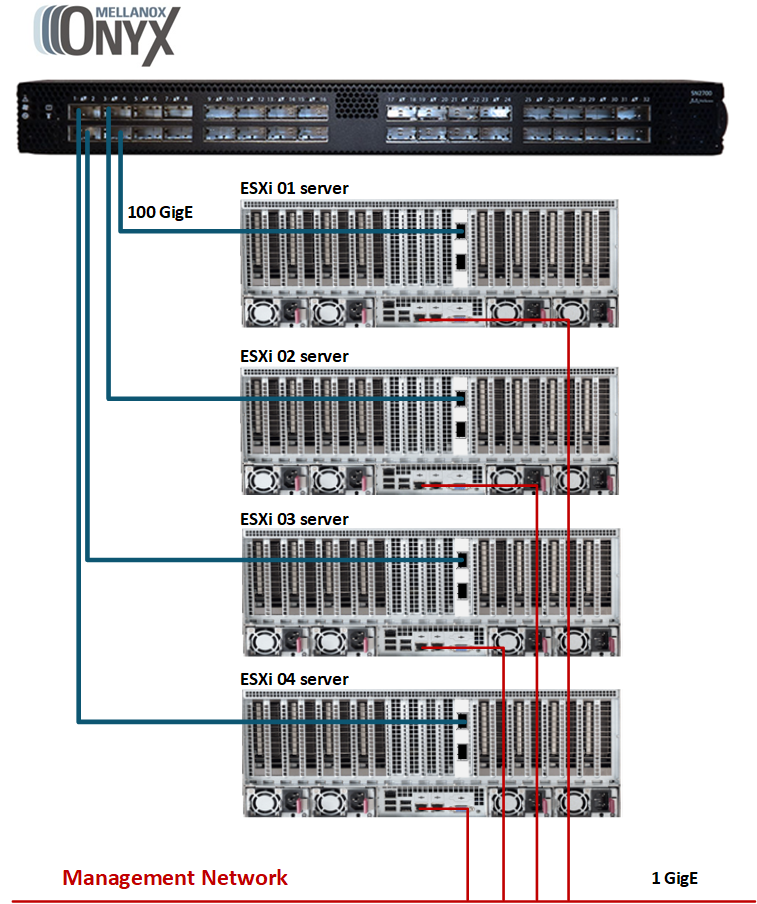
Solution Physical Network Wiring
Configuration
Network Configuration
The below table provides the ESXi server names and details on their network configuration:
|
ESXi Server |
Server Name |
IP and NICs |
|
|---|---|---|---|
|
High-Speed Ethernet Network |
Management Network 192.168.1.0 |
||
|
ESXi-01 |
sl01w01esx21 |
none |
eno0: From DHCP (reserved) |
|
ESXi-02 |
sl01w01esx22 |
none |
eno0: From DHCP (reserved) |
|
ESXi-03 |
sl01w01esx23 |
none |
eno0: From DHCP (reserved) |
|
ESXi-04 |
sl01w01esx24 |
none |
eno0: From DHCP (reserved) |
The below table provides the VM names and details on their network configuration:
|
VM |
Server Name |
IP and NICs |
|
|---|---|---|---|
|
High-Speed Ethernet Network |
Management Network 192.168.1.0 |
||
|
VM-01 |
pvrdma-vm01 |
192.168.11.51 |
eno0: From DHCP (reserved) |
|
VM-02 |
pvrdma-vm02 |
192.168.11.52 |
eno0: From DHCP (reserved) |
|
VM-03 |
pvrdma-vm03 |
192.168.11.53 |
eno0: From DHCP (reserved) |
|
VM-04 |
pvrdma-vm04 |
192.168.11.54 |
eno0: From DHCP (reserved) |
ESXi Host Configuration
Check the host configurations:
-
Enable SSH Access to ESXi server.
-
Log into the ESXi vSphere Command-Line Interface with root permissions.
-
Verify that the host is equipped with an NVIDIA adapter card:
ESXi Console
~ lspci | grep Mellanox

0000:02:00.0 Network controller: Mellanox Technologies MT28800 Family [ConnectX-5 Ex] [vmnic2]
0000:02:00.1 Network controller: Mellanox Technologies MT28800 Family [ConnectX-5 Ex] [vmnic3]
Note: in this case, the NVIDIA card is using vmnic2 and vmnic3.
-
Verify that the logical RDMA devices are currently registered on the system:
ESXi Console
~ esxcli rdma device list
Name 	 Driver 	 State 	 MTU    Speed 	   Paired Uplink 	Description
-------	 ----------	 ------	 ----   --------   -------------	-----------------------------------
vmrdma0	 nmlx5_rdma  Active	 1024	100 Gbps   vmnic2			MT28800 Family [ConnectX-5 MT28831]
vmrdma1	 nmlx5_rdma  Down	 1024	0		   vmnic3			MT28800 Family [ConnectX-5 MT28831]
Deployment
Before starting the deployment process, a vSphere Distributed Switch (vDS) must be created:
Creating a vDS
To create a new vDS:
-
Launch the vSphere Web Client, and connect to a vCenter Server instance.
-
On the vSphere Web Client home screen, select the vCenter object from the list on the left.
Hover over the Distributed Switches from the Inventory Lists area, and click on the New Distributed Switch icon (see below image):
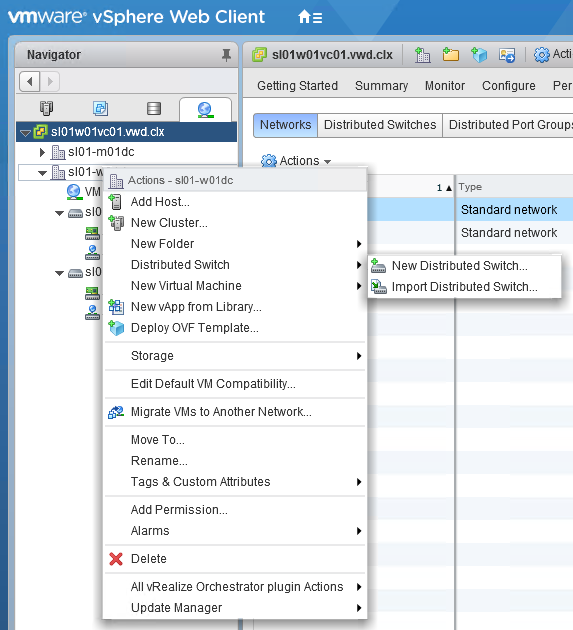
This will launch the New vDS creation wizard. -
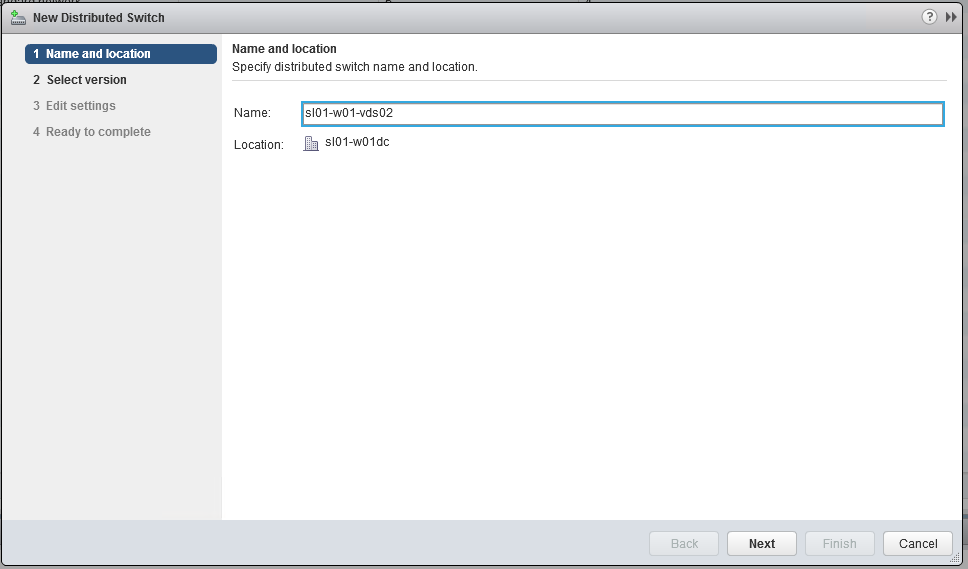
Provide a name for the new distributed switch, and select the location within the vCenter inventory where you would like to store the new vDS (a datacenter object or a folder). Click Next.
-
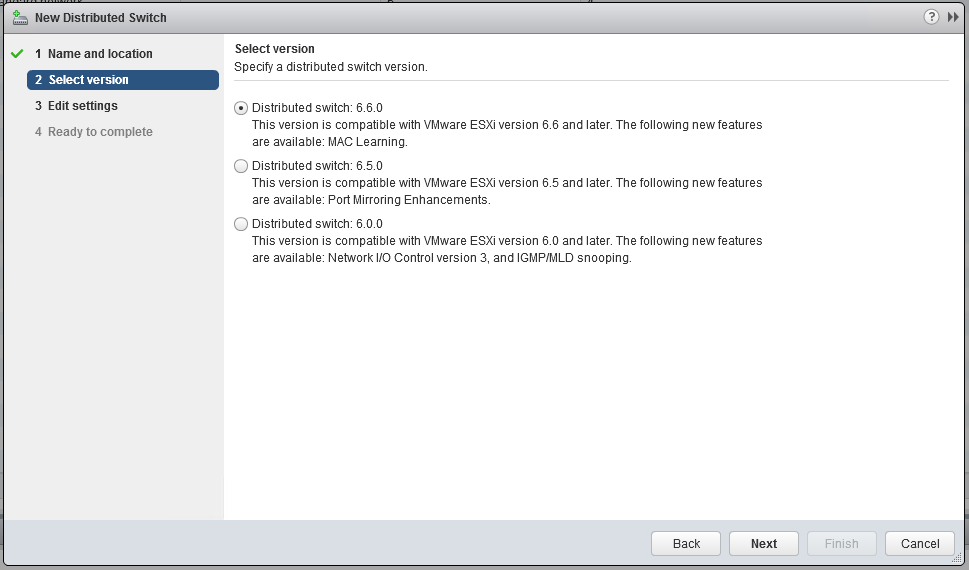
Select the version of the vDS you would like to create:
-
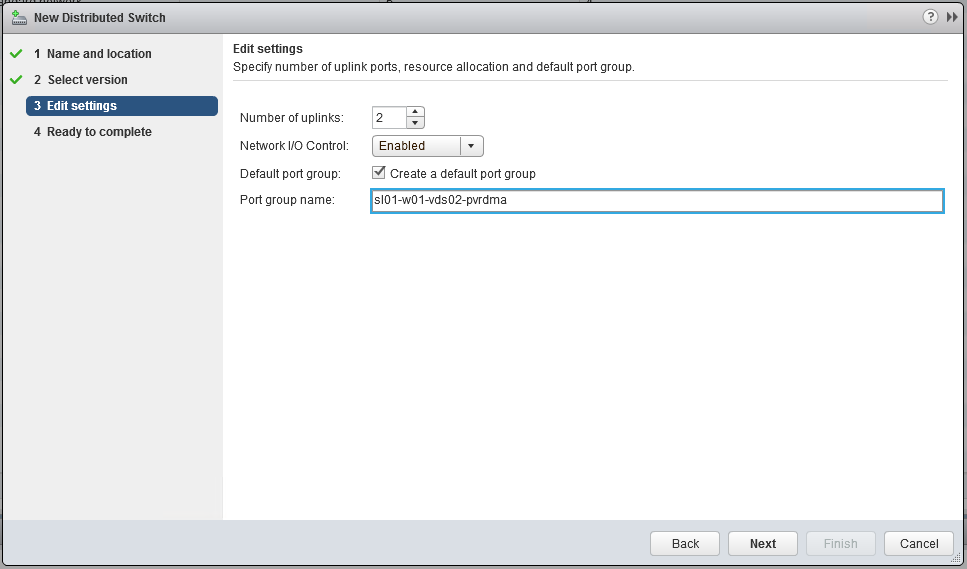
Set the number of uplink ports to 2. Tick the Create a default port group box, and give a name to that group:
-
Click Next to Finish.
Adding Hosts to the vDS
To add an ESXi host to an existing vDS:
-
Launch the vSphere Web Client, and connect to a vCenter Server instance.
-
Navigate to the list of distributed switches.
-
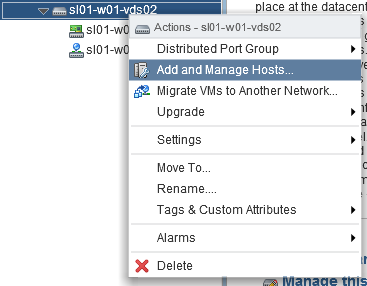
Choose the new distributed switch from the list of objects on the right, and select Add and Manage Hosts from the Actions menu:
-
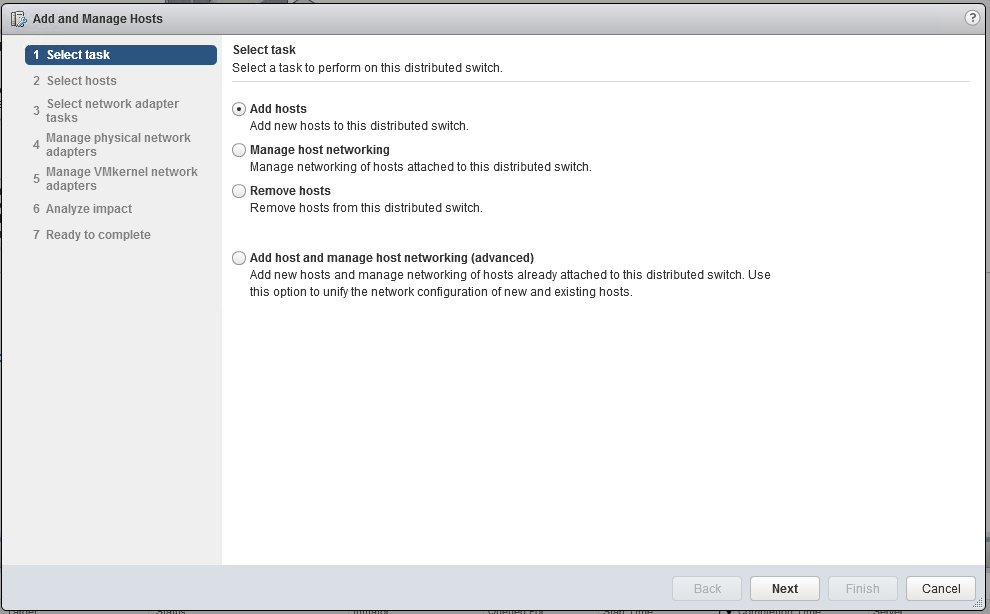
Select the Add hosts button, and click Next:
-
Click on the New hosts option (a green plus icon) to add an ESXi host.
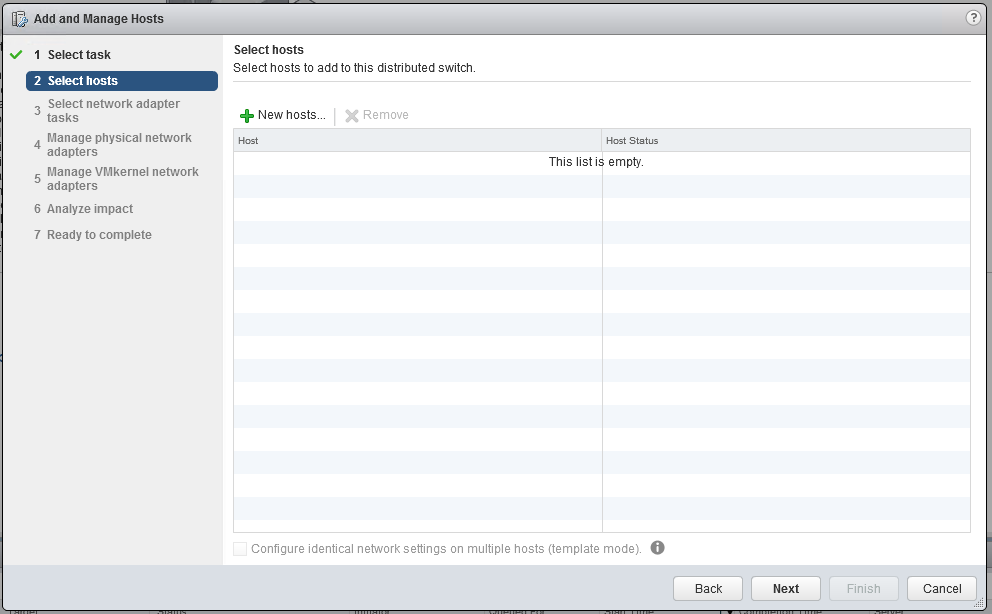
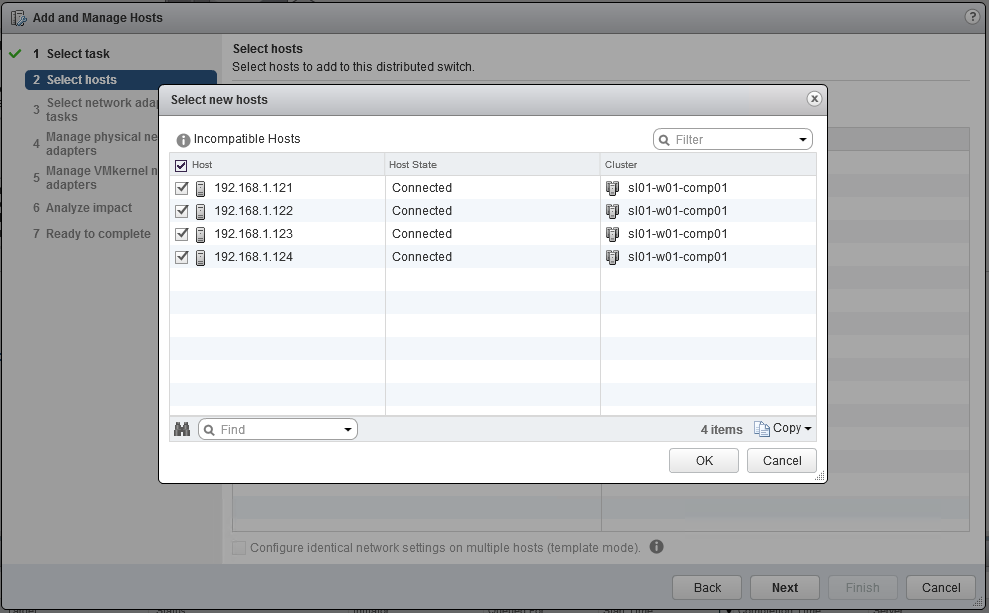
This opens the Select New Host dialog box. -
From the list of new hosts, tick the boxes with the names of the ESXi hosts you wish to add to the vDS.
-
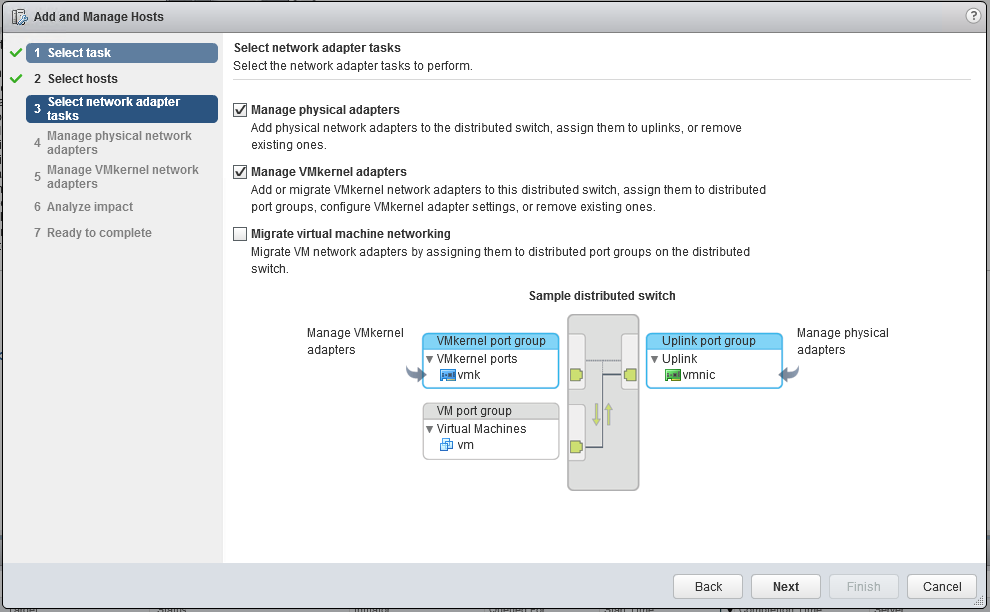
In the next screen, make sure both the Manage physical adapters and Manage VMkernel adapters checkboxes are ticked. Click Next to continue.
-
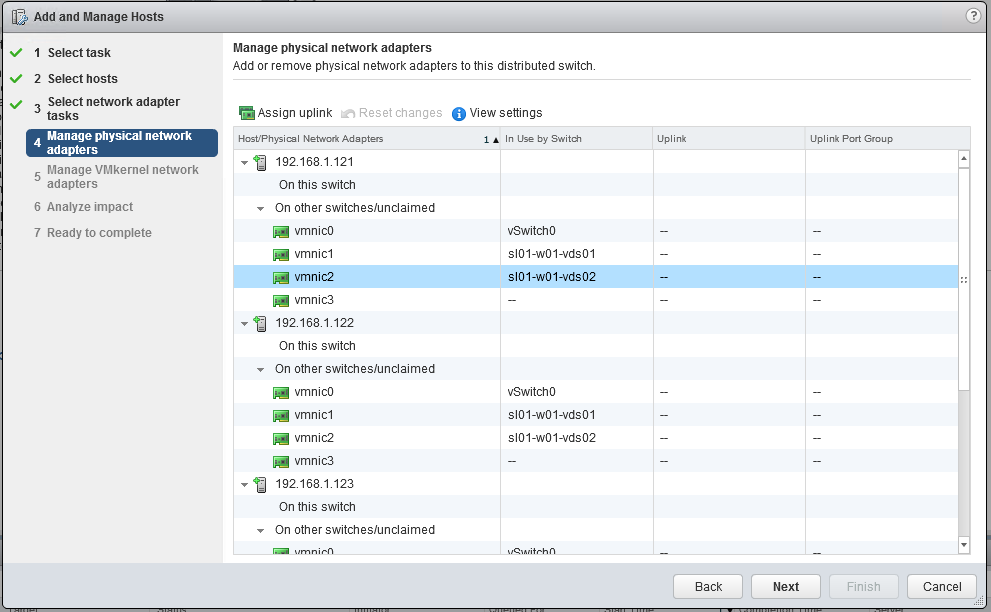
Configure vmnic2 in each ESXi host as an Uplink 1 for vDS:
-
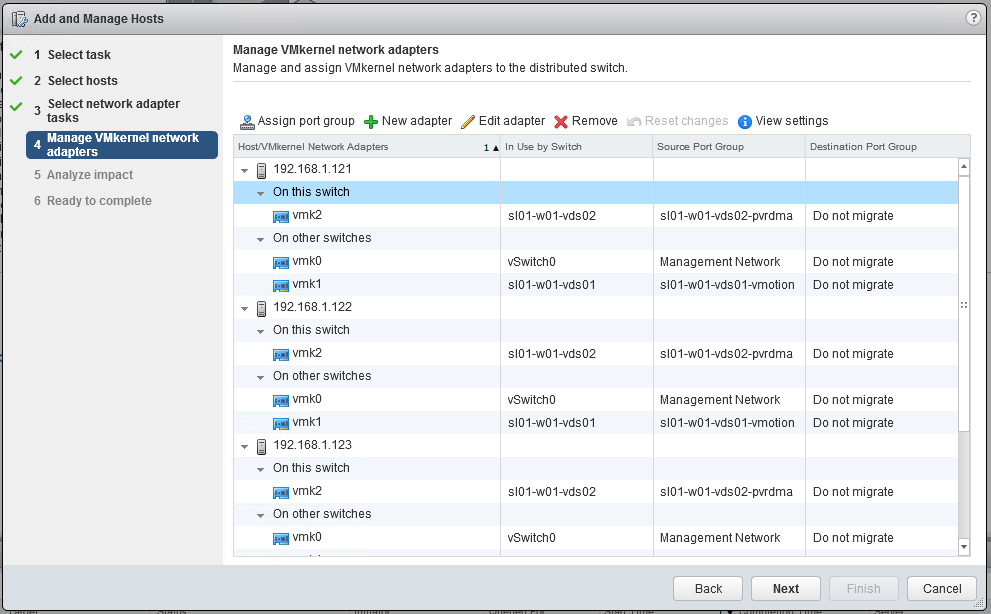
Create and attach the vmkernel adapter vmk2 to the sl01-w01-vds02-pvrdma vDS port group. Click the green plus icon, and select one of the existing networks. Click OK.
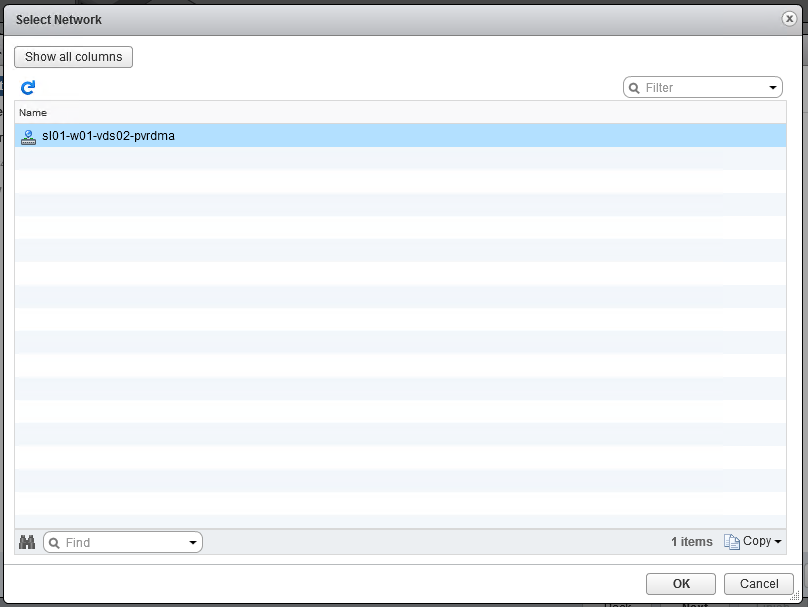
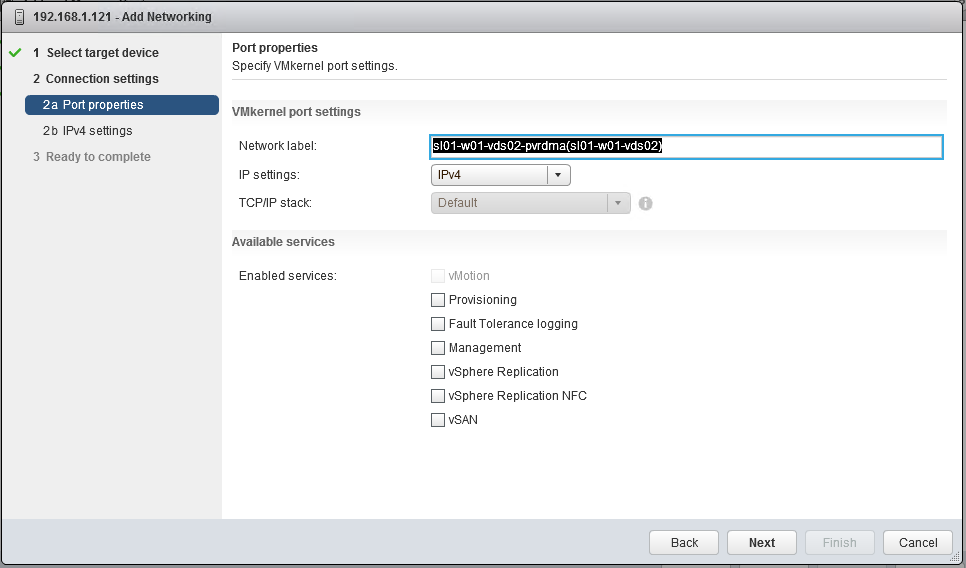
Click Next. -
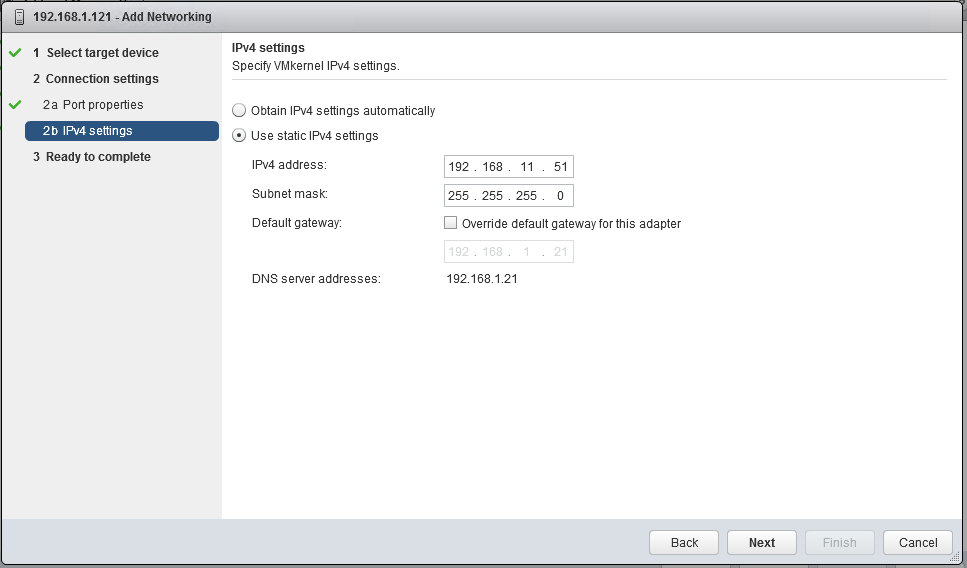
Provide an IPv4 address and Subnet mask for the vmk2 vmkernel adapter:
-
Click Next until the wizard is finished:
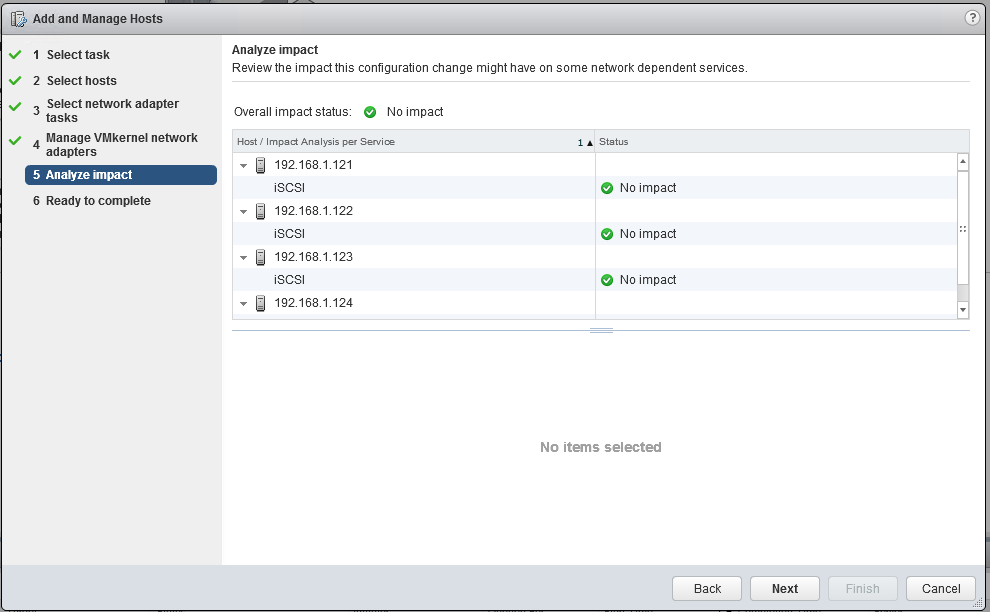
-
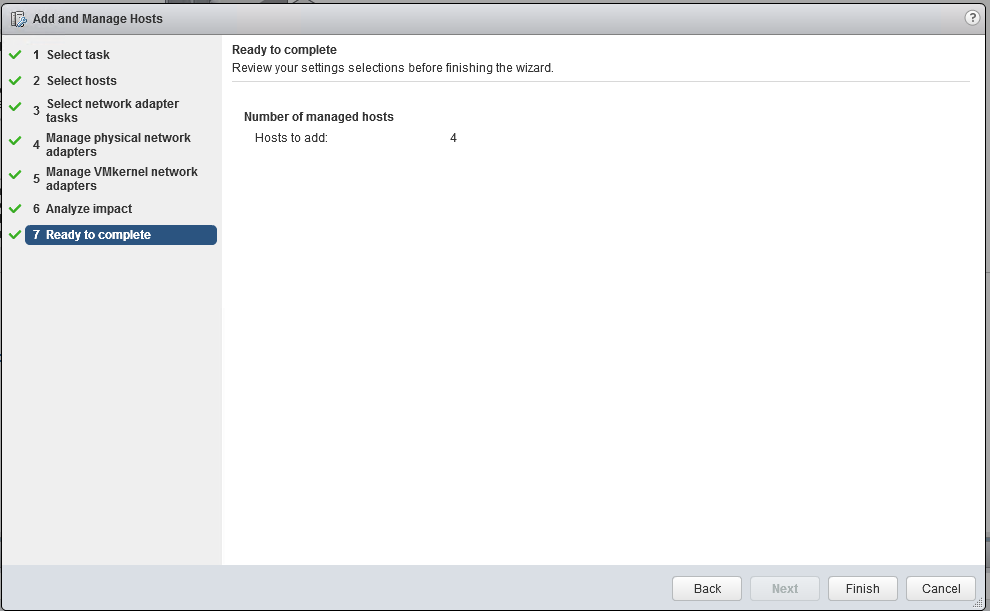
Click Finish:
Configure an ESXi Host for PVRDMA
To use PVRDMA in vSphere 6.5/6.7, your environment must meet several configuration requirements.
To configure an ESXi host for PVRDMA, follow the below steps.
Tag a VMkernel Adapter for PVRDMA
To tag a VMkernel adapter, select it and enable it for PVRDMA communication by performing the following steps:
-
In the vSphere Web Client, navigate to the host.
-
On the Configure tab, expand the System subheading and click Advanced System Settings.
-
Locate Net.PVRDMAvmknic and click Edit.
-
Enter the value of the VMkernel adapter that you want to use, and click OK.
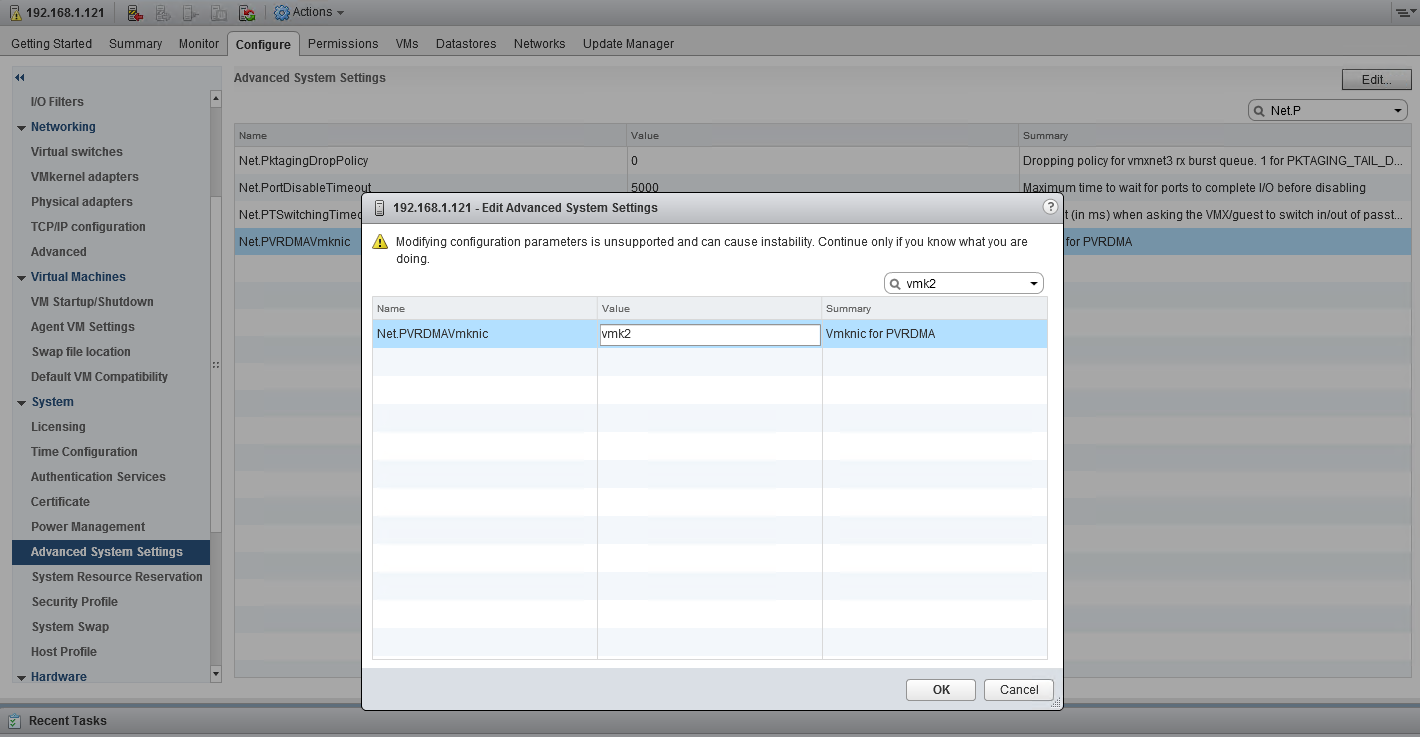
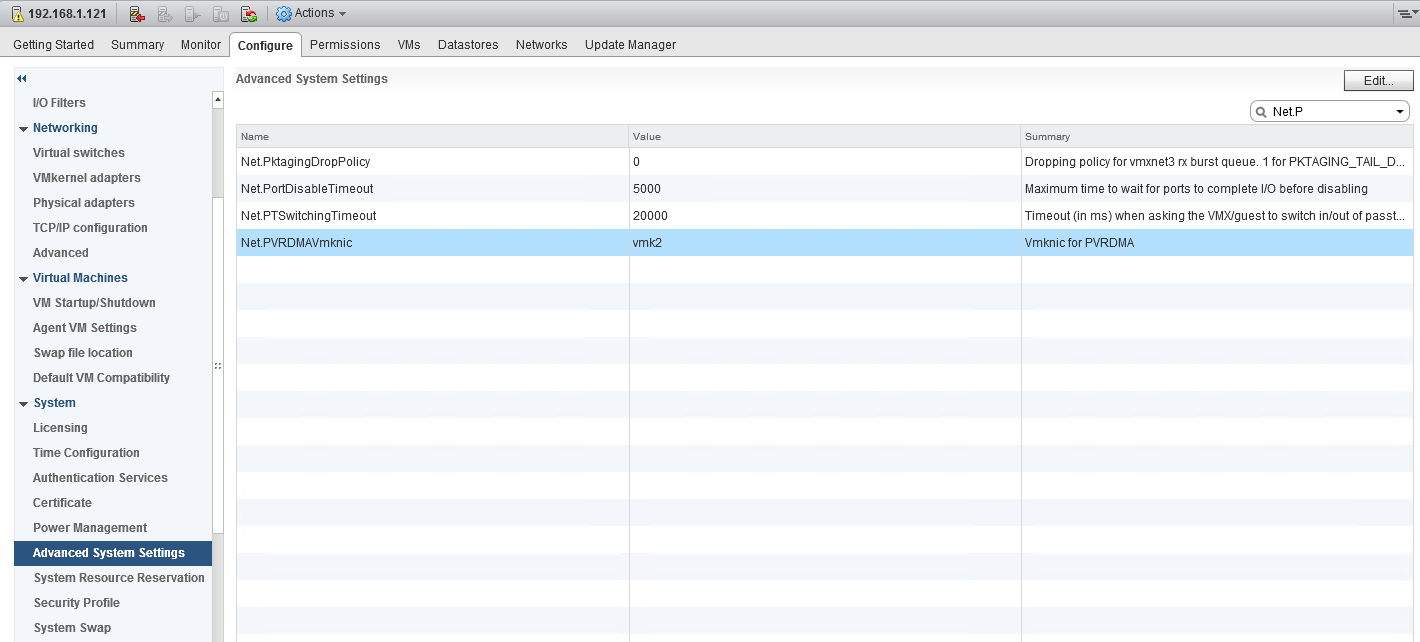
In this example, vmk2 was used.
Optional:
To tag a vmknic created on the DVS and used by the VRDMA for TCP channel, you can use ESXI CLI by running the following command line:
ESXi Console
esxcli system settings advanced set -o /Net/PVRDMAVmknic -s vmk2
Enable Firewall Rule for PVRDMA
To enable the firewall rule for PVRDMA in the security profile of the ESXi host:
-
In the vSphere Web Client, navigate to the host.
-
In the Configure tab, expand the System subheading.
-
Go to Security Profile → Firewall(6.7) or Firewall(6.5) section and click Edit.
-
Scroll to the pvrdma rule and tick the relevant box next to it:
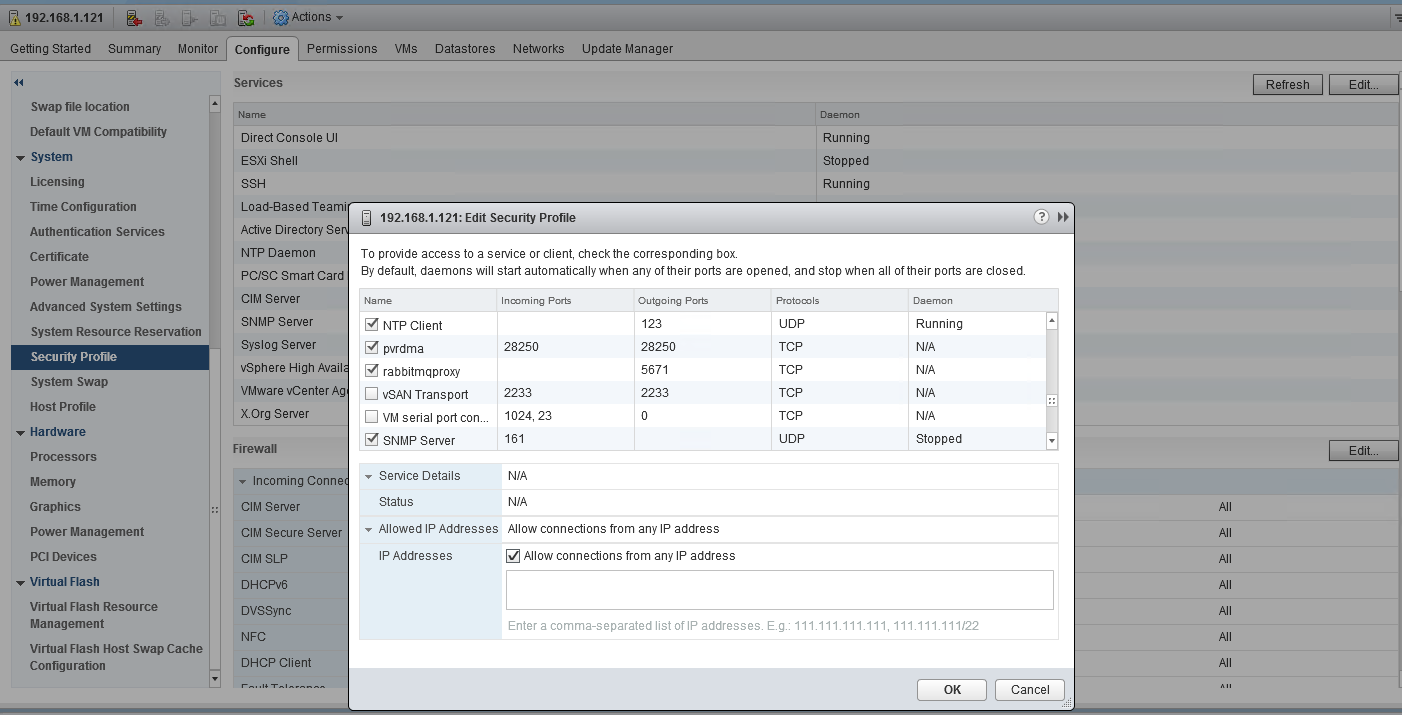
-
Click OK to finish.
Optional:
You can use ESXI CLI to enable the pvrdma firewall rule (or disable the firewall) with the following command line:
ESXi Console
esxcli network firewall ruleset set -e true -r pvrdma
Assign PVRDMA Adapter to a Virtual Machine
To enable a virtual machine to exchange data using RDMA, you must associate the VM with a PVRDMA network adapter. To do so:
-
Locate the VM in the vSphere Web Client.
-
Select a data center, folder, cluster, resource pool or a host, and click on the VMs tab.
-
Click Virtual Machines and double-click the VM from the list.
-
Power off the VM.
-
In the Configure tab of the VM, expand the Settings subheading, and select VM Hardware.
-
Click Edit, and select the Virtual Hardware tab in the dialog box displaying the settings.
-
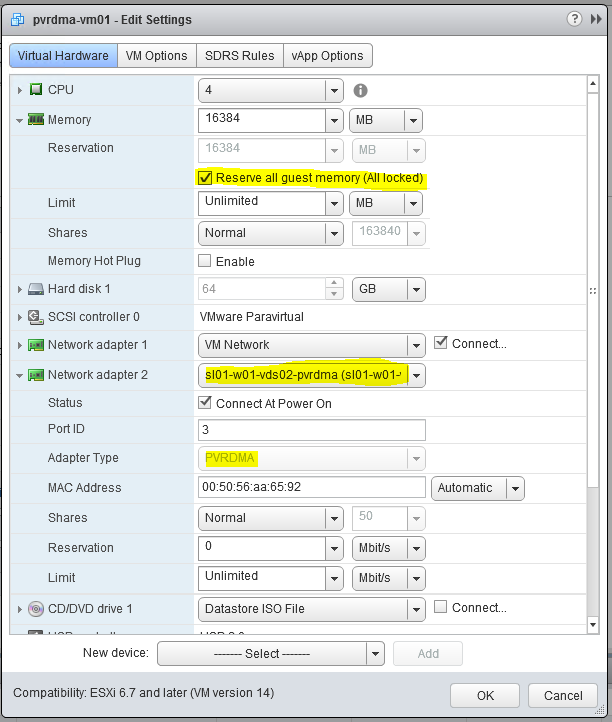
At the bottom of the window next to New device, select Network, and click Add.
-
Expand the New Network section, and connect the VM to a distributed port group.
For Adapter Type, select PVRDMA.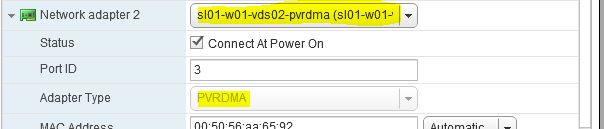
-
Expand the Memory section, tick the box next to Reserve all guest memory (All locked).
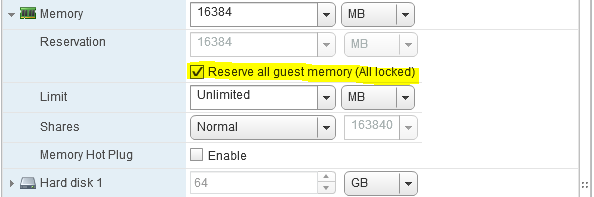
-
Click OK to close the dialog window.
-
Power on the virtual machine.
Configure Guest OS for PVRDMA
A prerequisite of this step is assigning a PVRDMA adapter to a Virtual Machine with CentOS 7.2 or later, and Ubuntu 18.04.
To configure a Guest OS for PVRDMA, install a PVRDMA driver. The installation process depends on the ESXi version, VM tools and Guest OS version:
|
Guest OS: CentOS 7.3 and later
|
Guest OS: CentOS 7.2
|
|---|---|
|
|
|
For Guest OS: Ubuntu 18.04, VM hardware version 14, ESXi v6.7 , the vmw_pvrdma driver should already be included in 18.04. The user level libraries can be installed using:
VM Console
apt-get install rdma-core
reboot
In case the VM compatibility version does not match the above, upgrade the VM compatibility to version 13 in ESXi 6.5, and to version 14 in Esxi 6.7.
Deployment Verification
To test the communication using PVRDMA, Perftest is used. This is a collection of tests written over uverbs intended for use as a performance micro-benchmark.
The tests may be used for hardware or software tuning, as well as for functional testing.
To install and run the benchmark:
-
Install Perftest:
VM Console
yum install git git clone https://github.com/linux-rdma/perftest.git cd perftest/ yum install autotools-dev automake yum install libtool yum install libibverbs-devel ./autogen.sh ./configure make -j 8 -
Check the network interface name:
VM Console
ifconfig ... ens224f0: flags=4163<UP,BROADCAST,RUNNING,MULTICAST> mtu 1500 -
Add Static IP configuration to the network interface. Modify /etc/sysconfig/network-scripts/ifcfg-ens224f0
Add to file
HWADDR=00:50:56:aa:65:92
DNS1=192.168.1.21
DOMAIN=vwd.clx
BOOTPROTO="static"
NAME="ens224f0"
DEVICE="ens224f0"
ONBOOT="yes"
USERCTL=no
IPADDR=192.168.11.51
NETMASK=255.255.255.0
PEERDNS=no
IPV6INIT=no
IPV6_AUTOCONF=no
ping 192.168.11.51
Repeat steps 1-3 for the second VM.
On the first VM ("Server"), run the following:
VM01 "Server" Console
systemctl disable firewall
systemctl stop firewalld
systemctl disable firewalld
firewall-cmd --state
./ib_write_bw -x 0 -d vmw_pvrdma0 --report_gbits
On the second VM ("Client"), run the following:
VM02 "Client" Console
./ib_write_bw -x 0 -F 192.168.11.51 -d vmw_pvrdma0 --report_gbits
************************************

* Waiting for client to connect... *
************************************
-------------------------------------------------------------------------------- -------
RDMA_Write BW Test
Dual-port : OFF Device : vmw_pvrdma0
Number of qps : 1 Transport type : IB
Connection type : RC Using SRQ : OFF
CQ Moderation : 100
Mtu : 1024[B]
Link type : Ethernet
GID index : 0
Max inline data : 0[B]
rdma_cm QPs : OFF
Data ex. method : Ethernet
-------------------------------------------------------------------------------- -------
local address: LID 0000 QPN 0x0004 PSN 0xfb9486 RKey 0x000005 VAddr 0x007f68c62 a1000
GID: 254:128:00:00:00:00:00:00:02:80:86:255:254:170:101:146
remote address: LID 0000 QPN 0x0002 PSN 0xe72165 RKey 0x000003 VAddr 0x007f2ab4 361000
GID: 254:128:00:00:00:00:00:00:02:80:86:255:254:170:58:174
-------------------------------------------------------------------------------- -------
#bytes #iterations BW peak[MB/sec] BW average[MB/sec] MsgRate[Mpps]
65536  5000          90.56           90.39            0.172405
-------------------------------------------------------------------------------- -------
Done!
Authors
|
|
Boris Kovalev
Boris Kovalev has worked for the past several years as a Solutions Architect, focusing on NVIDIA Networking/Mellanox technology, and is responsible for complex machine learning, Big Data and advanced VMware-based cloud research and design. Boris previously spent more than 20 years as a senior consultant and solutions architect at multiple companies, most recently at VMware. He has written multiple reference designs covering VMware, machine learning, Kubernetes, and container solutions which are available at the NVIDIA Documents website. |

Last updated: