Created on Mar 8, 2022
Introduction
This Quick Start Guide describes how to install and prepare a VMware NSX Edge on Bare Metal server with NVIDIA® ConnectX®-5 card and NATIVE VMware ESXi Driver on VMware vSphere Cluster version 7.0.3c, and how to perform basic initial configuration steps.
Abbreviations and Acronyms
|
Term |
Definition |
|---|---|
|
DHCP |
Dynamic Host Configuration Protocol |
|
NAT |
Network Address Translation |
|
VDS |
NSX-managed Virtual Distributed Switch |
|
VM |
Virtual Machine |
|
VPN |
Virtual Private Network |
|
QSG |
Quick Start Guide |
References
Key Components and Technologies
VMware NSX-T Edge
-
Edge nodes are service appliances with pools of capacity, dedicated to run network and security services that cannot be distributed to the hypervisors.
NSX-T Edge nodes are used for security and gateway services that can’t be run on the distributed routers in use by NSX-T. These edge nodes do things like North/South routing, load balancing, DHCP, VPN, NAT, etc. If you want to use Tier0 or Tier1 routers, you will need to have at least 1 edge node deployed.
-
NVIDIA ConnectX SmartNICs
10/25/40/50/100/200 and 400G Ethernet Network Adapters
The industry-leading NVIDIA® ConnectX® family of smart network interface cards (SmartNICs) offer advanced hardware offloads and accelerations.
NVIDIA Ethernet adapters enable the highest ROI and lowest Total Cost of Ownership for hyperscale, public and private clouds, storage, machine learning, AI, big data, and telco platforms.
Hardware and Software Requirements
-
A server platform meets the supported requirements with NVIDIA ConnectX®-5 adapter card (or above) installed
-
Console connectivity on the target machine for the installation
-
The environment meets the supported requirements prior to configuring the NSX Edge bare metal
-
See NSX Edge network requirements in NSX Edge Installation Requirements
Procedure
To install NSX Edge on Bare Metal server, you can either use a PXE server for automatic installation, or an ISO file.
This document demonstrates how to manually install NSX Edge nodes on bare metal using an ISO file. This includes configuring networking settings, such as IP address, gateway, network mask, NTP, and DNS.
Installing NSX Edge on Bare Metal
To install a new NSX Edge on a bare metal server:
-
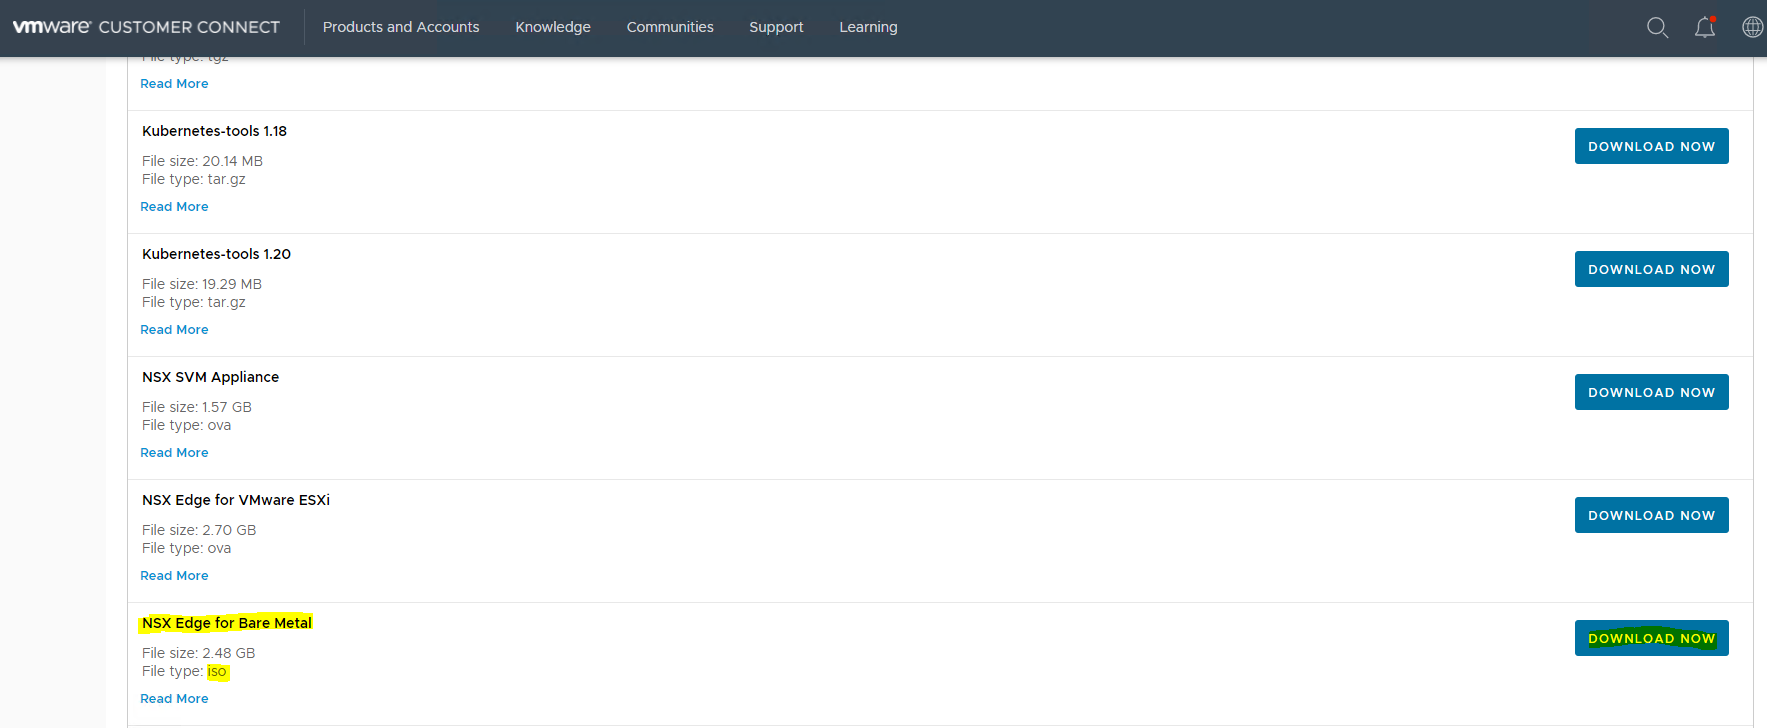
Download the NSX manager OVA from my.vmware.com.
-
Log in to the out-of-band management interface (for example, Integrated Lights-Out (ILO) on HP servers) of the bare metal.
-
Before you begin installation, select the boot mode for the NSX Edge node.
-
Access the System Setup screen and select System BIOS.
-
On the System BIOS Setting screen, select Boot Settings.
-
On the Boot Settings screen, set Boot Mode to Legacy or UEFI.
-
Click Back and Finish.
-
-
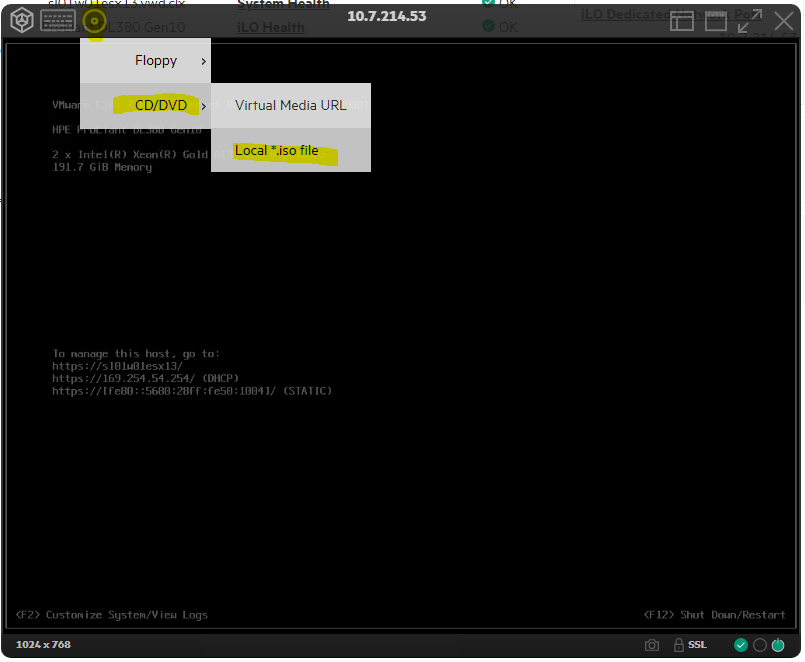
Click the Virtual Media icon and Select CD/DVD → Local *.iso file.
-
Select the downloaded file and click Open to connect to the virtual media.
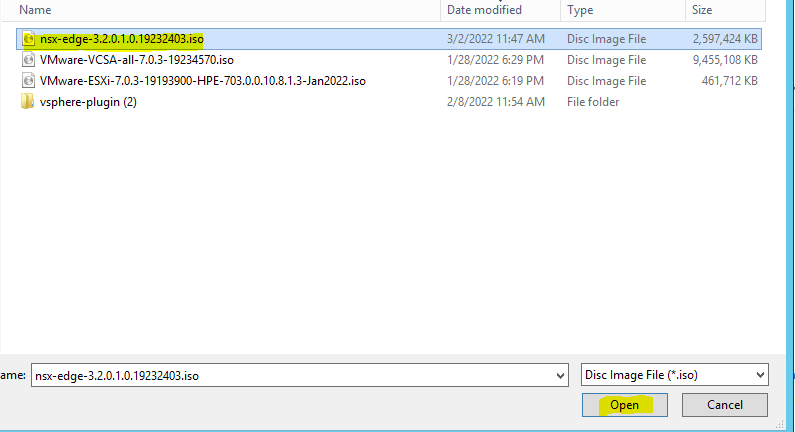
Wait a few seconds for the virtual media to connect. -
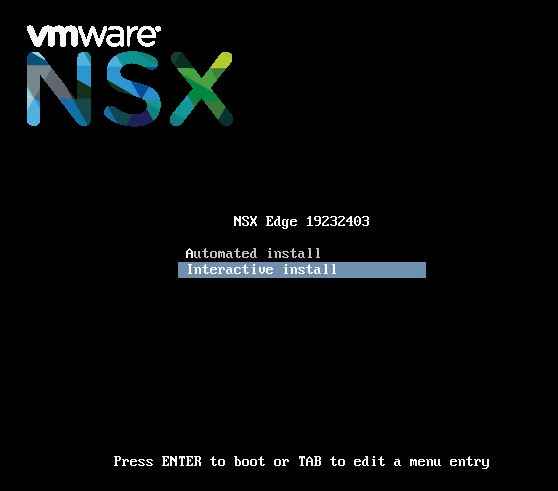
Choose Interactive install. There may be a pause for 10 seconds after which you press Enter.
-
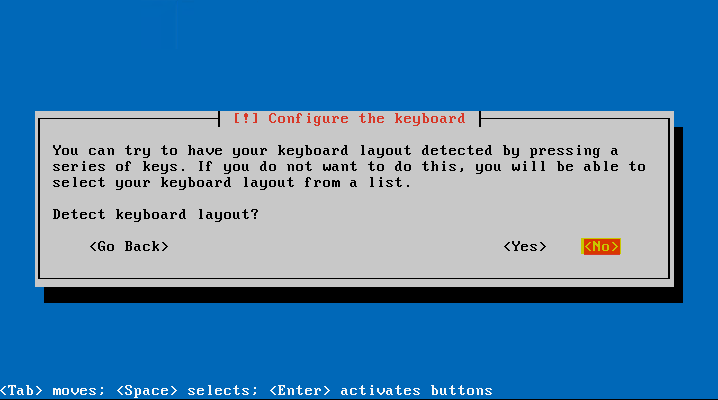
In the Configure the keyboard window, Select No.
-
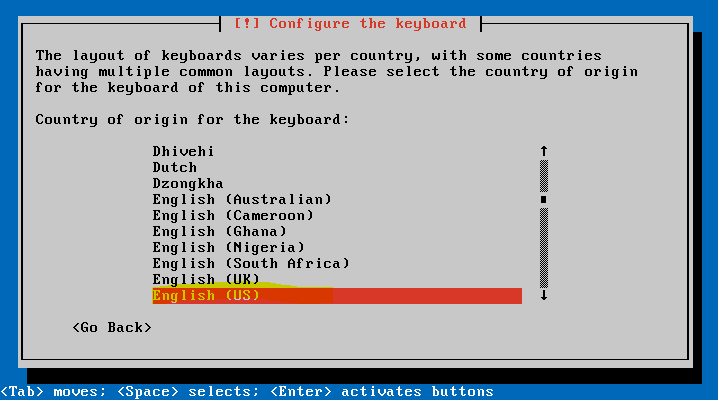
Select English US as the language. Click Enter.
-
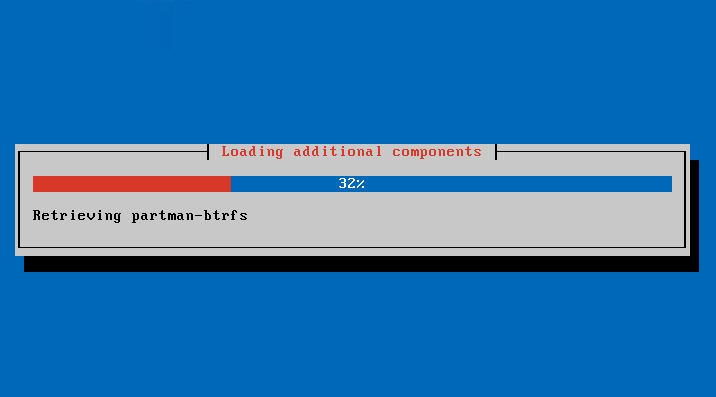
Wait for the additional components to load.
-
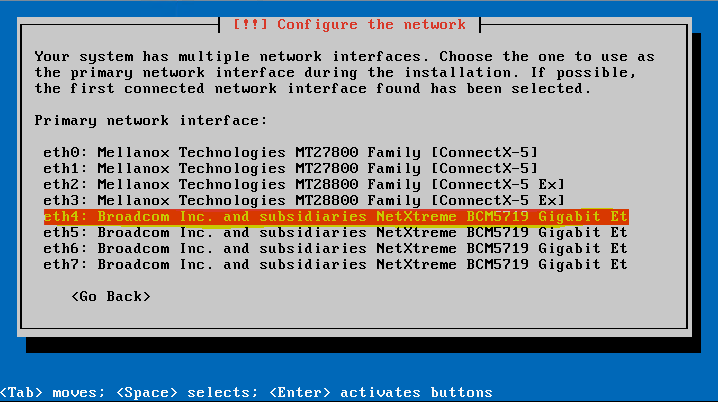
Select the applicable primary network interface. This is for the management network interface.
-
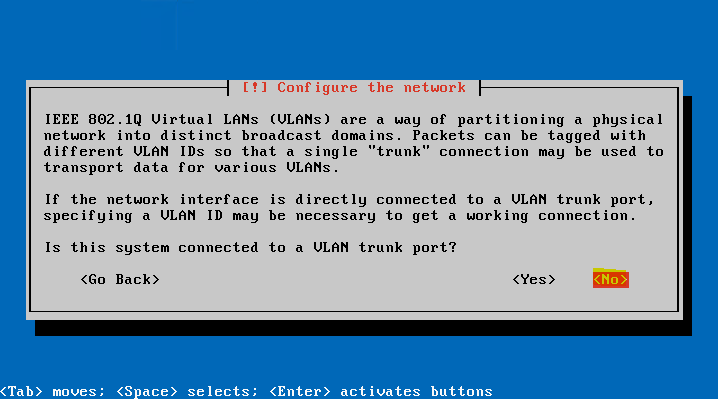
Select Yes to specify the VLAN ID to connect to a Tagged interface, or No if you wish to connect to an Untagged interface.
-
In our case, we are using DHCP for the network configuration.
-
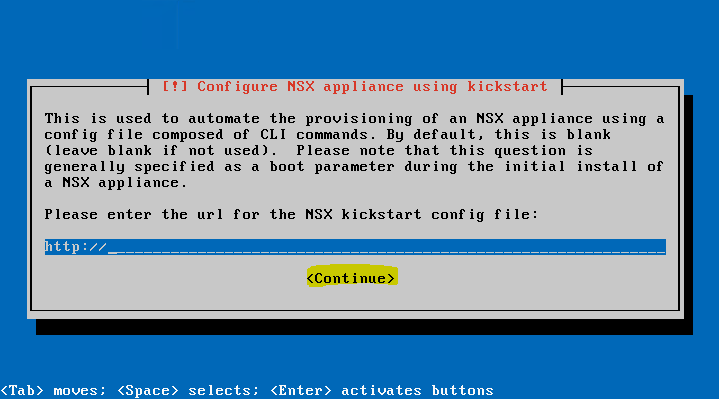
Click Continue. In this case, kick start is not used.
-
Select a disk size that meets the system requirements.
-
In the Partition disks window, choose one of the following options.
-
Yes - in case you want to unmount existing partitions for new partitions to be created on disks.
-
No - in case you want to use existing partitions.
-
-
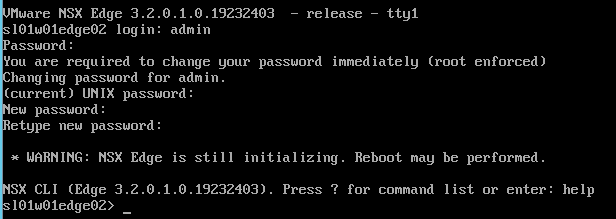
After the NSX Edge node starts, log in to the CLI with admin credentials.
By default, the root login password is vmware, and the admin login password is default.
Upon initial login, make sure to change the default password.
After the NSX Edge node starts, if you do not log in for the first time using admin credentials, the data plane service will not start automatically on the NSX Edge node.
-
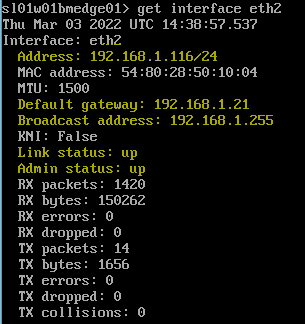
Run the get interface eth2 (in our case, without VLAN) or get interface ethX.<vlan_ID> (with a VLAN) command to verify that the IP address was applied as expected.
-
Wait for system system reboot, and log with admin credentials.
-
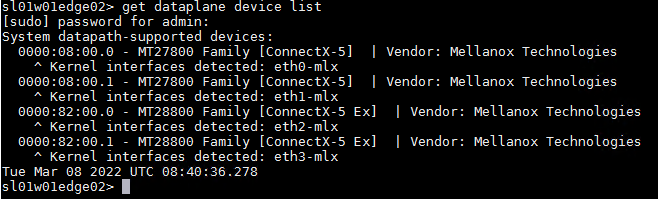
By default, the NSX Edge node Datapath claims all virtual machine NICs except the management NIC (the one that has an IP address and a default route).
To see physical NICs to be used by NSX-T Data Center dataplane from the list of available PCI devices, run the following command.
-
(Optional) To configure custom NICs for dataplane, run the following commands.
NSX-T Edge console
sl01w01edge02> reset dataplane device list sl01w01edge02> set dataplane device list <NIC1>, <NIC2>, <NIC3> sl01w01edge02> restart service dataplane -
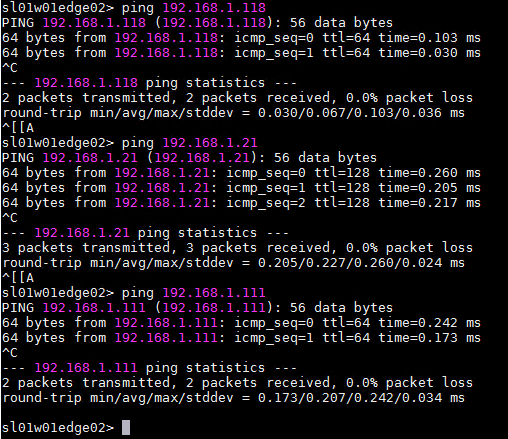
Verify that the NSX Edge node has the required connectivity.
If you enabled SSH, make sure that you can use SSH to your NSX Edge node and verify the following:
-
You can ping your NSX Edge node management interface.
-
From the NSX Edge node, you can ping the node's default gateway.
-
From the NSX Edge node, you can ping the hypervisor hosts that are either in the same network or in a network reachable through routing.
-
From the NSX Edge node, you can ping the DNS server and NTP Server IP or FQDN.
-
-
To establish communication between NSX Edges and NSX Manager or NSX Manager cluster, join NSX Edges with NSX Manager. You only need to register NSX Edges with one NSX Manager to ensure communication with the management plane.
Open an SSH session or console session to one of the NSX Manager appliances.
To retrieve the thumbprint of the NSX Manager appliance, at the NSX Manager appliance console, run the get certificate API thumbprint command.
The command output is a string of alphanumeric numbers that is unique to this NSX Manager.
For example:
-
To join the NSX Manager appliance to the NSX Edge node VM, run the
join management-planecommand.
join management-plane <Manager-IP> thumbprint <Manager-thumbprint> username admin
Provide the following information:-
Hostname or IP address of the NSX Manager with an optional port number
-
Username of the NSX Manager
-
Certificate thumbprint of the NSX Manager
-
Password of the NSX Manager
-

Verification
To Verify the result, run the get managers command on your NSX Edge node VMs.

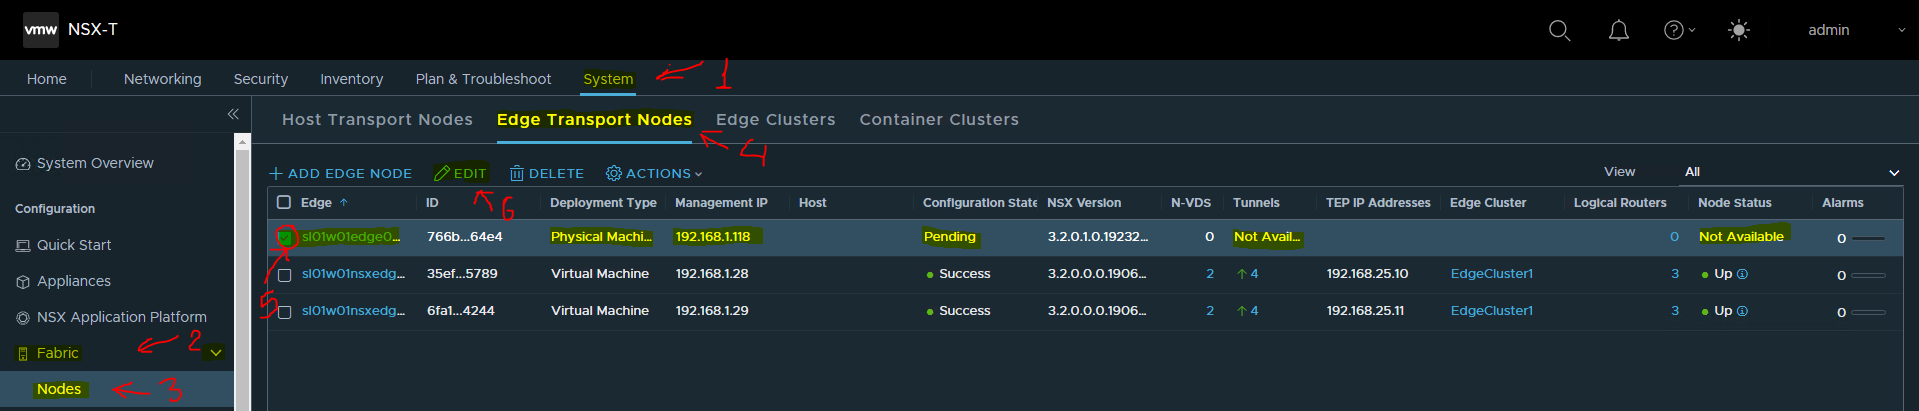
Or alternatively, in the NSX Manager UI, navigate to System → Fabric → Nodes → Edge Transport Nodes.
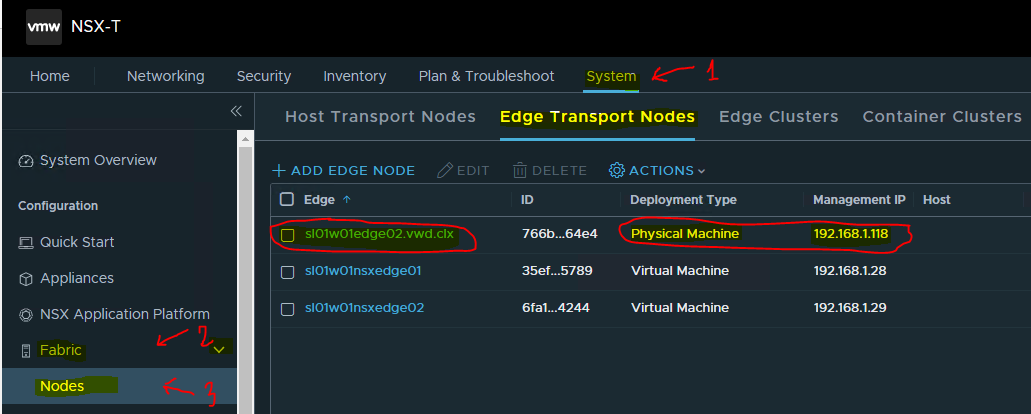
On the NSX Edge Transport Node page:
-
The Configuration State column displays
Pending. ClickConfigure NSXto begin configuration on the node. If the NSX Version column does not display the version number installed on the node, try refreshing the browser window. -
Before you configure NSX on the NSX Edge node, the Node Status and Tunnel Status columns display state Not Available. The Transport Zones and N-VDS switches columns display value
0, indicating that there are no transport zones attached or N-VDS switches configured on the NSX Edge node.
Configuring an NSX Edge as a Transport Node
After manually installing NSX Edge Bare Metal, configure the NSX Edge as a transport node in NSX-T Data Center.
A transport node is a node that is capable of participating in an NSX-T Data Center overlay or NSX-T Data Center VLAN networking. Any node can serve as a transport node if it contains an N-VDS. Such nodes include but are not limited to NSX Edges.
An NSX Edge can belong to one overlay transport zone and multiple VLAN transport zones. If a VM requires access to the outside world, the NSX Edge must belong to the same transport zone that the VM's logical switch belongs to. Generally, the NSX Edge belongs to at least one VLAN transport zone to provide the uplink access.
Prerequisites
-
Transport zones must be configured.
-
Verify that compute manager is configured. See Add a Compute Manager.
-
An uplink profile must be configured or you can use the default uplink profile for bare-metal NSX Edge nodes.
-
An IP pool must be configured or must be available in the network deployment.
-
At least one unused physical NIC must be available on the host or NSX Edge node.
Visit this document to perform all configurations needed.
Procedure
-
From a browser, log in with admin privileges to an NSX Manager at https://<nsx-manager-ip-address>.
-
Select System → Fabric → Nodes → Edge Transport Nodes.
-
Select the Edge node and click Edit.
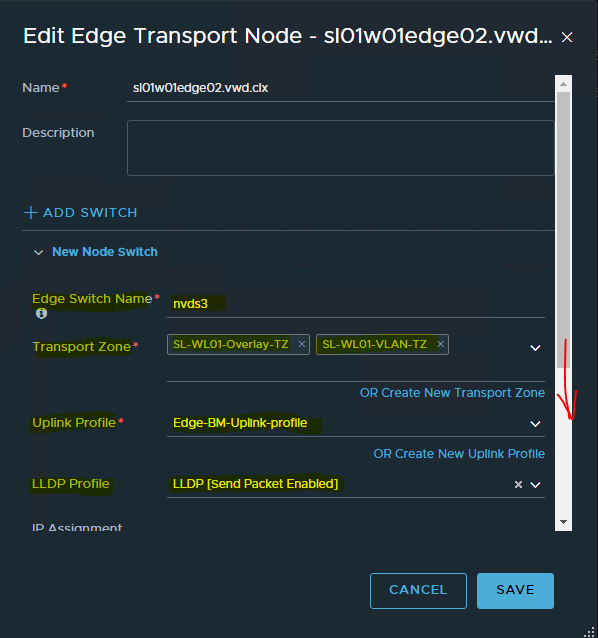
-
In the dialogue window, specify the Edge Switch Name → nvds3, select the Transport Zone → SL-WL01-Overlay-TZ and SL-WL01-VLAN-TZ, Uplink Profile → Edge-BM-Uplink-profile, and LLDP Profile → LLDP [Send Packet Enabled]. Scroll down.
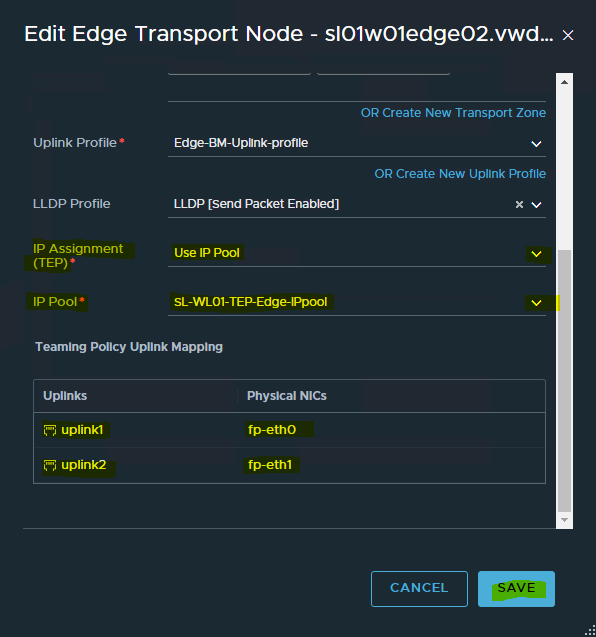
IP Assignment(TEP) → Use IP Pool and the IP Pool → SL-WL01-TEP-Edge-IPpool for the TEPs for the Edge. In Team Policy Uplink Mapping uplink-1, click Select Interfaces.
Click SAVE.
-
View the connection status on the Transport Nodes page.

-
To successfully configure firewall rules on the NSX Edge node, enable service core on the transport node.
NSX-T Edge console
sl01w01edge02> set debug sl01w01edge02> set dataplane service-core enabled INFO: Enabling service core. Changing from [] to 12,13,14,15,16,17. INFO: Config was written to: /config/vmware/edge/config.json INFO: Grub backup already exists. Skipping. INFO: Grub config is good. sl01w01edge02> restart service dataplane sl01w01edge02> -
(Optional) View the transport node with the GET https://<nsx-manager>/api/v1/transport-nodes/<transport-node-id> API call.
-
(Optional) For status information, use the GET https://<nsx-mgr>/api/v1/transport-nodes/<transport-node-id>/status API call.
-
After an NSX Edge node is migrated to a new host using vCenter Server, you might find NSX Manager UI reporting stale configuration details (Compute, Datastore, Network, SSH, NTP, DNS, Search Domains) of the NSX Edge. To get the latest configuration details of NSX Edge on the new host, run the API command
POST api/v1/transport-nodes/<transport-node-id>?action=refresh_node_configuration&resource_type=EdgeNode
What to do next
Add the NSX Edge node to an NSX Edge cluster. See Create an NSX Edge Cluster.
Done!
Authors
|
|
Boris Kovalev
Boris Kovalev has worked for the past several years as a Solutions Architect, focusing on NVIDIA Networking/Mellanox technology, and is responsible for complex machine learning, Big Data and advanced VMware-based cloud research and design. Boris previously spent more than 20 years as a senior consultant and solutions architect at multiple companies, most recently at VMware. He has written multiple reference designs covering VMware, machine learning, Kubernetes, and container solutions which are available at the NVIDIA Documents website. |

Last updated: