This section provides instructions on how to enable/disable the Secure Boot feature in UFM Enterprise Appliance.
Enabling Secure Boot
The NVIDIA public certificate needs to be imported to the Machine Owner Key DB (MOK DB) before enabling secure boot. To do so, follow the below steps:
Add NVIDIA Certificate to MOK DB
-
Download NVIDIA certificate mlnx_signing_key_pub.der to a temporary folder.
checksums:
MD5: c3ce3dcad0f38b02a9cbb991ce1bc7f4
sha256: ff7fe8c650e936079a8add2900b190f9e7f3806e5ad42e48c2b88408a6ce70aaBashcd /tmp wget http://www.mellanox.com/downloads/ofed/mlnx_signing_key_pub.der ls -ltrh ./mlnx_signing_key_pub.derExample:

-
Import the mlnx_signing_key_pub.der to MOK DB using mok-util:
Bashcd /tmp mokutil --import ./mlnx_signing_key_pub.der --root-pwThe certificate is in the enrolled queue at this point. Upon the next server reboot, a 10 second prompt appears at the start of the boot process to confirm the certificate addition. It is important to confirm the certificate addition at this stage. Failure to do so requires you to repeat the procedure.
To be able to interact with the prompt, a console connection is needed either from the serial port or from the web console available via Remote Management.
Verify the certificate in the enrolled queue:
Bashmokutil --list-new
-
Login to Remote Management via https://<iDRAC-ip address>
-
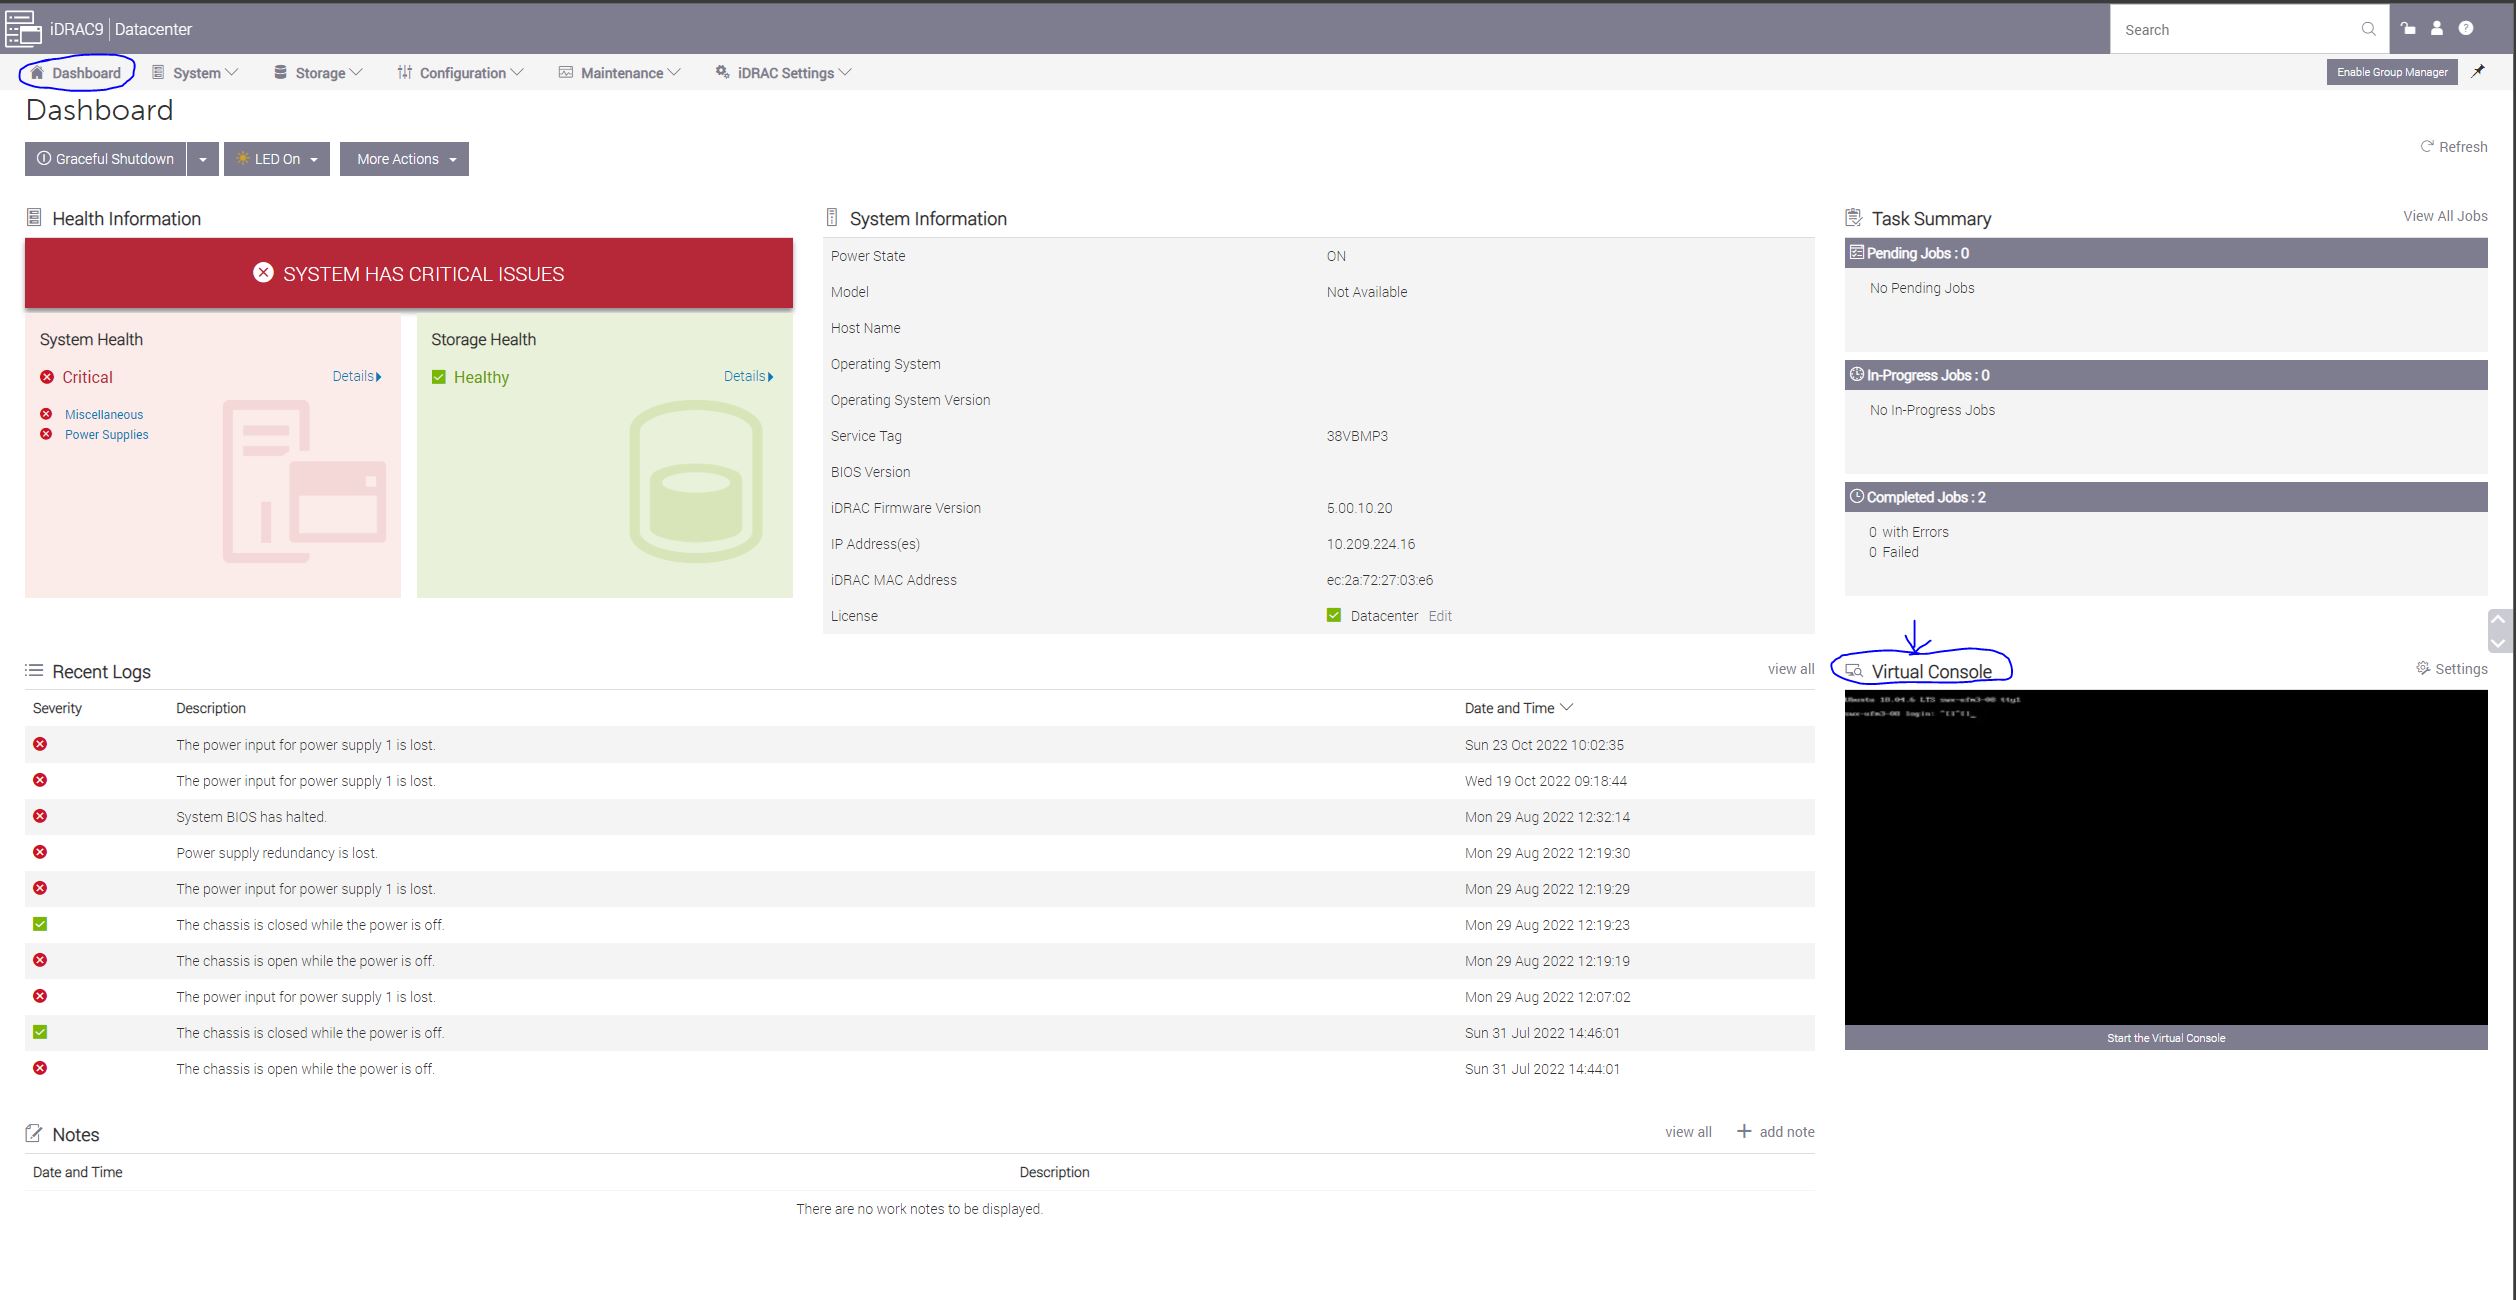
To open the virtual web console, click on "Dashboard"→"Virtual Console"

-
Power cycle the server (at boot startup a 10 second prompt appears to verify the certificate addition)
On the top menu, go to "Power"→"Reset System (warm boot)"
The server will now reboot.
-
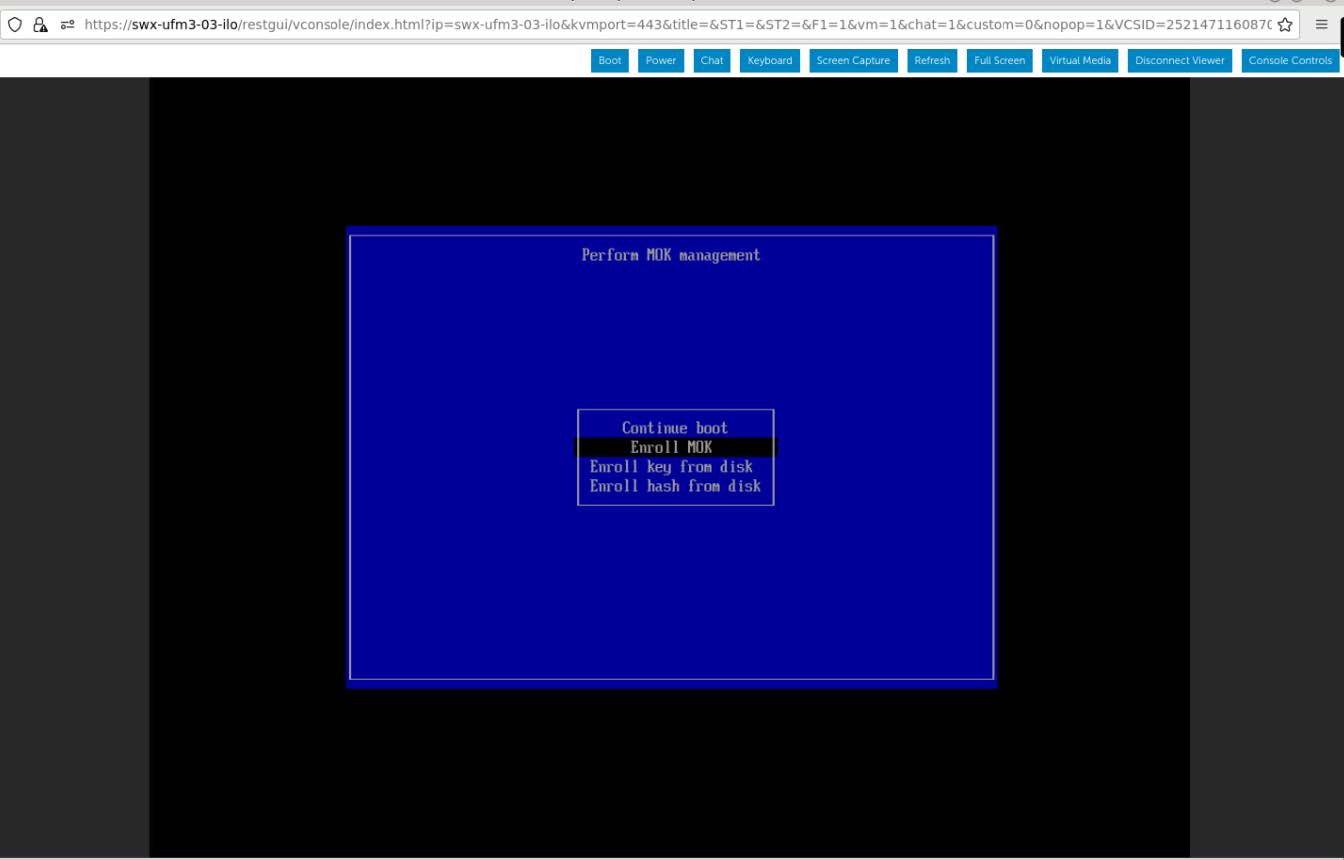
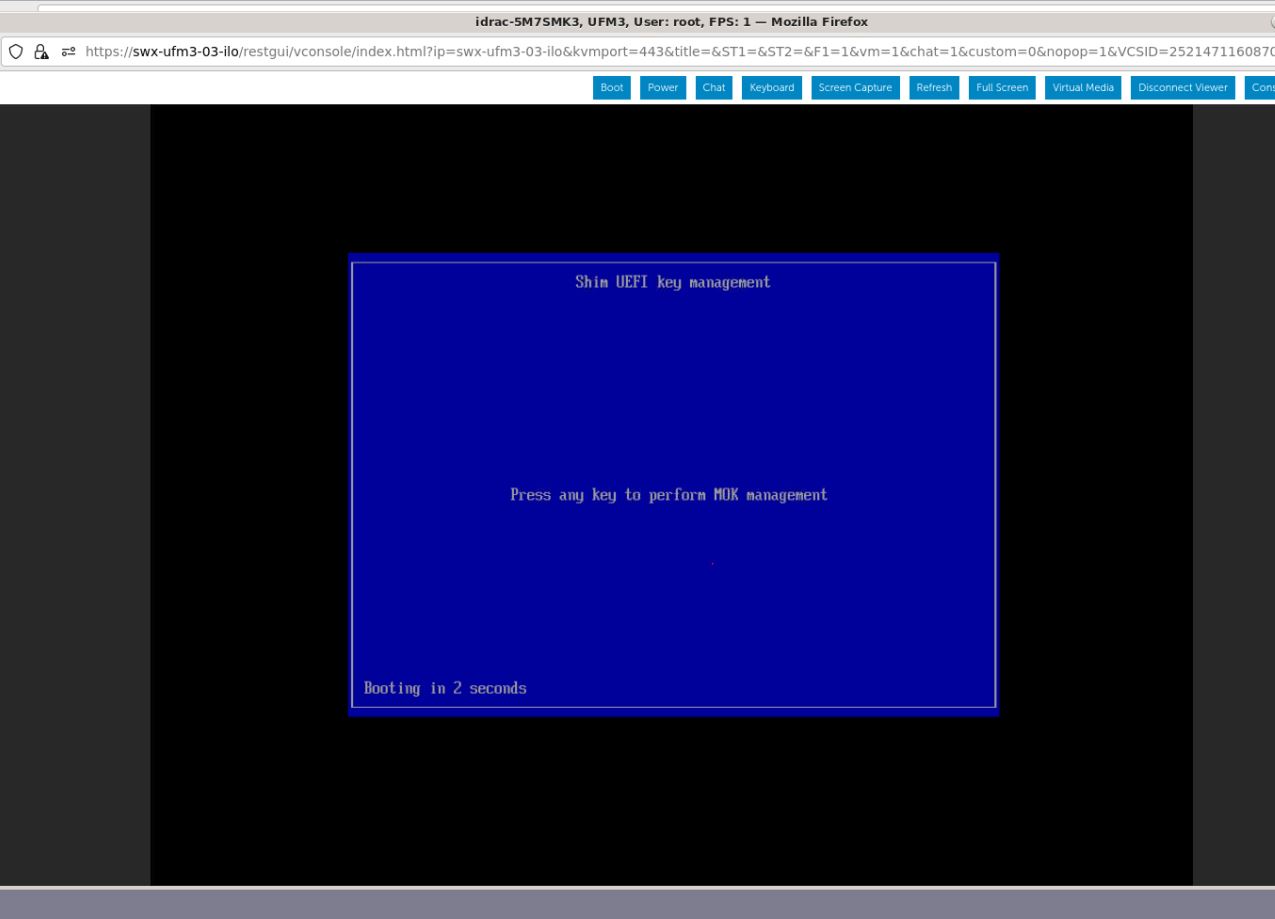
At boot startup, a confirmation prompt appears to verify certificate addition. The prompt closes after 10 seconds, so if missed, the certificate addition procedure needs to be done again.
When the prompt appears, press any key to interact.

-
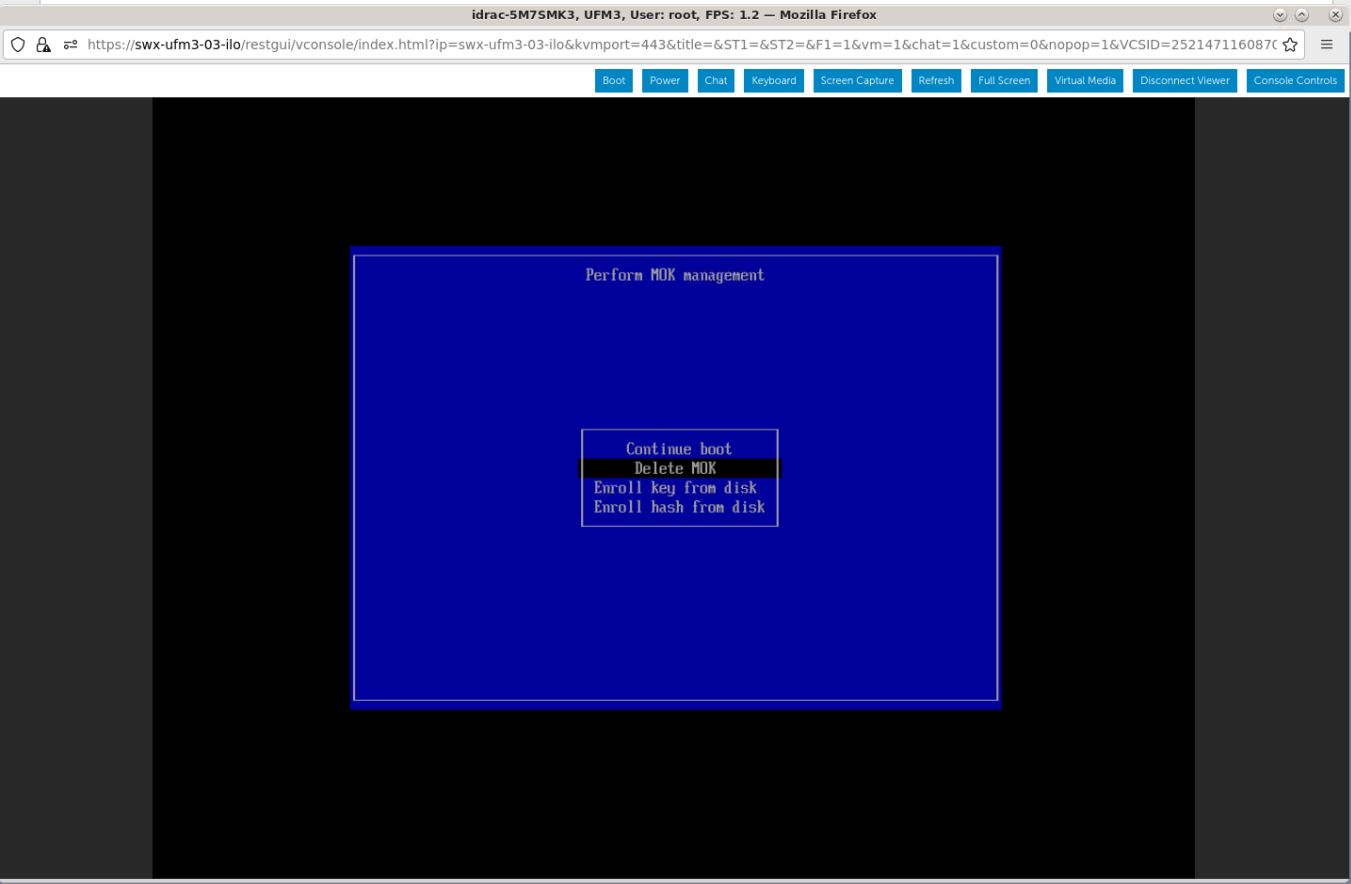
Navigate to "Delete MOK"
-
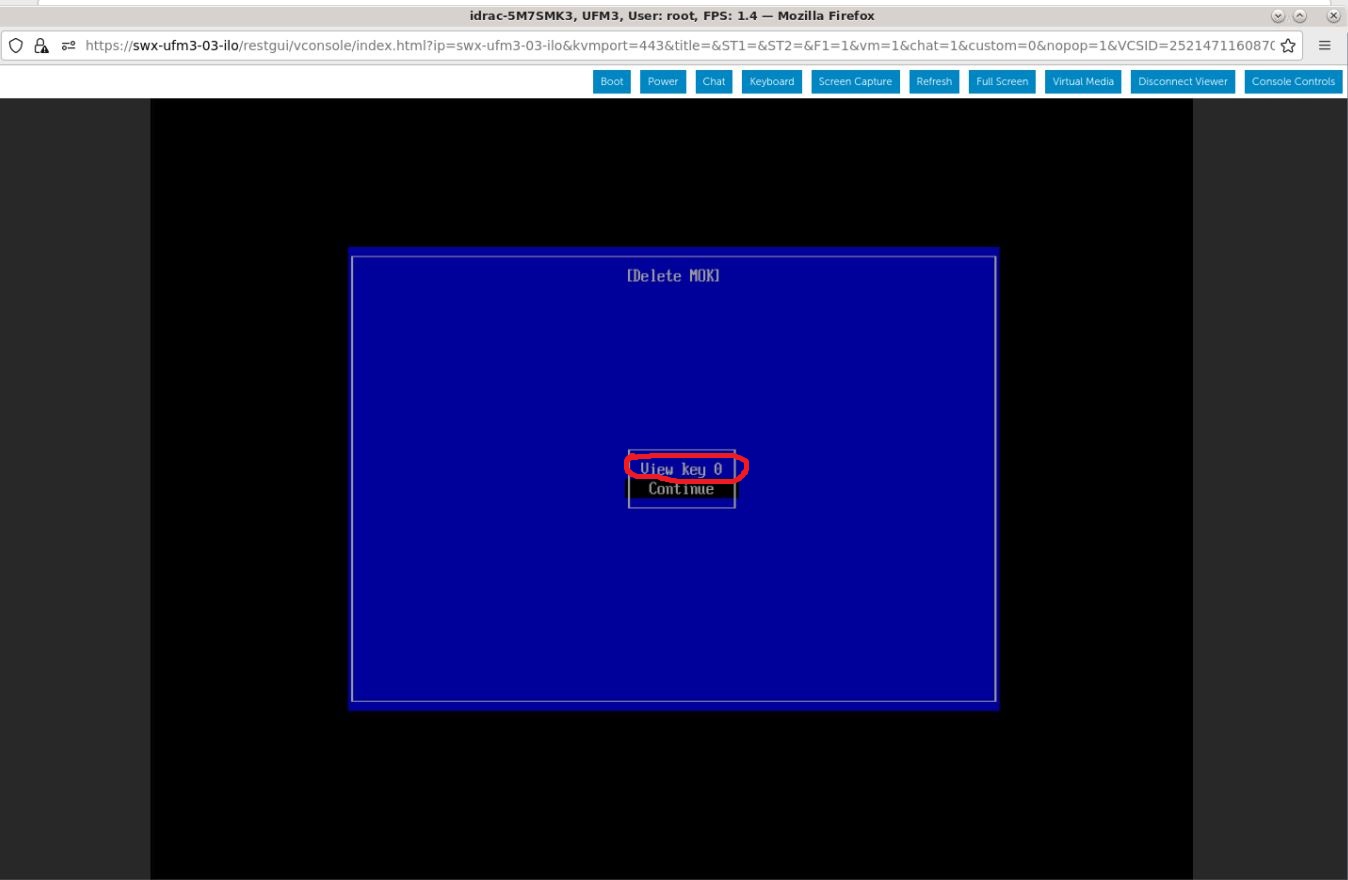
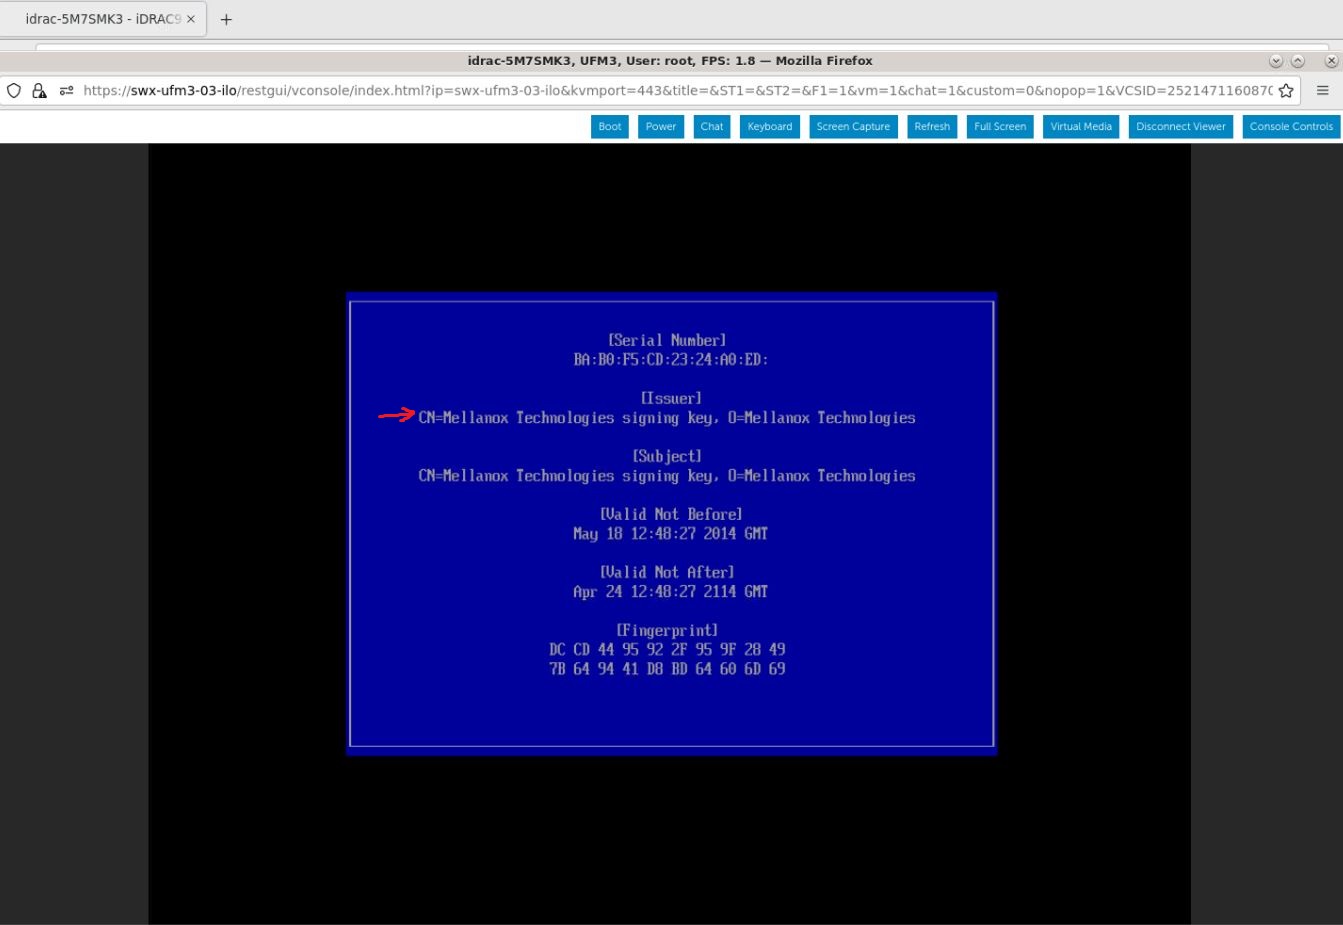
View the certificate to be enrolled. To verify, press "View key0".


Press "Enter" to exit the view.
-
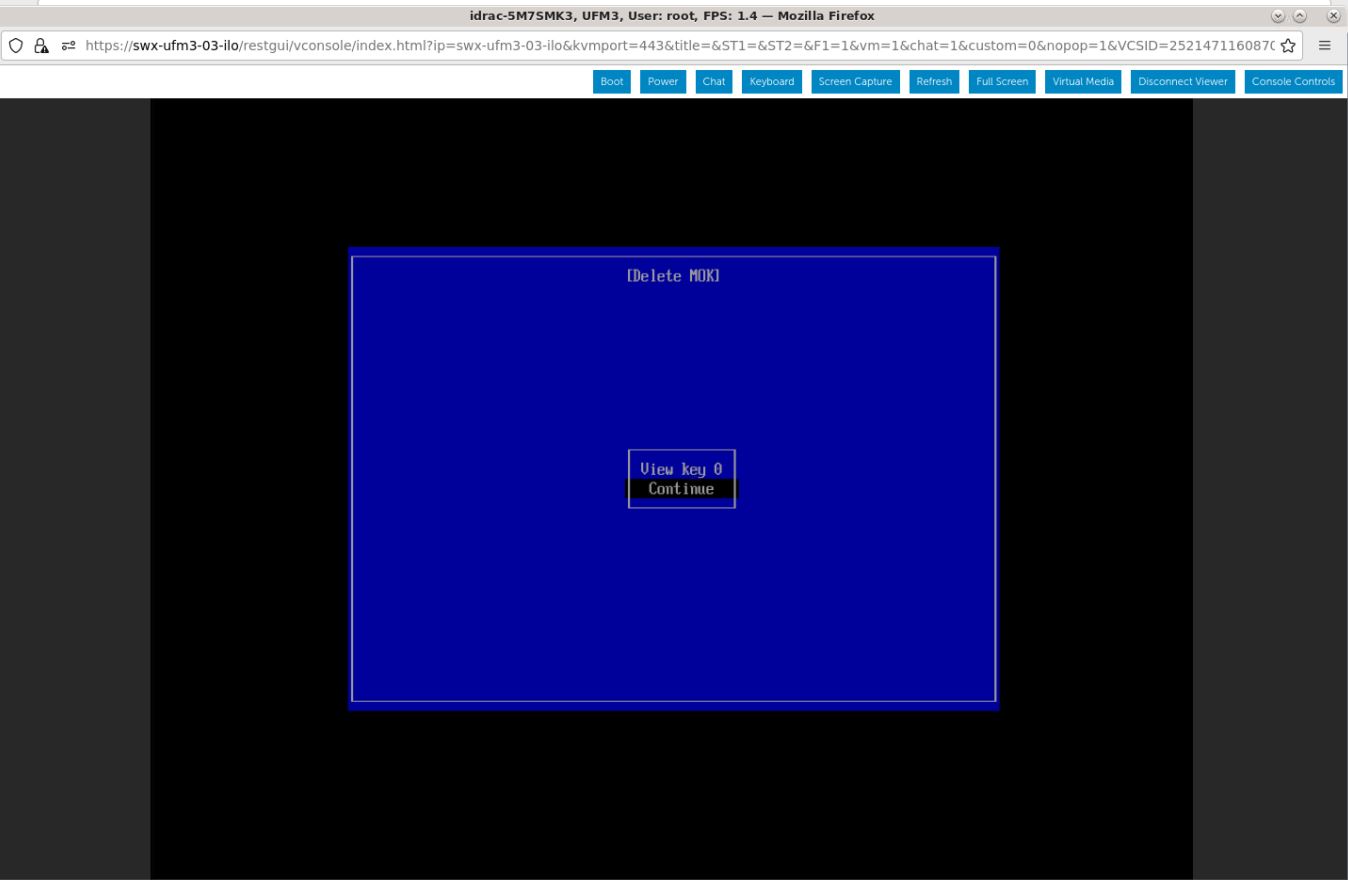
Select "Continue" from the menu and press Enter.

-
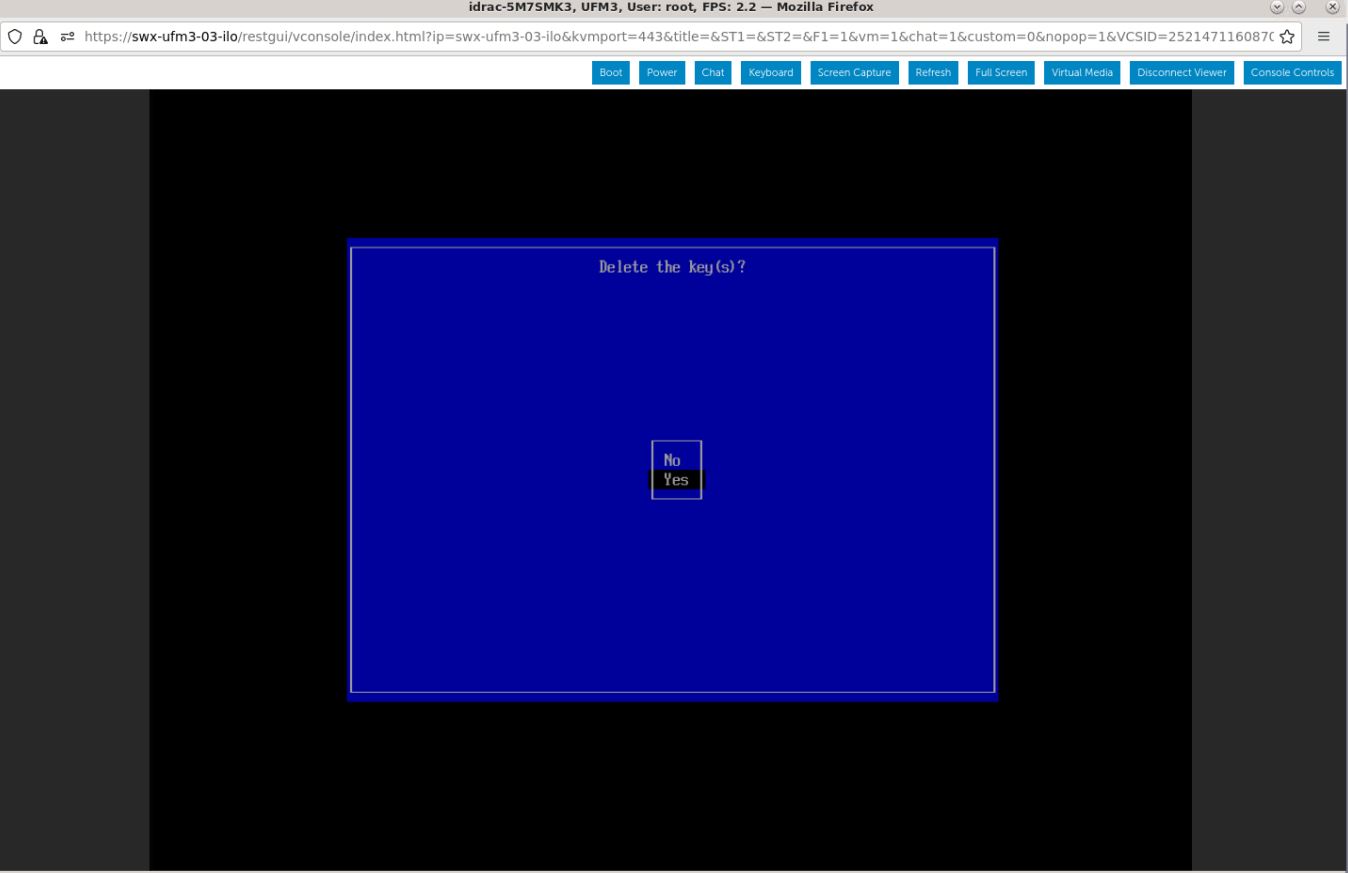
Select "Yes" from the menu, and press Enter.

-
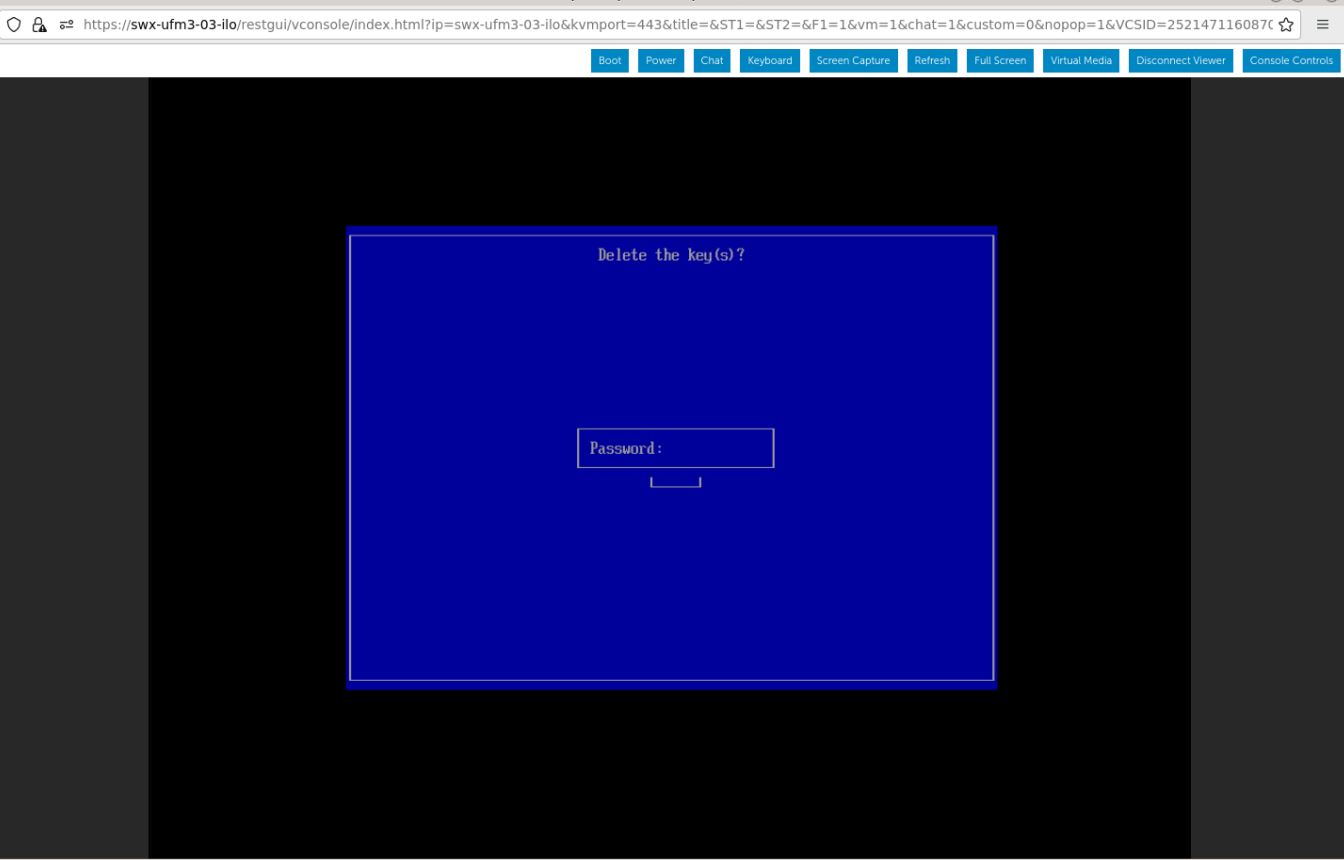
A password prompt appears, then, enter the OS Root user credentials.

-
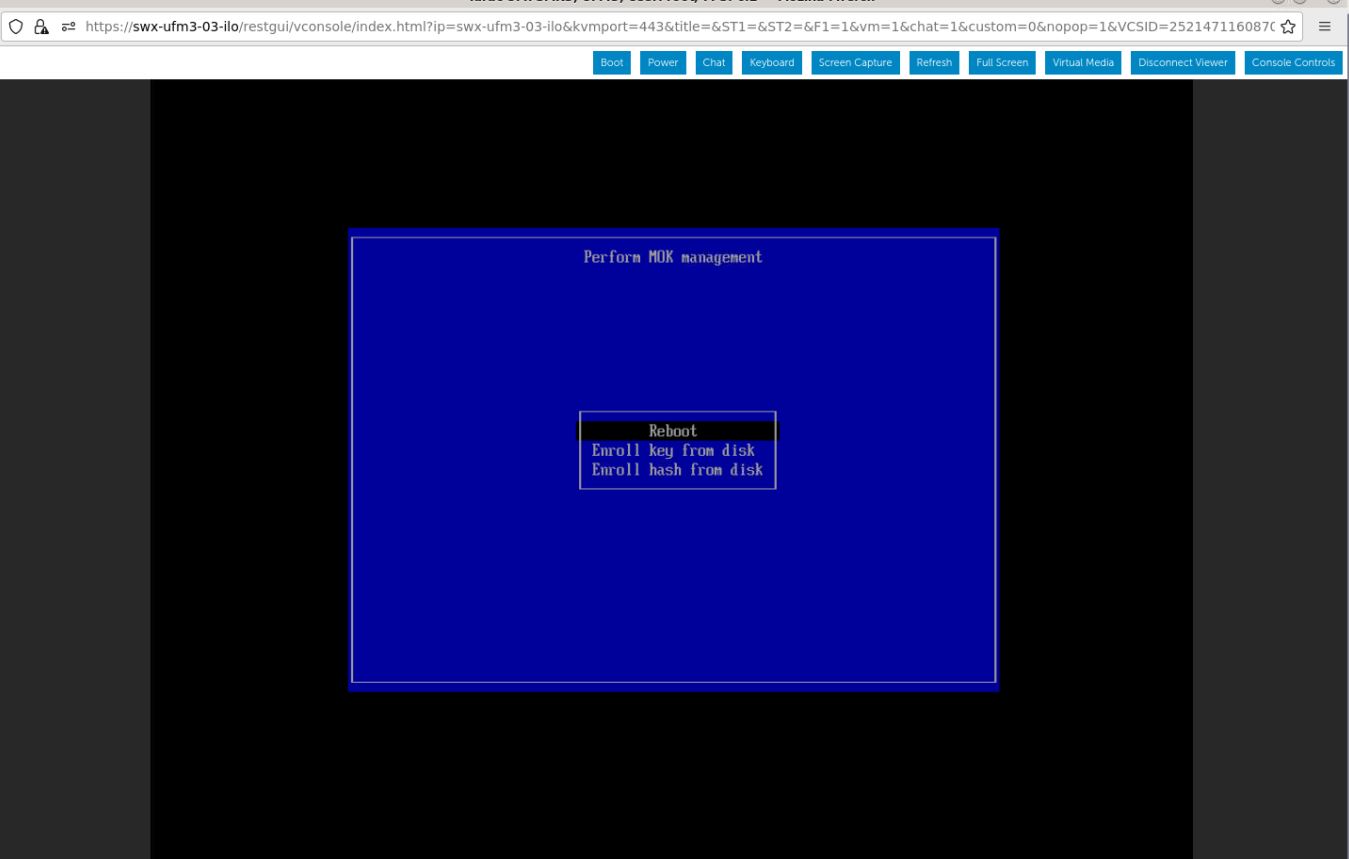
Select "Reboot" and press Enter. After the reboot is completed, the certificate is removed.

Enable Secure Boot
-
Login to Remote Management available via https://<iDRAC-ip address>
-
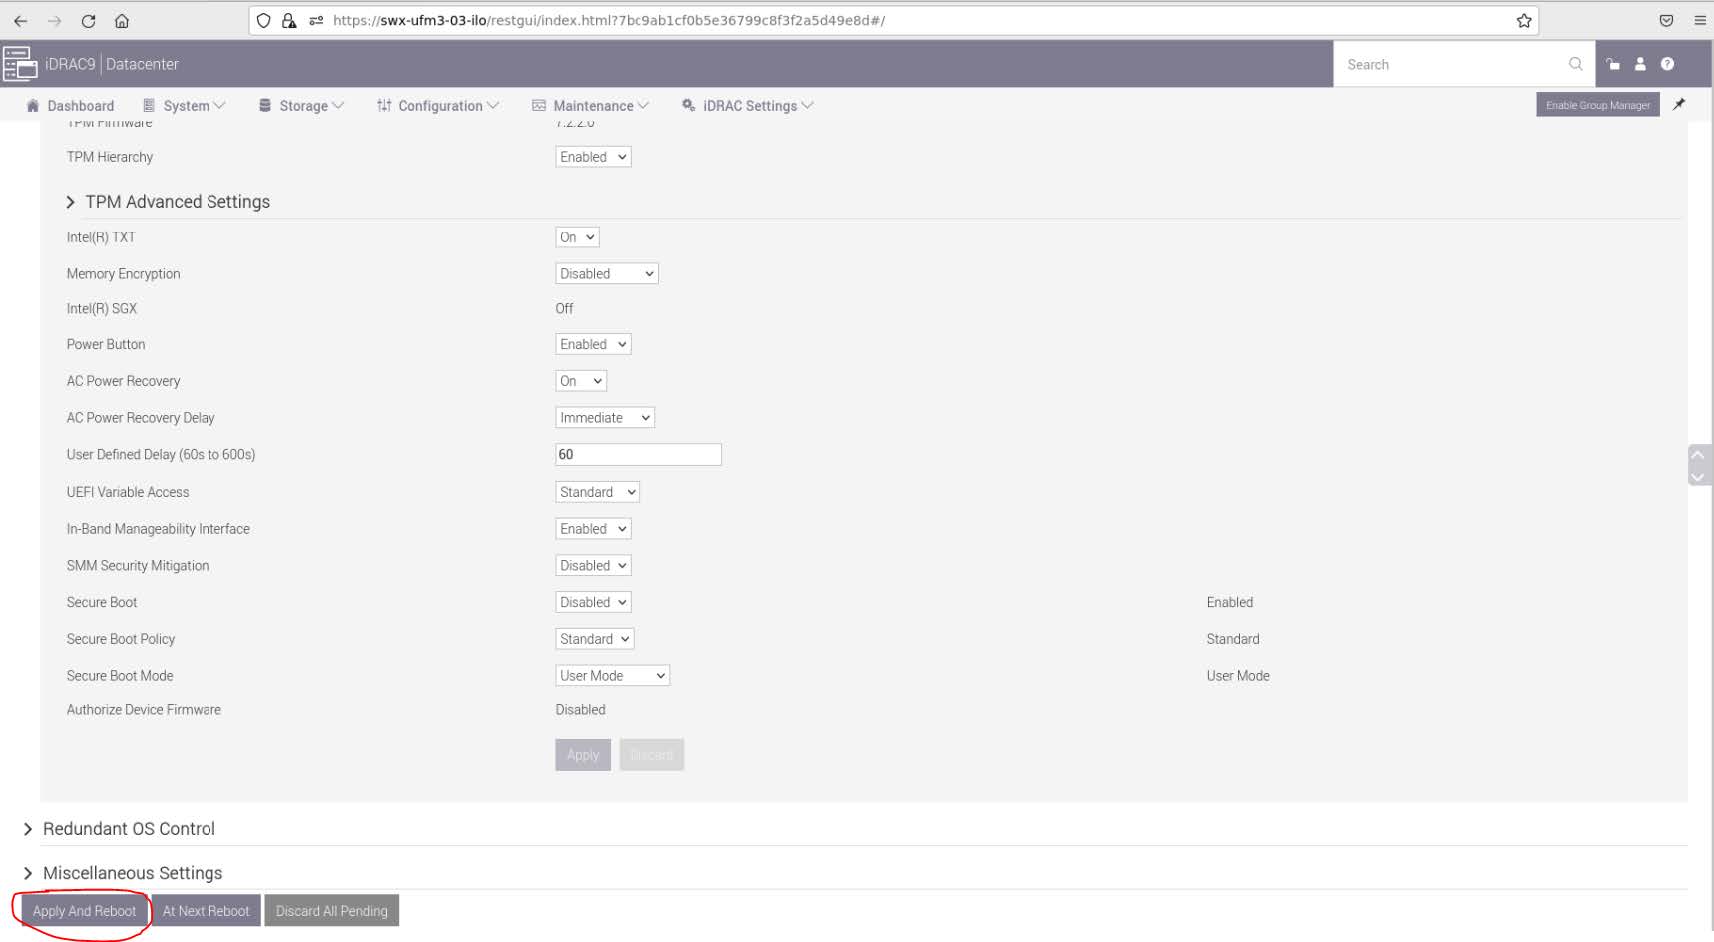
Navigate to "Configuration" → "BIOS Settings" → "System Security" and press the drop down menu (arrow).

-
Scroll down to "Secure Boot" and select "Enabled" from the drop menu. Click the "Apply" button.

-
Scroll to the bottom of the page and click on "Apply And Reboot" button, this will reboot the server and perform the configuration
-
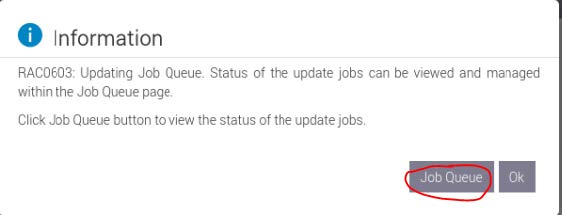
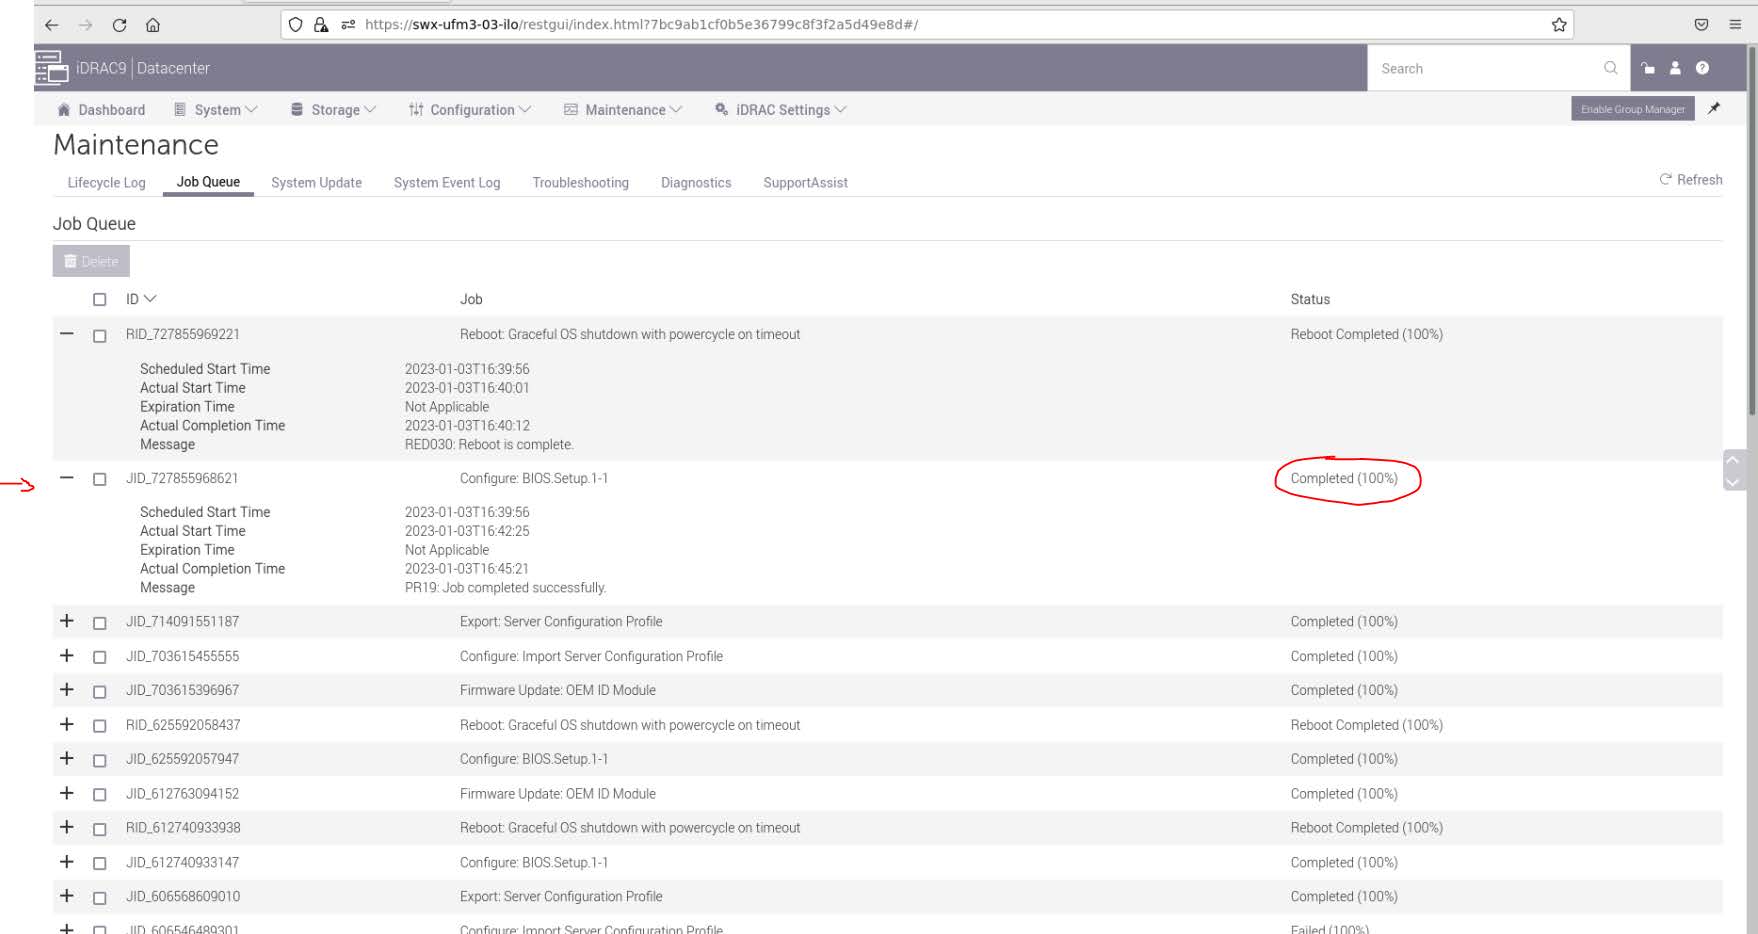
An Information Popup is prompted. Click on the "Job Queue" button (can also be navigated from "Maintenance" → "Job Queue").
-
Wait for the Jobs to finish and reach 100%
-
Validate that secure boot is enabled and active (from the terminal).
Bashmokutil --sb-state Bash
Bashmokutil --list-enrolled | grep -i mellanox
Disable Secure Boot
Disabling secure boot is not recommended and may cause security issues.
Secure Boot needs to be disabled prior to removing the NVIDIA public certificate.
The removal of the certificate is optional and can be skipped if secure boot should be re-enabled at some point in the future.
Disable Secure Boot in the BIOS
-
Login to Remote Management (https://<iDRAC-ip address>
-
Navigate to "Configuration" → "BIOS Settings" → "System Security" and press the drop menu (arrow).

-
Scroll down to "Secure Boot" and select "Disabled" from the drop menu, and click the "Apply" button.
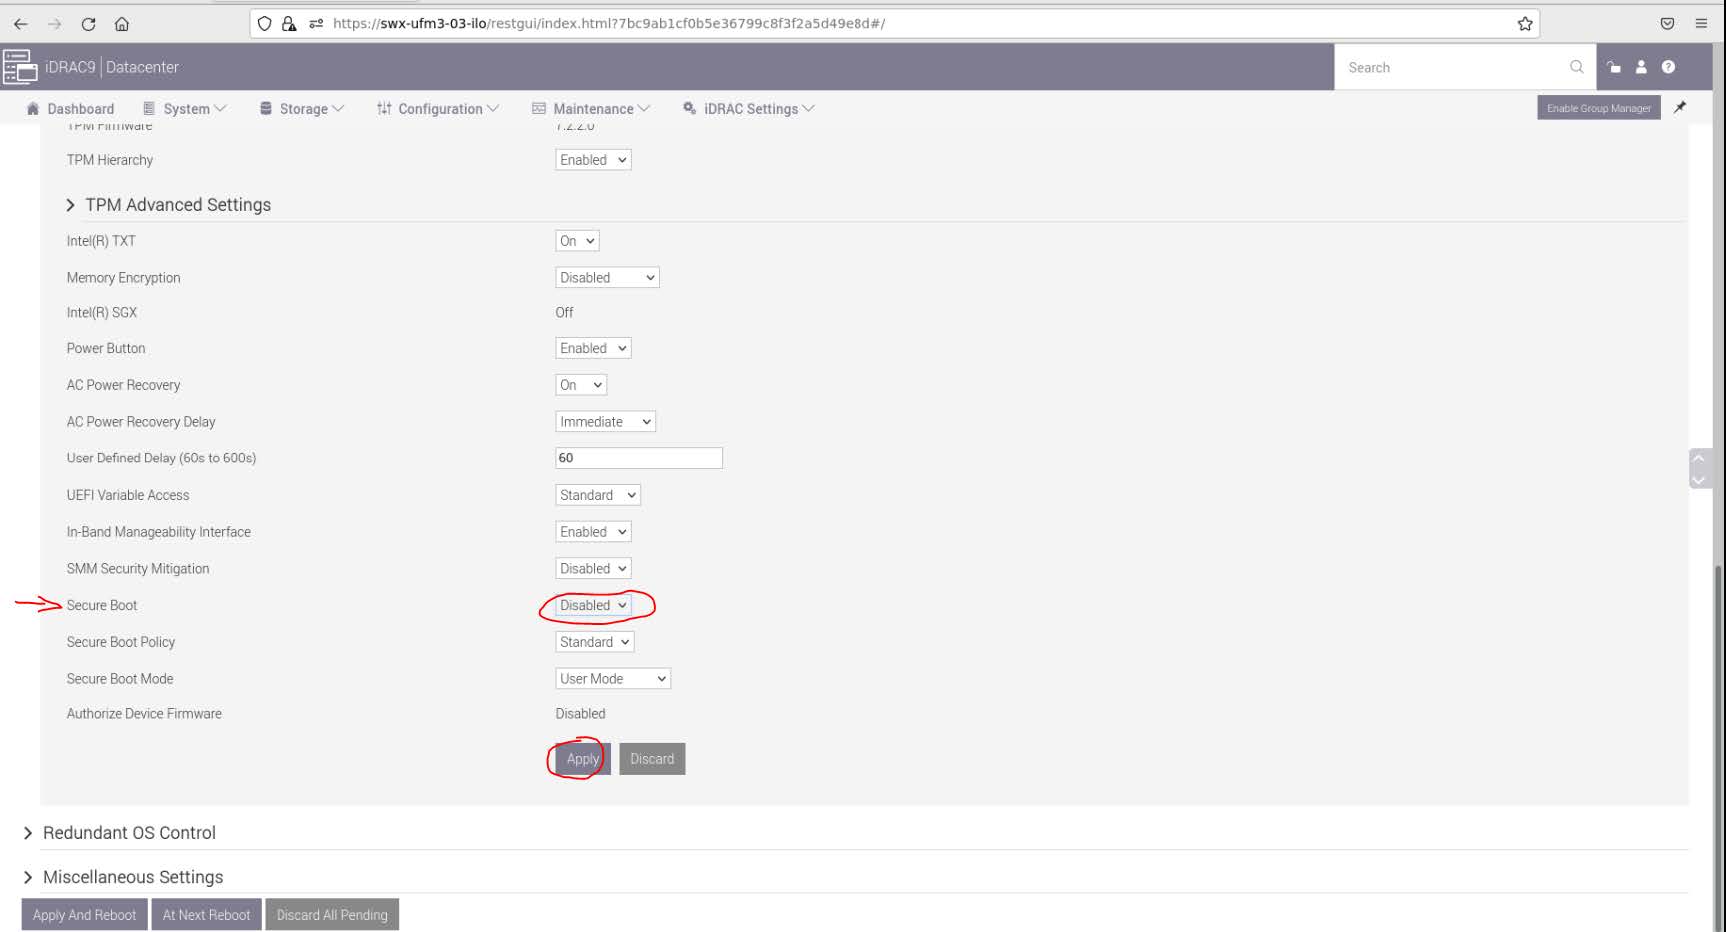
-
Scroll to the bottom of the page and click on the "Apply And Reboot" button; this will reboot the server and perform the configuration.
-
An Information Popup is prompted. Click on the "Job Queue" button (can also be navigated from "Maintenance" → "Job Queue").
-
Wait for the completion of the jobs (reach 100%).
-
Validate that secure boot is Disabled (from the terminal).
Bashmokutil --sb-state
Remove the NVIDIA Certificate from MOK db
Perform this step if you want to entirely remove NVIDIA's certificate from MOK DB. This step is optional and is not required to disable secure boot. Skip this if you wish to enable secure boot at a later time.
-
Login as root to the UFM server.
-
Check current enrolled certificates.
Bashmokutil --list-enrolledSearch for "Issuer: O=Mellanox Technologies.." and note the key ID above the start of this certificate:
-
Download the mlnx_signing_key_pub.der to a temporary folder (the DER certificate file must be present to be deleted). If the certificate is not available, it can be exported.
Bashct /tmp wget http://www.mellanox.com/downloads/ofed/mlnx_signing_key_pub.derOr export from current keys (all the keys are named MOK-000X.der) and search the NVIDIA certificate.
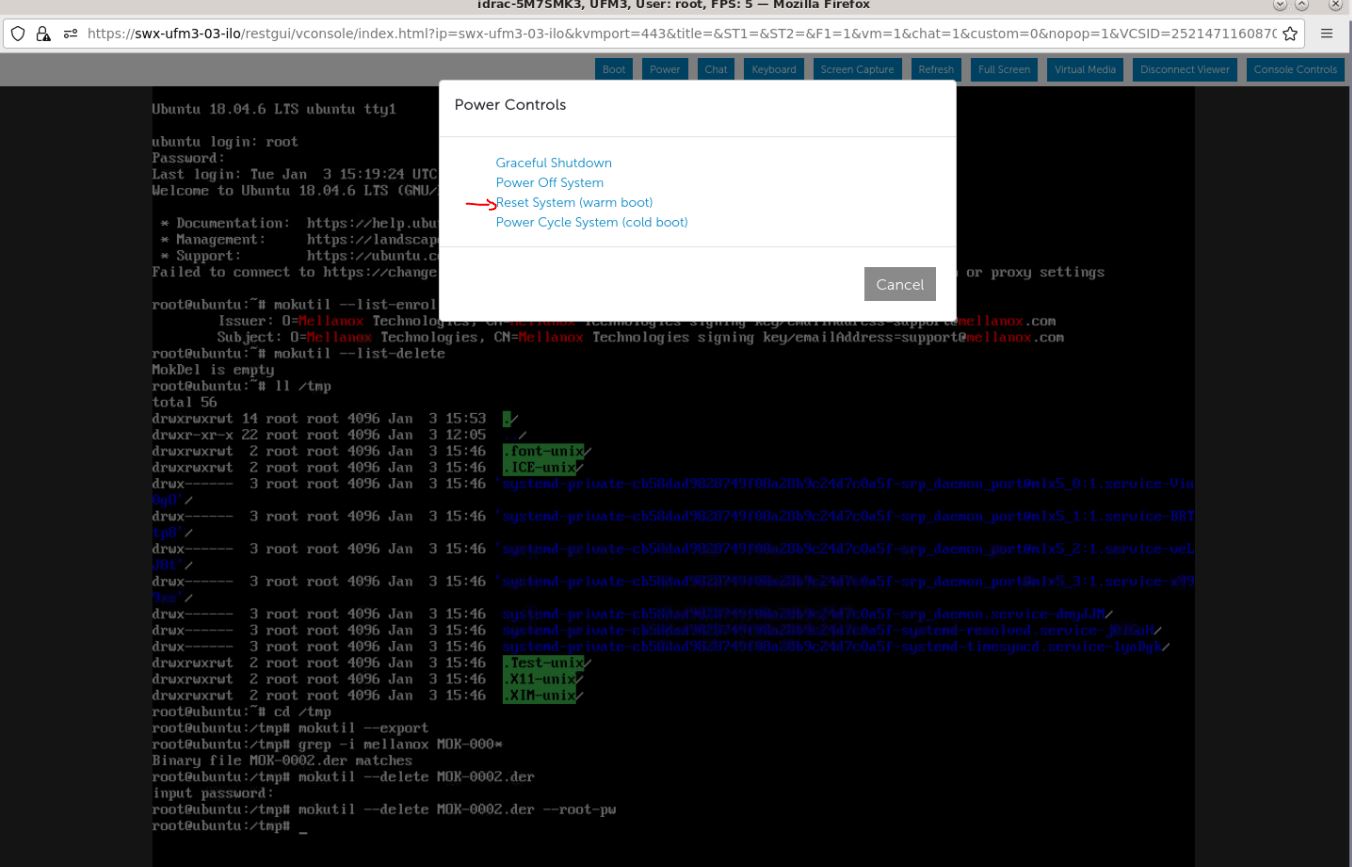
Bashcd /tmp mokutil --export grep "Mellanox" MOK-0*
Validate the certificate:Bashopenssl x509 -inform der -in MOK-0002.der -noout -issuer
-
Remove the certificate from the MOK db. The below example lists MOK-0002.der, the naming convention might be different.
Bashmokutil --delete ./MOK-0002.der --root-pwThe above can be validated by running
Bashmokutil --list-delete
The certificate is in the enrolled queue at this point. Upon the next server reboot, a 10 second prompt appears at the start of the boot process to confirm the certificate addition. It is important to confirm the certificate addition at this stage. Failure to do so requires you to repeat the procedure.
To be able to interact with the prompt, a console connection is needed either from the serial port or from the web console available via Remote Management. -
Login to Remote Management (https://<iDRAC-ip address>
-
click on "Dashboard"→"Virtual Console" to open the virtual web console.
-
Power cycle the server (at boot startup, a 10 second prompt appears to verify the certificate deletion).
On the top menu: "Power" → "Reset System (warm boot)".

The server now performs reboot.
-
Once the startup procedure begins, a confirmation prompt appears to verify certificate deletion. The prompt closes after 10 seconds, if missed, the certificate deletion procedure needs to be repeated.
Once the prompt appears, press any key to interact.
-
Navigate to "Delete MOK".
-
View the certificate to be deleted. To verify, press "View key0".
Press "Enter" to exit the view.
-
Select "Continue" from the menu and press the Enter key.
-
Select "Yes" from the menu and press the Enter key.
-
Once a password prompt appears, enter the OS root user credential.
-
Select "Reboot" from the menu and press Enter. Upon reboot completion, the certificate is removed.
Last updated: