UFM Prime lets administrators run cross-fabric management operations from a single entry point. Each operation listed below is available from the Consumer Web UI for resources that span all connected providers, with per-provider results aggregated into a unified view. In most cases, from the user's perspective, multi-subnet operations are identical to regular UFM operations, so users can consult the manual pages for the corresponding operations for detailed usage instructions.
Multi-Subnet Consumer Dashboard with at least two providers connected, showing the global Site filter in the top-right corner and the per-provider summary tiles.
The following operations are available:
|
Operation |
Description |
|---|---|
|
Cable Transceiver Firmware Upgrade Across Managed UFM Providers |
Upload, list, and burn cable transceiver firmware images on switches across all providers. |
|
Extract PM counters for tenant hosts that span multiple providers. |
|
|
View, create, modify, and delete partition keys (PKeys) and their member ports across all providers. |
Cable Transceiver Firmware Upgrade Across Managed Providers
In a Multi-Subnet deployment, the cable transceiver firmware upgrade workflow is available from the UFM Multi-Subnet Consumer for switches across all connected providers—there is no need to log in to individual providers.
To upgrade cable transceivers across providers
-
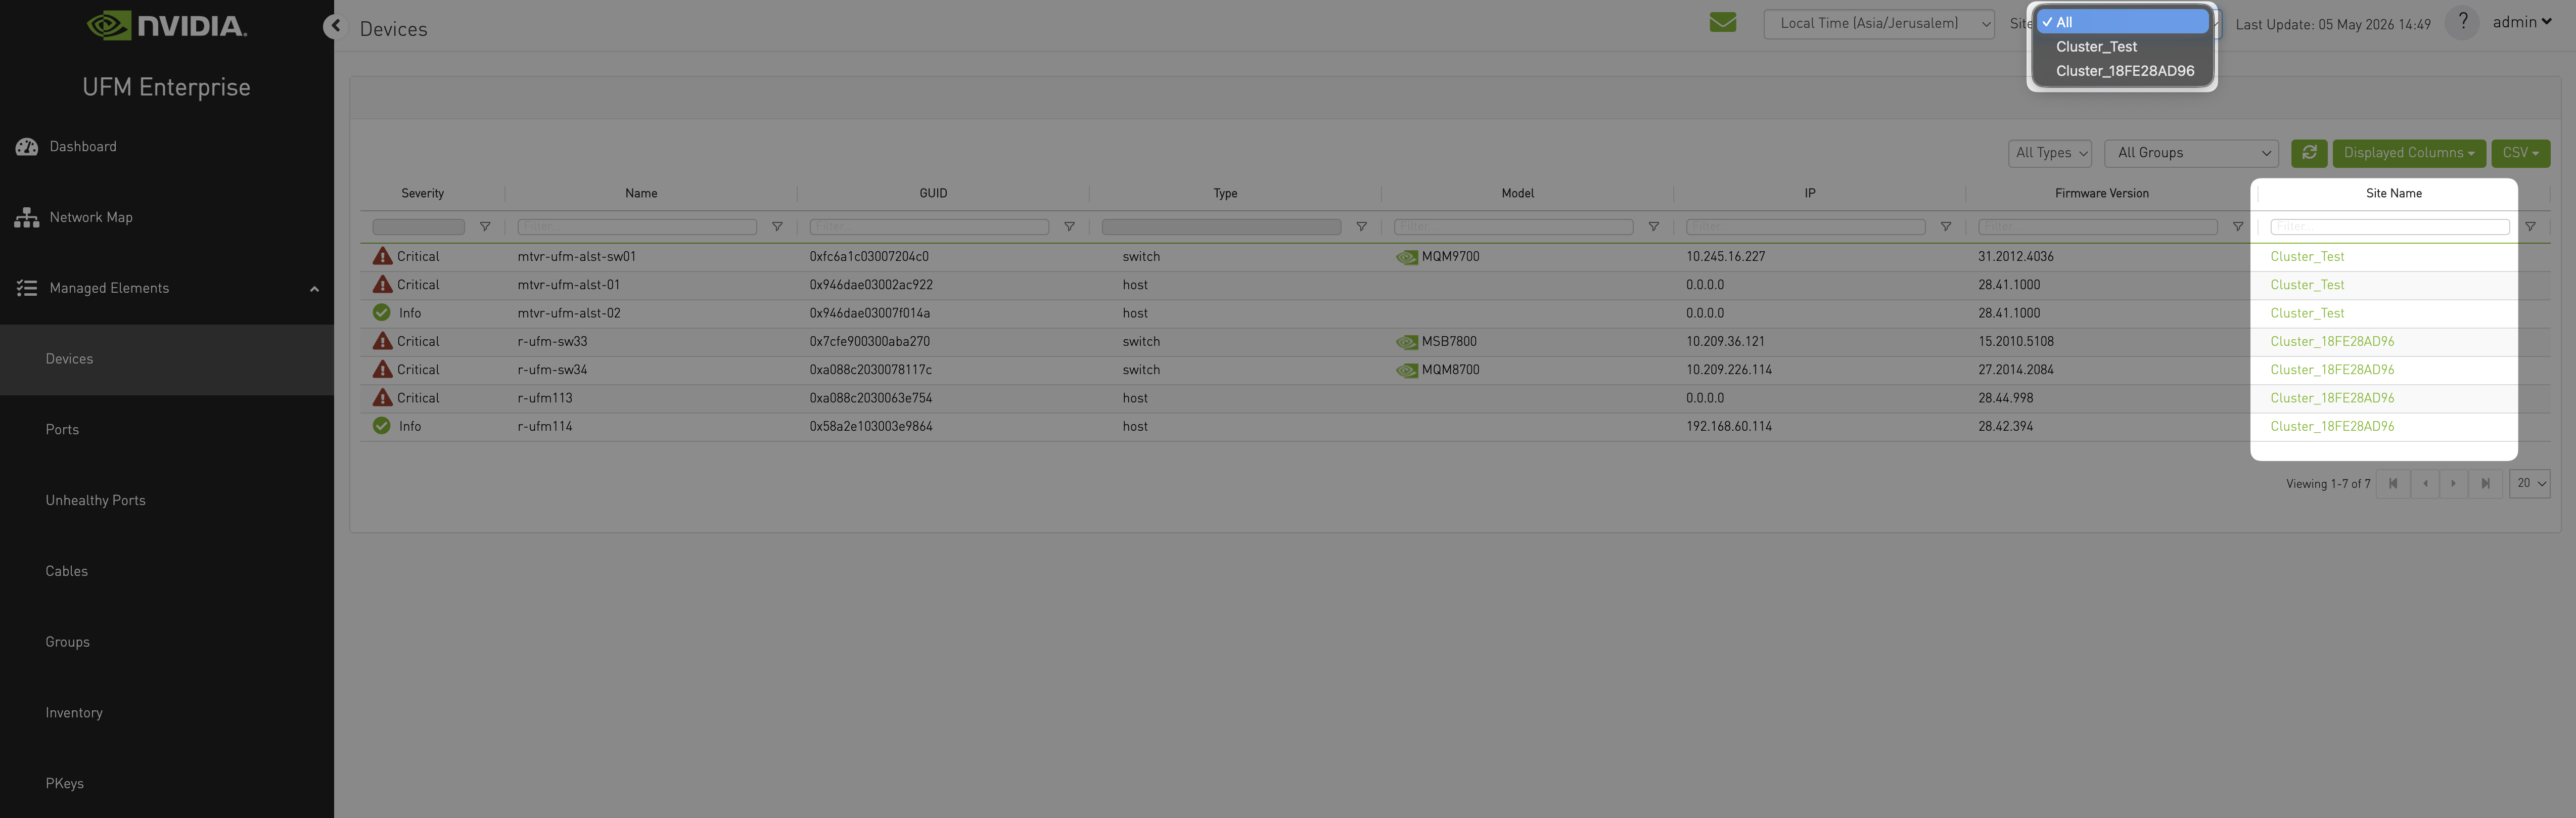
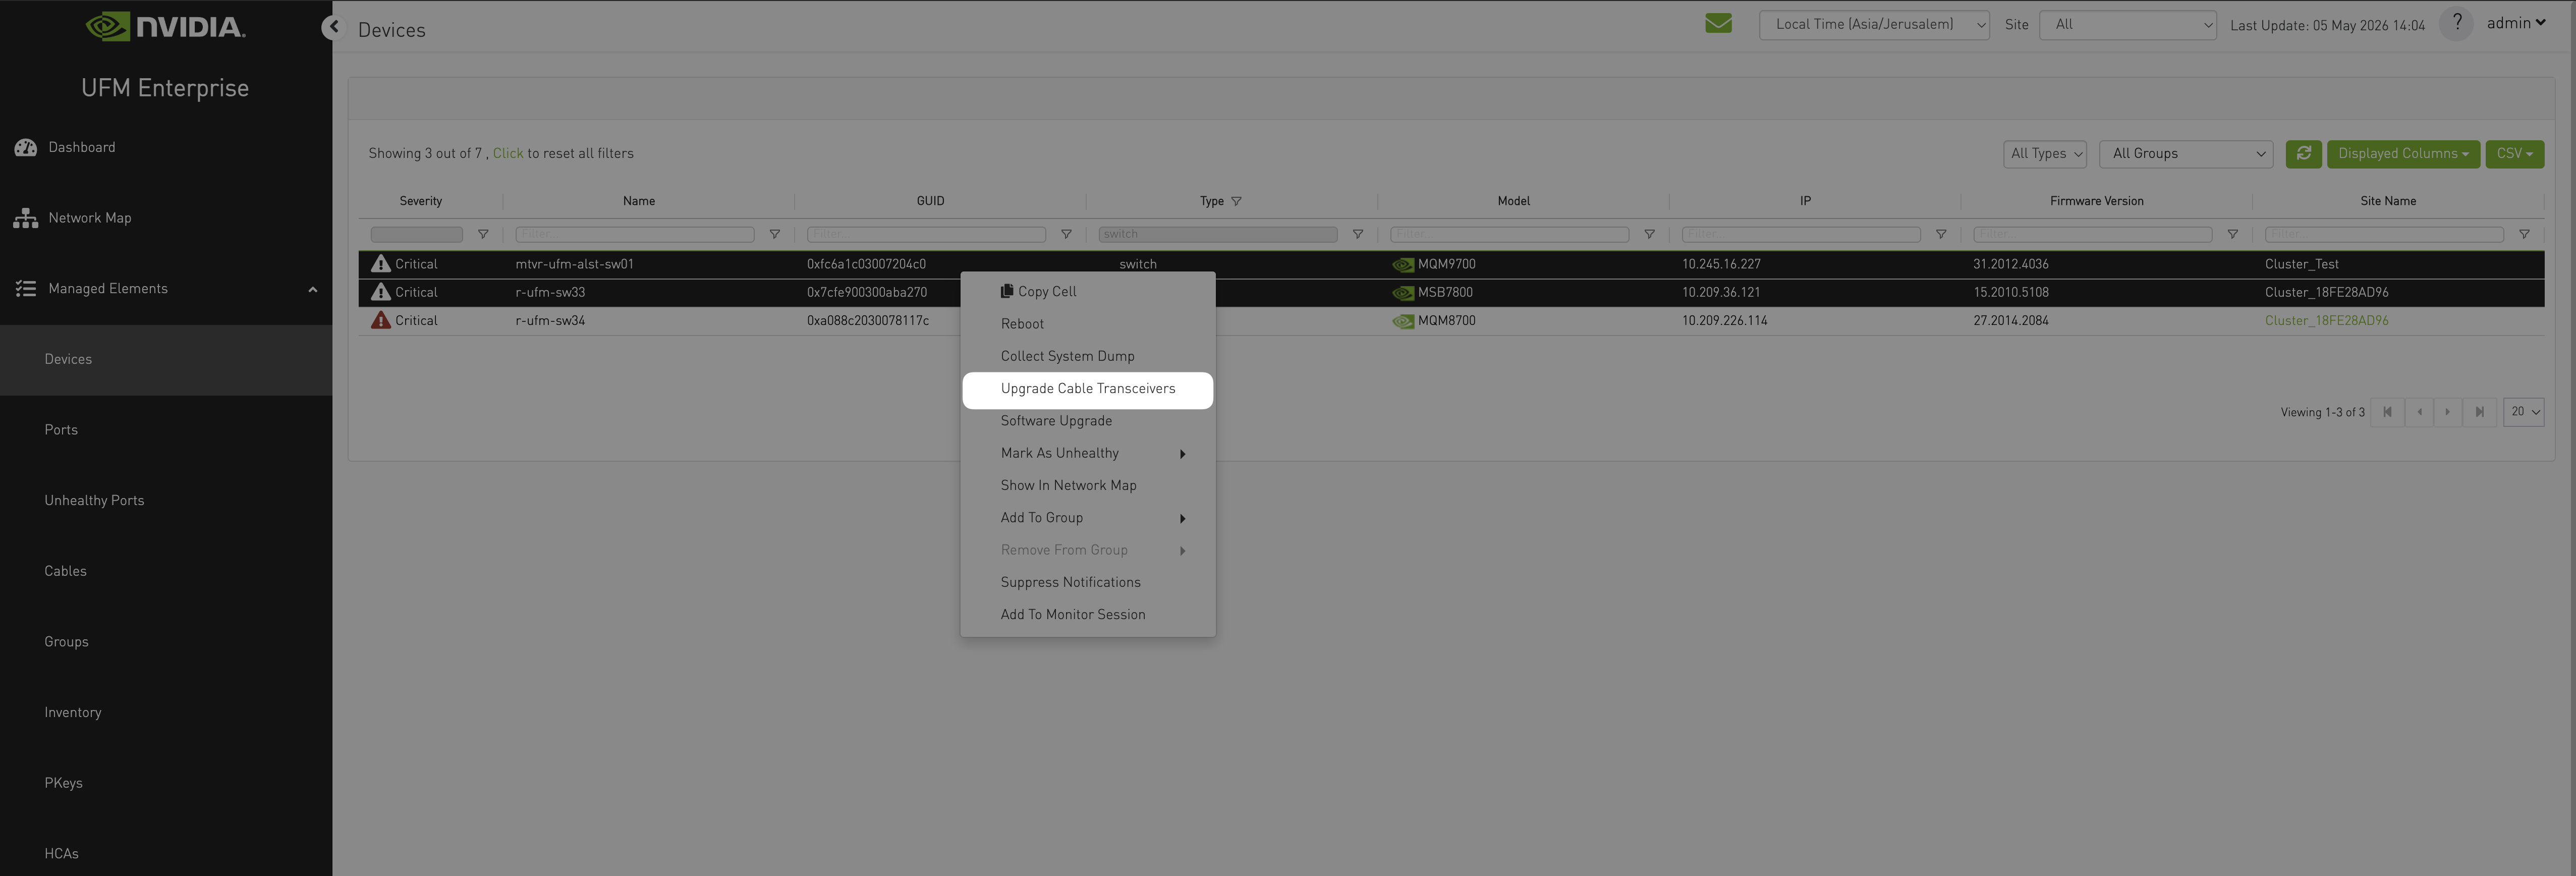
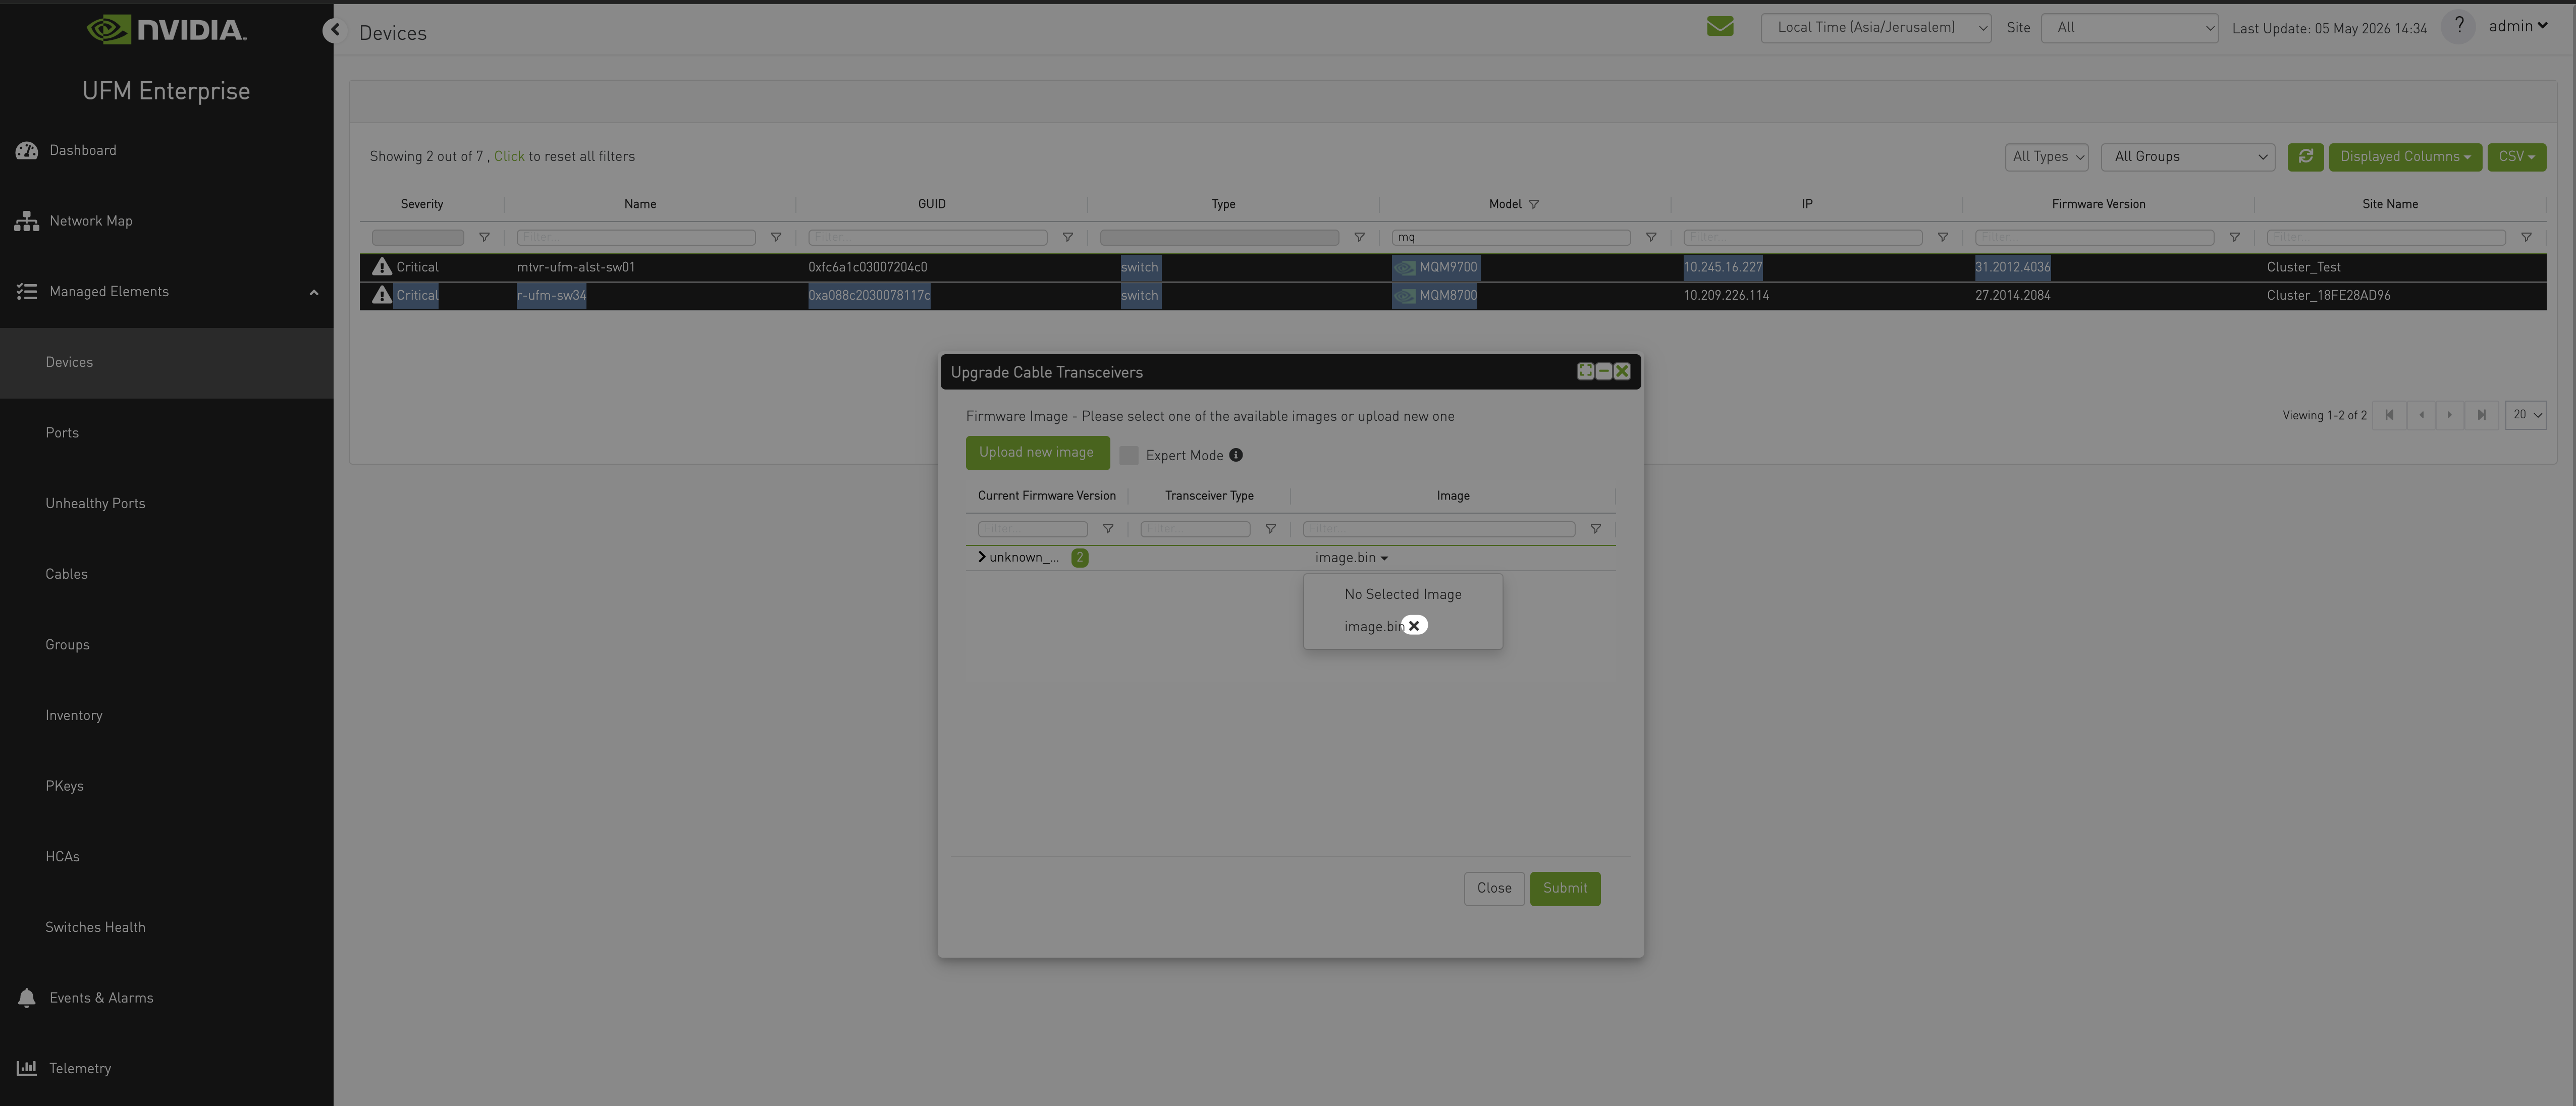
From the Managed Elements > Devices window, select one or more switches.
The selection may span multiple providers (the Site Name column shows each device’s owning provider).
Devices window with multiple switches selected from different providers (Site Name column visible) and the right-click context menu open on "Upgrade Cable Transceivers". -
Right-click and choose Upgrade Cable Transceivers.
The upgrade dialog opens and lists the active firmware versions for the selected devices, grouped by firmware version.
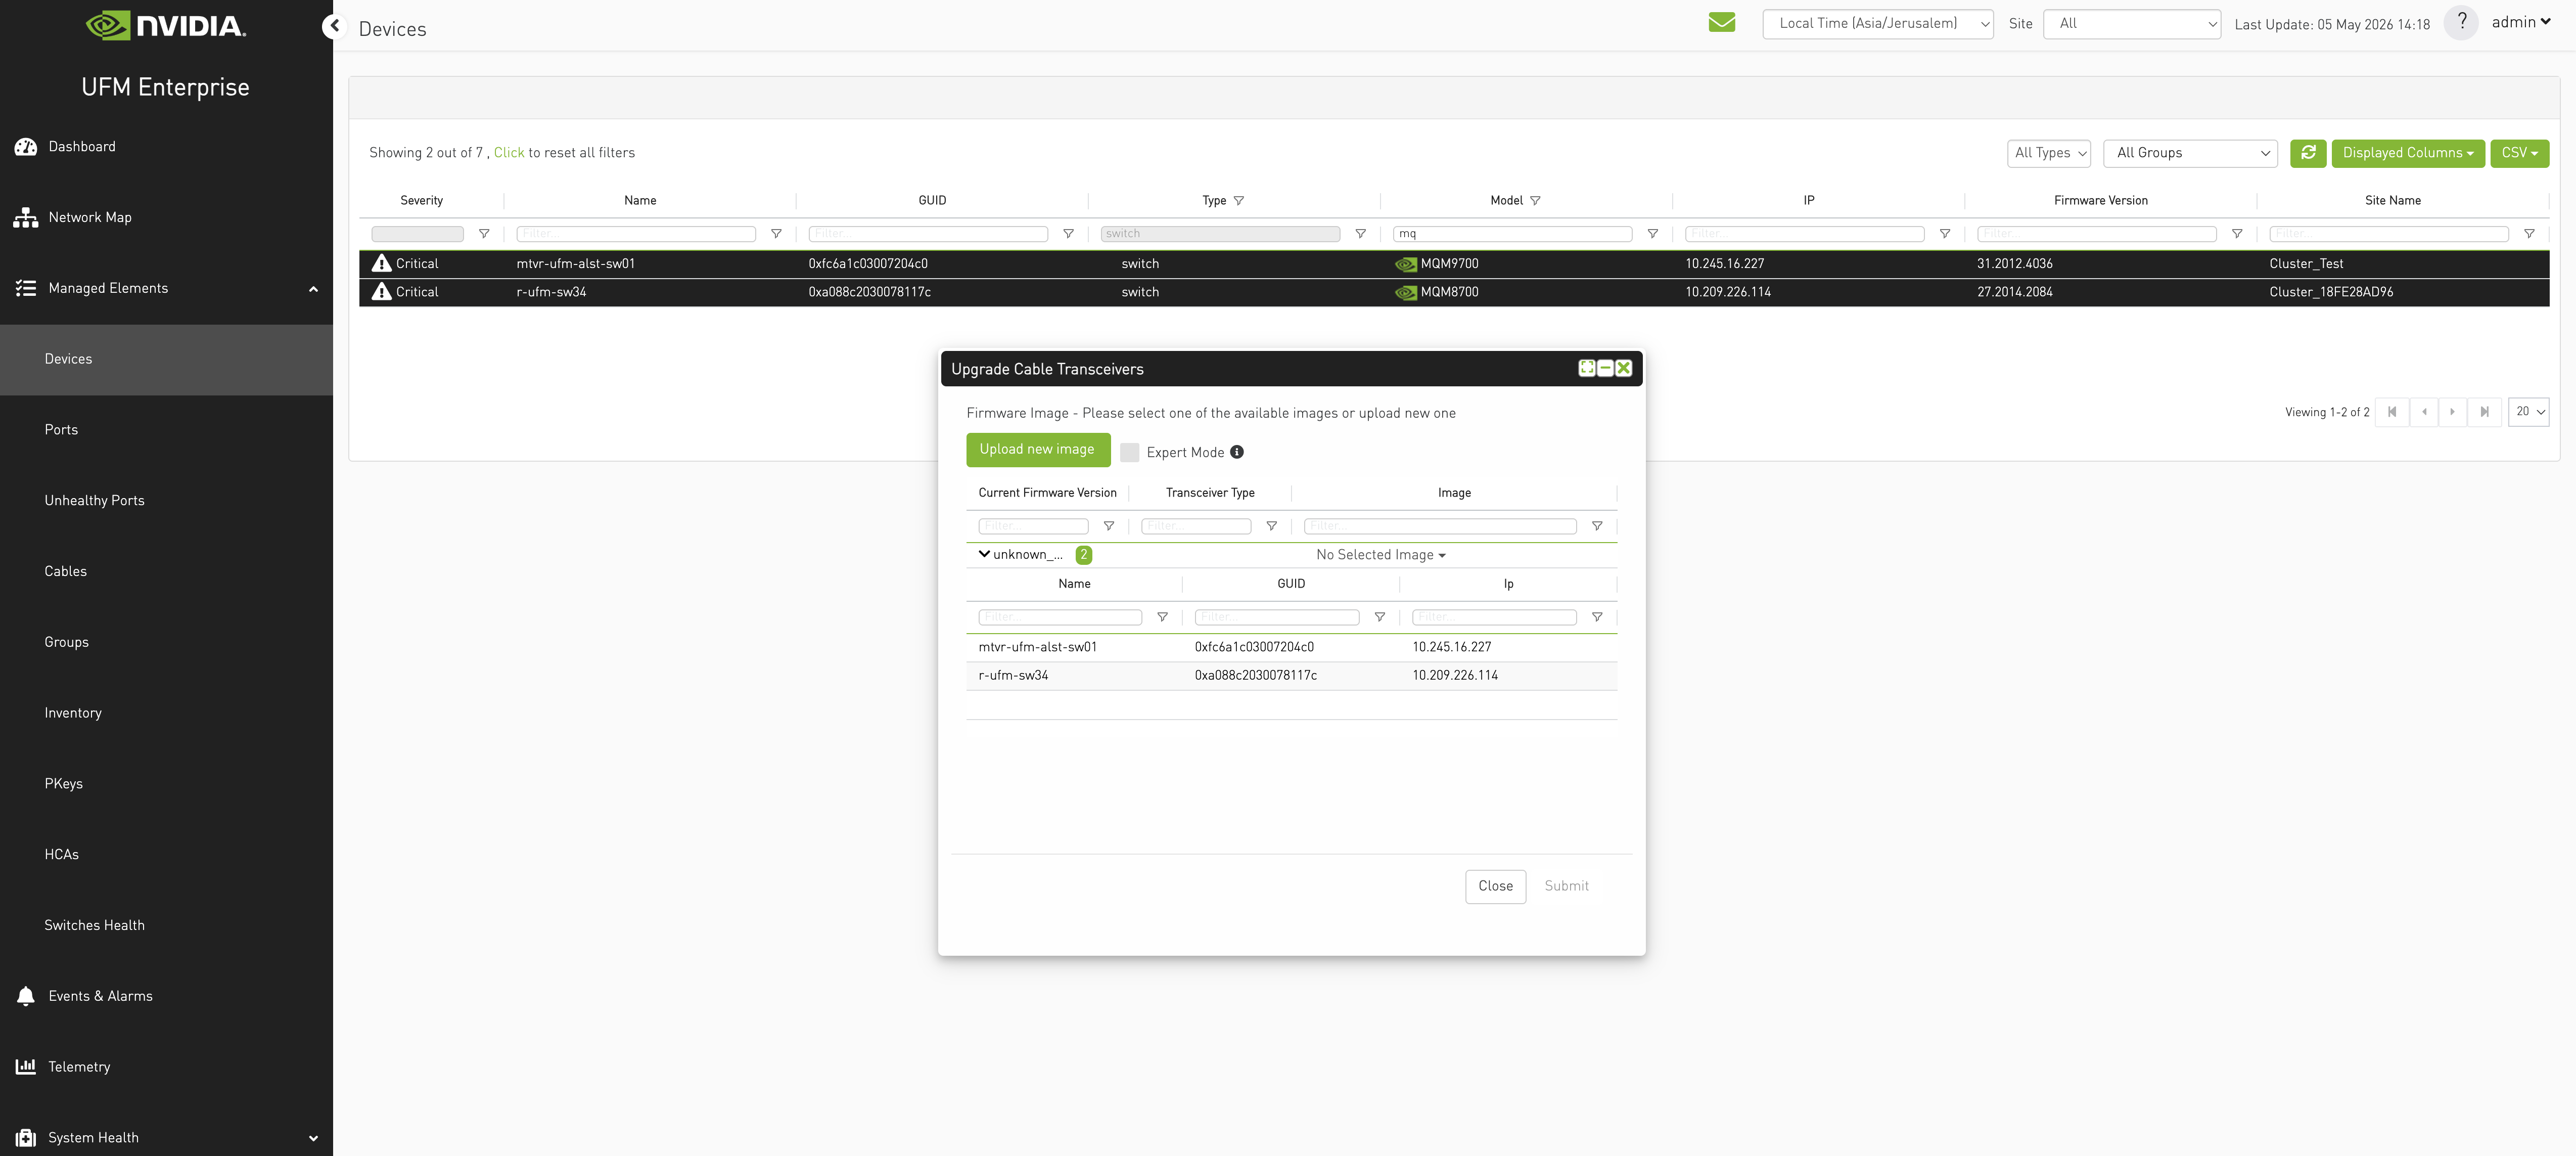
Upgrade Cable Transceivers dialog showing the active firmware versions table populated with rows from at least two providers; the Site Name column is visible. -
Click Upload new image.
In the opened dialog, choose the binary (
.bin) file to upload by clicking Browse, then click Upload.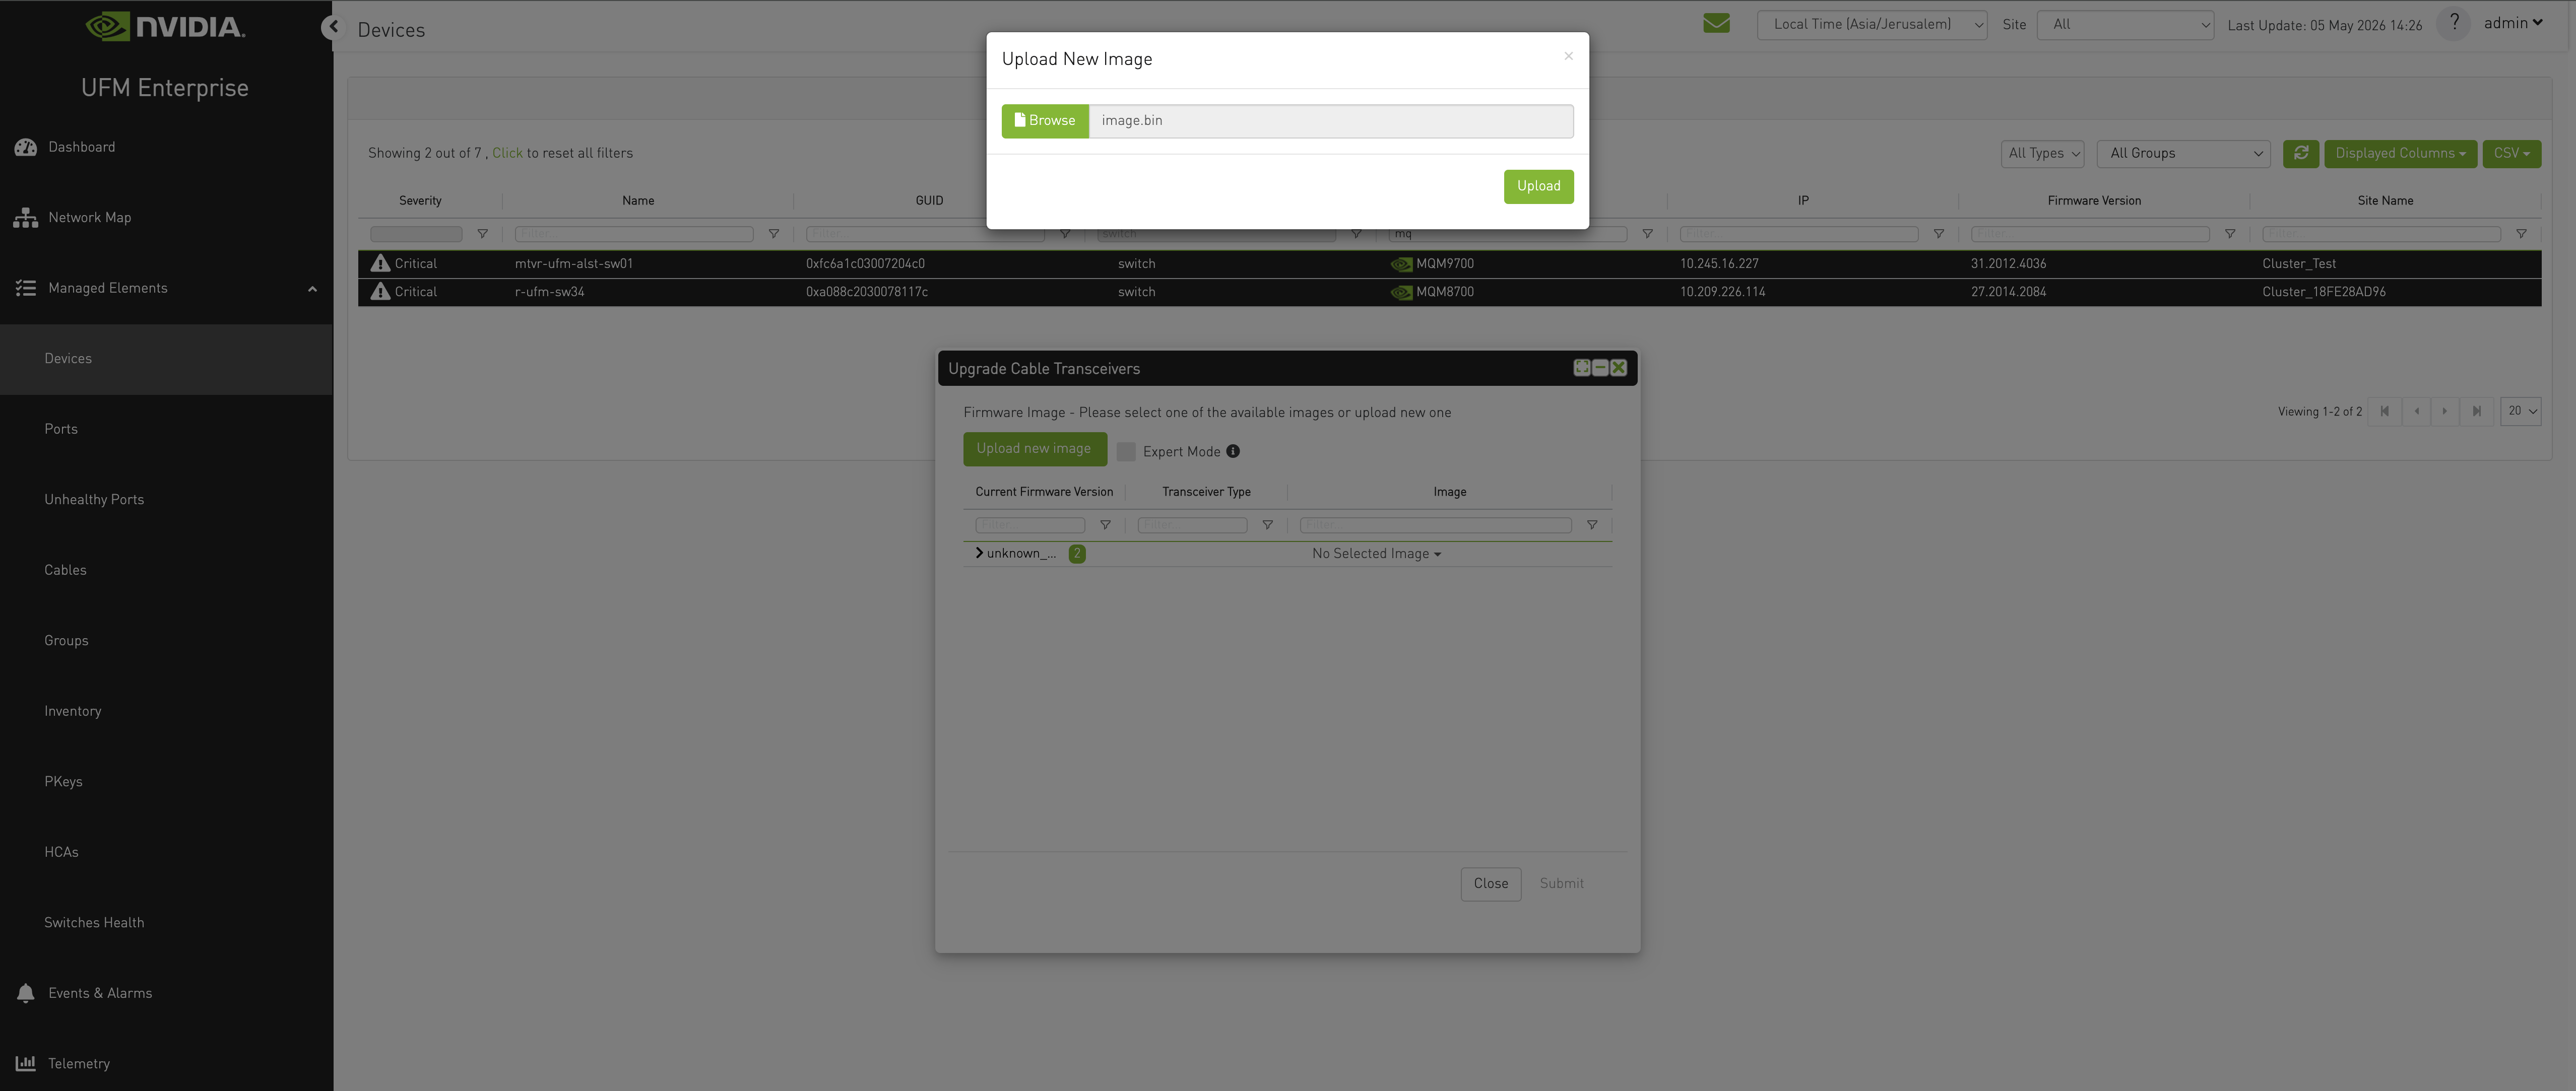
Upload Image dialog with a .bin file selected and the per-provider upload result panel visible. -
After the image is uploaded, trigger the burn action from the same dialog by clicking Submit.
Track progress in the Jobs window—a parent job is created for the upgrade, with one child job per provider.

Jobs window with the parent "Upgrade cables transceivers" consumer job expanded, showing one child job per provider and their statuses. -
To remove an uploaded image, open the Upgrade Cable Transceivers dialog, select the image, and delete it by clicking the small x icon.
Cable images list with one uploaded image selected and the Delete confirmation dialog open, showing the per-provider delete result.
Tenant Performance Monitoring Across Managed Providers
In a Multi-Subnet deployment, the UFM Multi-Subnet Consumer can extract Performance Management (PM) counters for hosts that span multiple providers in a single operation. There is no need to log in to individual providers.
Unlike other multi-subnet operations, PM counter extraction is not exposed in the Web UI. The user triggers it by issuing a REST request directly to the Consumer; results are then viewed in the Jobs window of the Consumer Web UI.
To extract PM counters for hosts across providers
-
Send a
POSTrequest to the Consumer at:/ufmRestV2/monitoring/job/resources/pm_counters?csv_format=true
The requested hosts may belong to any combination of connected providers. Refer to the REST API Reference Guide for the full request and response schema.
-
Open the Jobs window in the Consumer Web UI to track progress.
A parent job titled Consumer: Get performance counters for hosts is created, with one child (sub) job per provider that owns at least one of the requested hosts. The parent job completes only after all per-provider child jobs have finished.
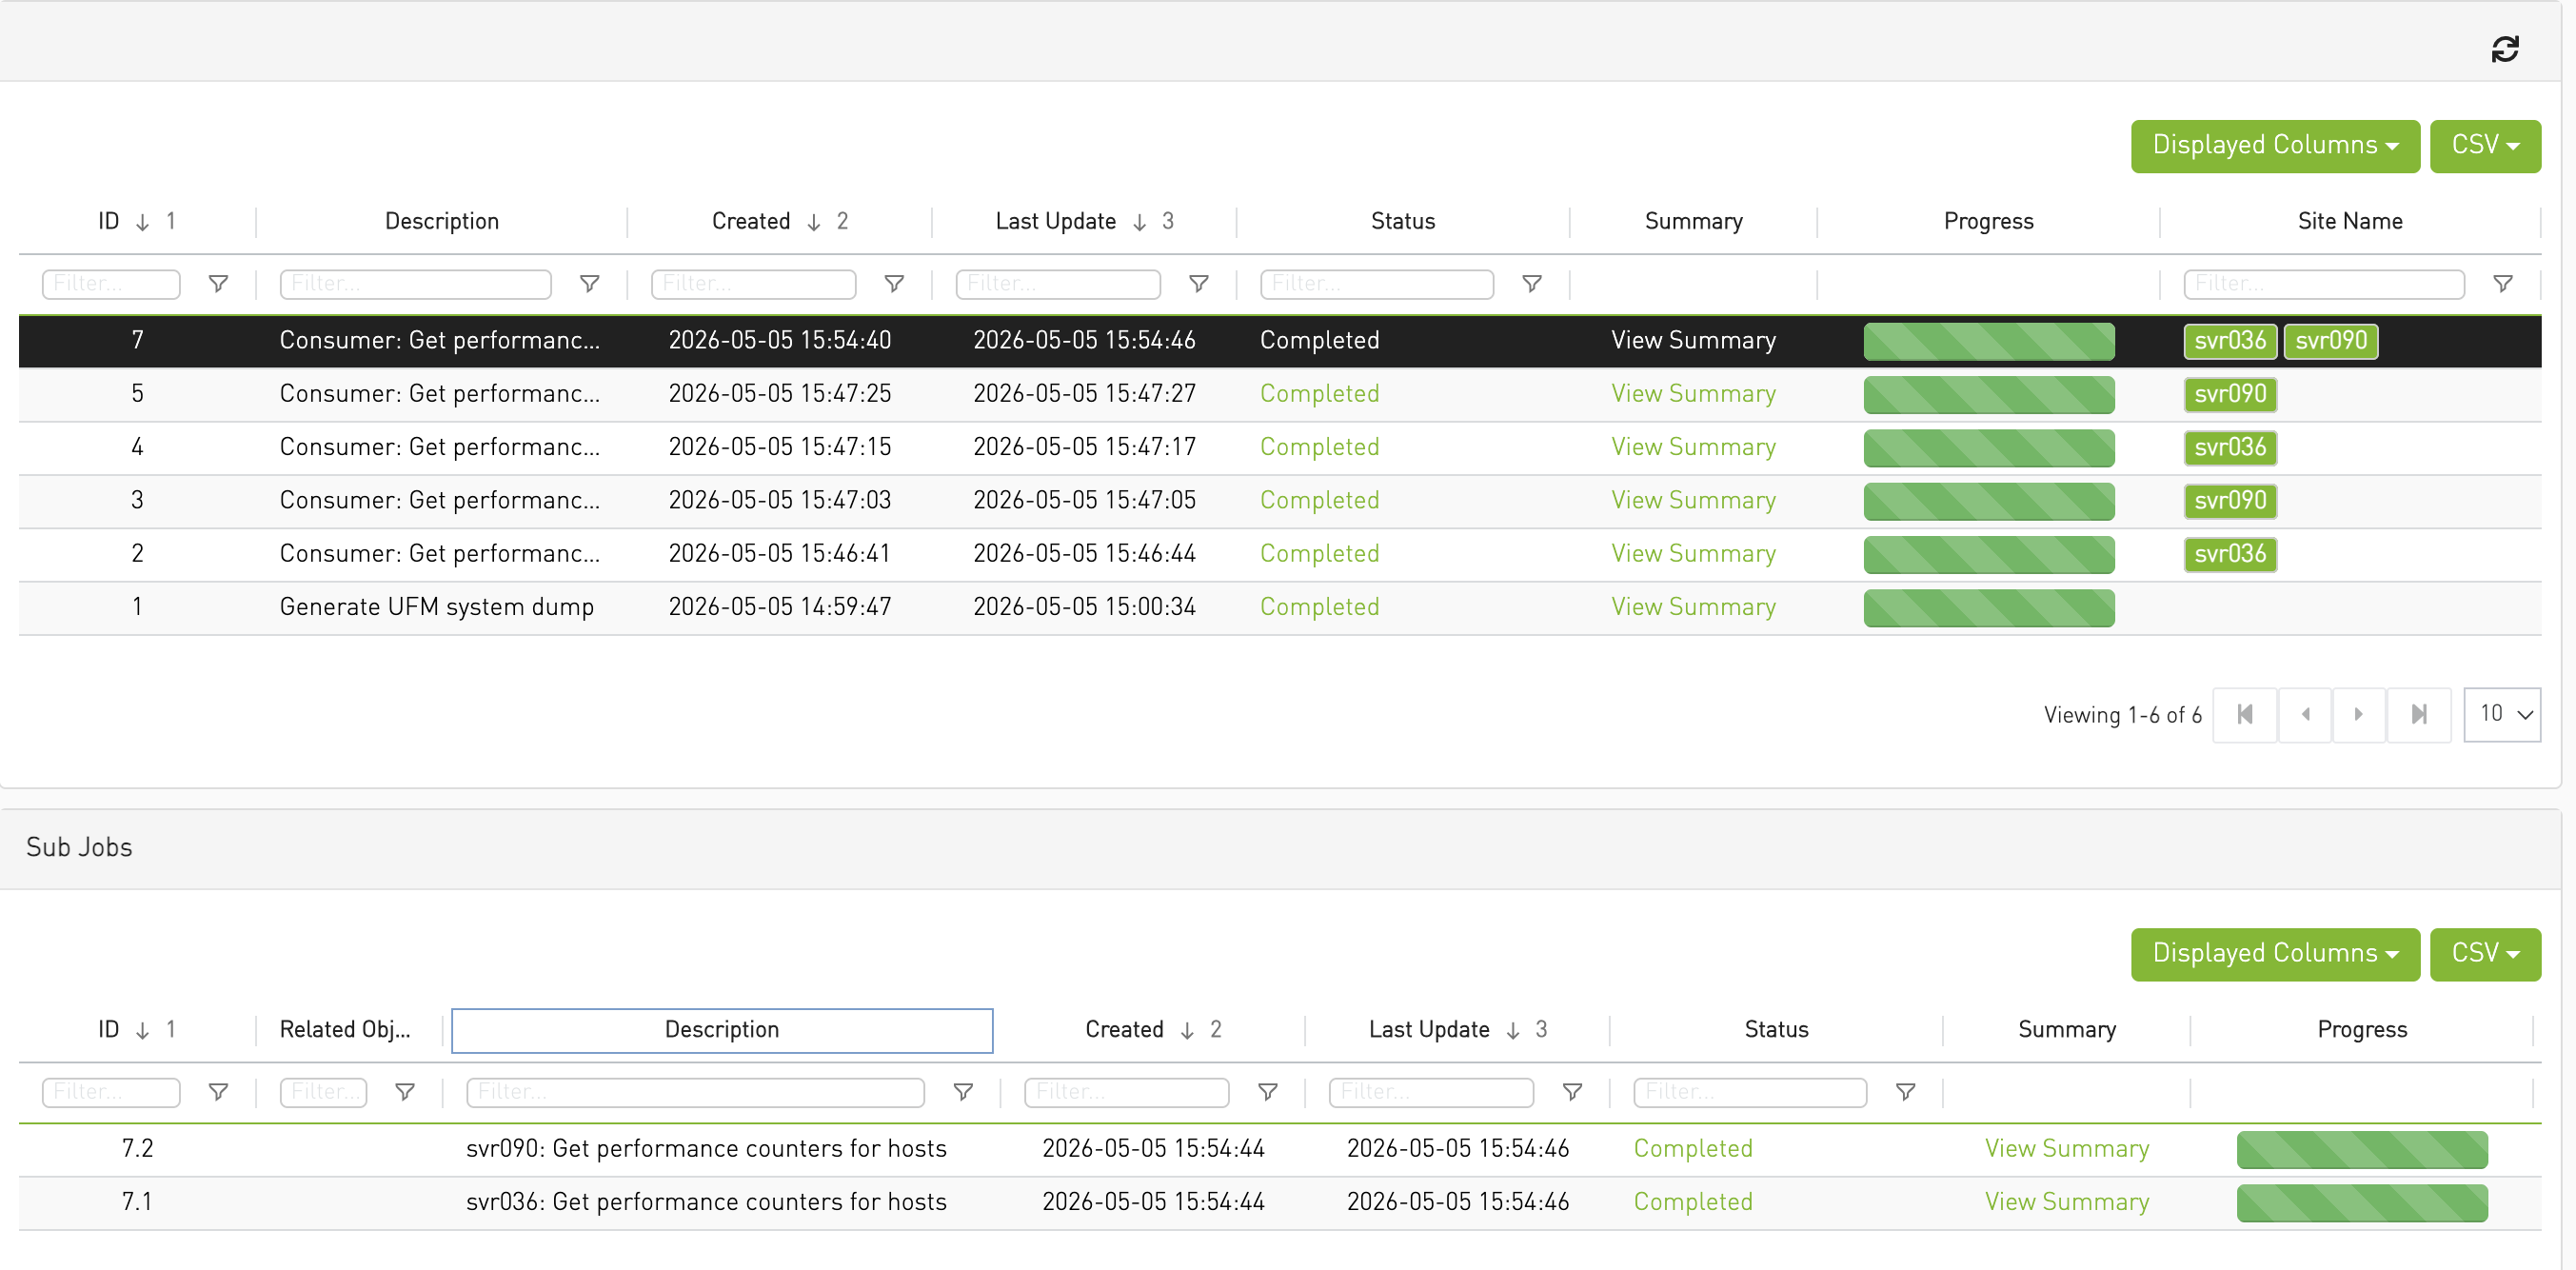
Jobs window with the parent "Consumer: Get performance counters for hosts" job in the upper Jobs table and the per-provider child jobs (one row per provider, with the Site Name column populated) in the lower Sub Jobs table.
-
Open the Job Summary to view the collected counter values in the selected format (CSV or JSON):
-
When a child (sub) job is selected, the Job Summary contains only the counter rows for the hosts owned by that provider.
-
When the parent (Consumer) job is selected, the Job Summary contains the aggregated counter rows from all providers.

Job Summary panel for a completed PM counters child job, showing the collected counter values (NodeGUID, PortGUID, PortNumber, the requested counters, and SystemName) for the hosts of one provider. -
PKey Management Across Managed Providers
In a Multi-Subnet deployment, partition keys (PKeys) and their member port GUIDs are managed from the UFM Multi-Subnet Consumer across all connected providers. The Consumer presents an aggregated PKey view; the Site Name column identifies the owning provider for each member GUID. There is no need to log in to individual providers.
To View PKeys Across Providers
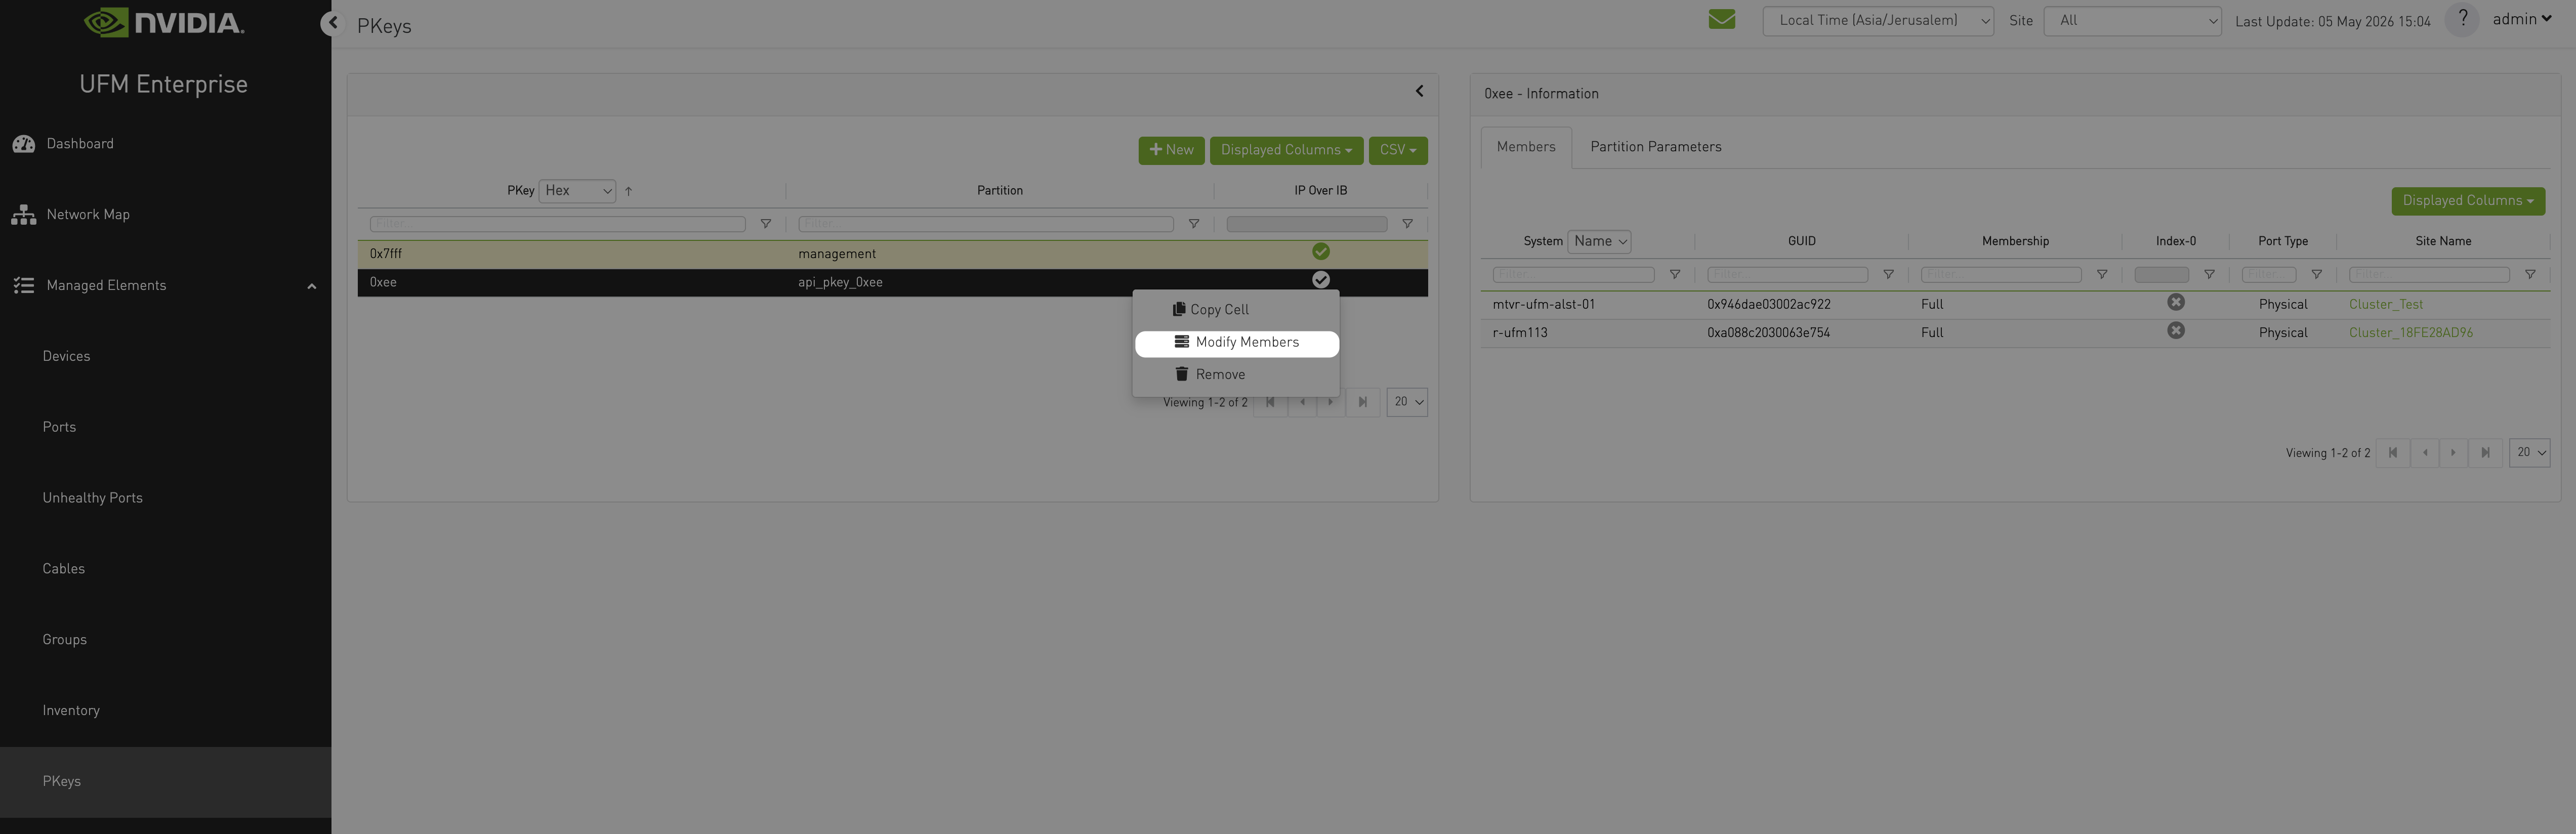
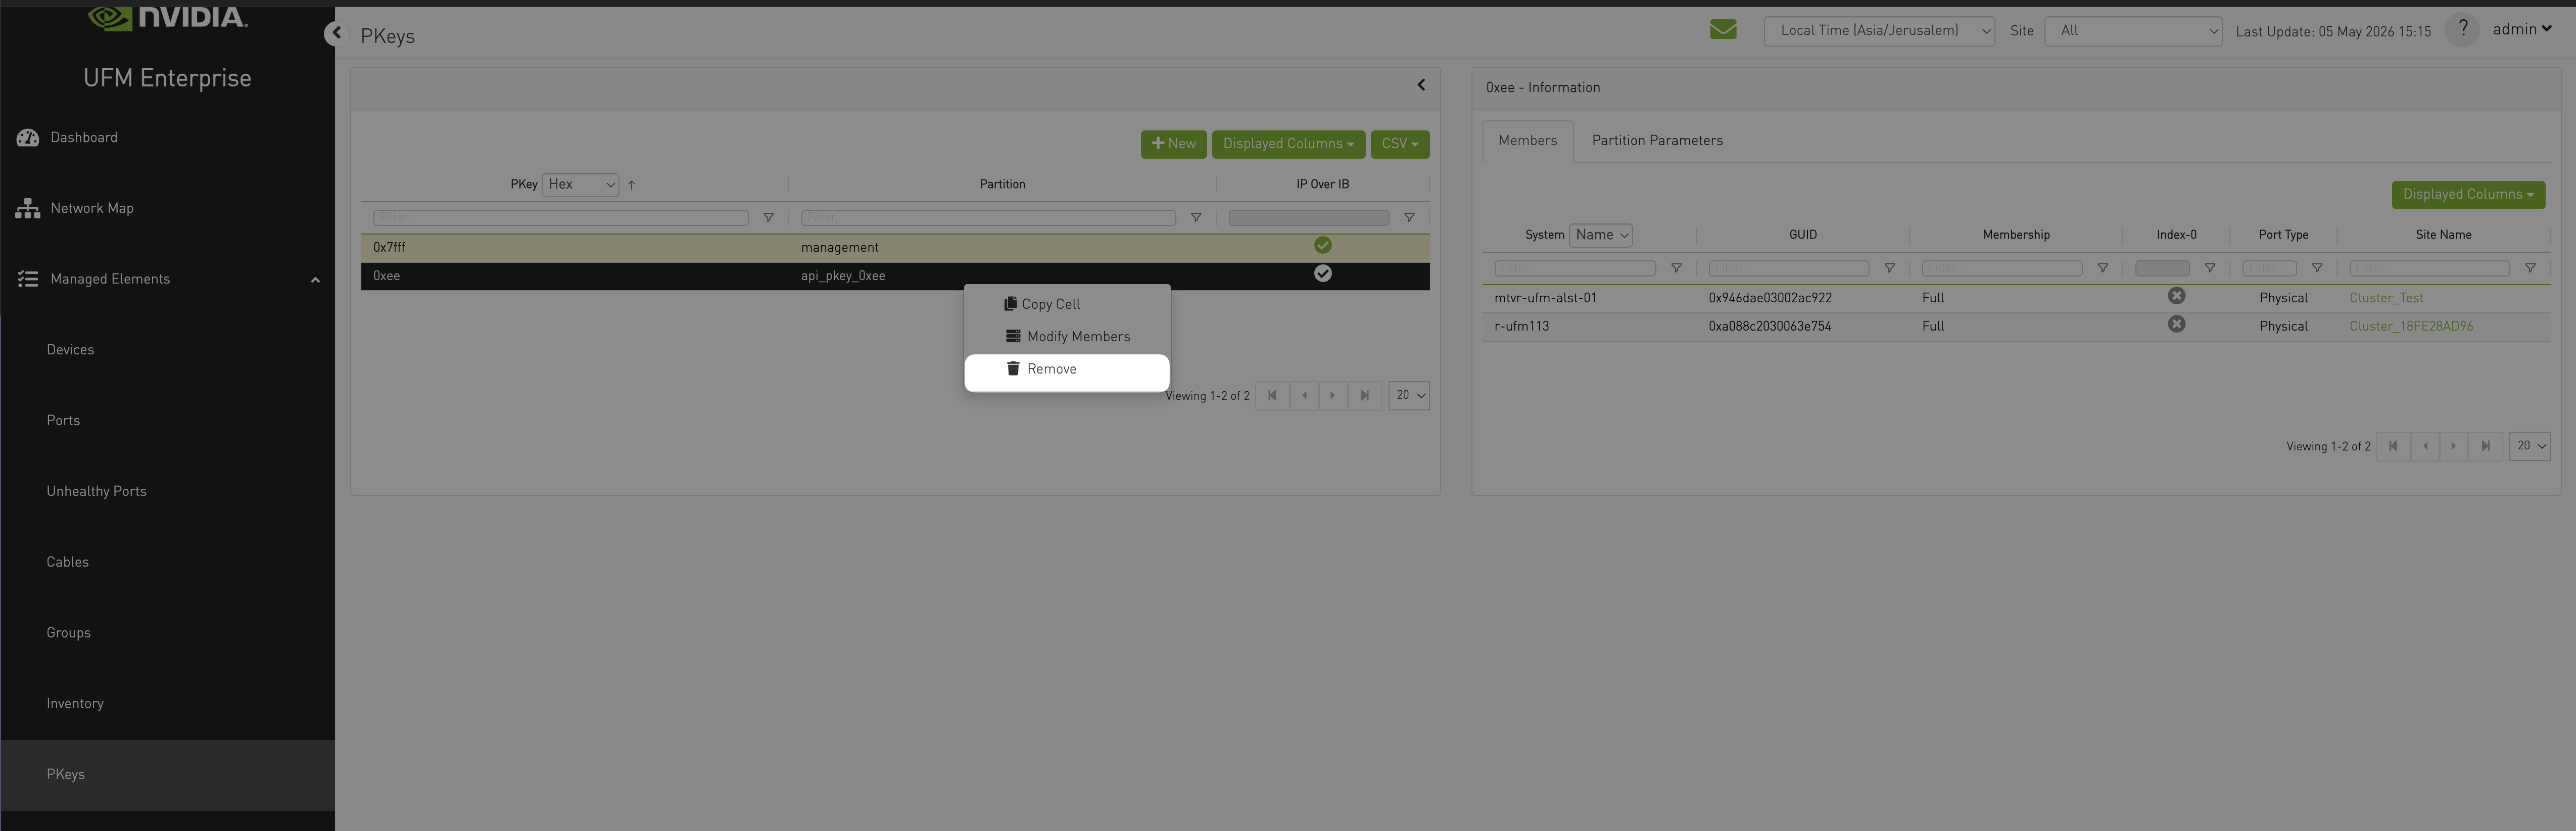
From the Managed Elements > PKeys window, the PKey list is aggregated across all providers. The same PKey may appear once, with member GUIDs contributed by more than one provider. The Site Name column on each row of a PKey’s Members table identifies the owning provider.

PKeys window with the aggregated PKey list across all providers; the Site Name column is visible in the per-PKey GUID table.
To Create a PKey Across Providers
-
From the Managed Elements > PKeys window, click New.
-
In the Create PKey dialog, enter the PKey name and any PKey-level options. Open the GUID picker to add member ports by clicking Next.
The picker lists devices from all providers, with a Site Name column identifying each device’s owning provider. Select port GUIDs from one or more devices.
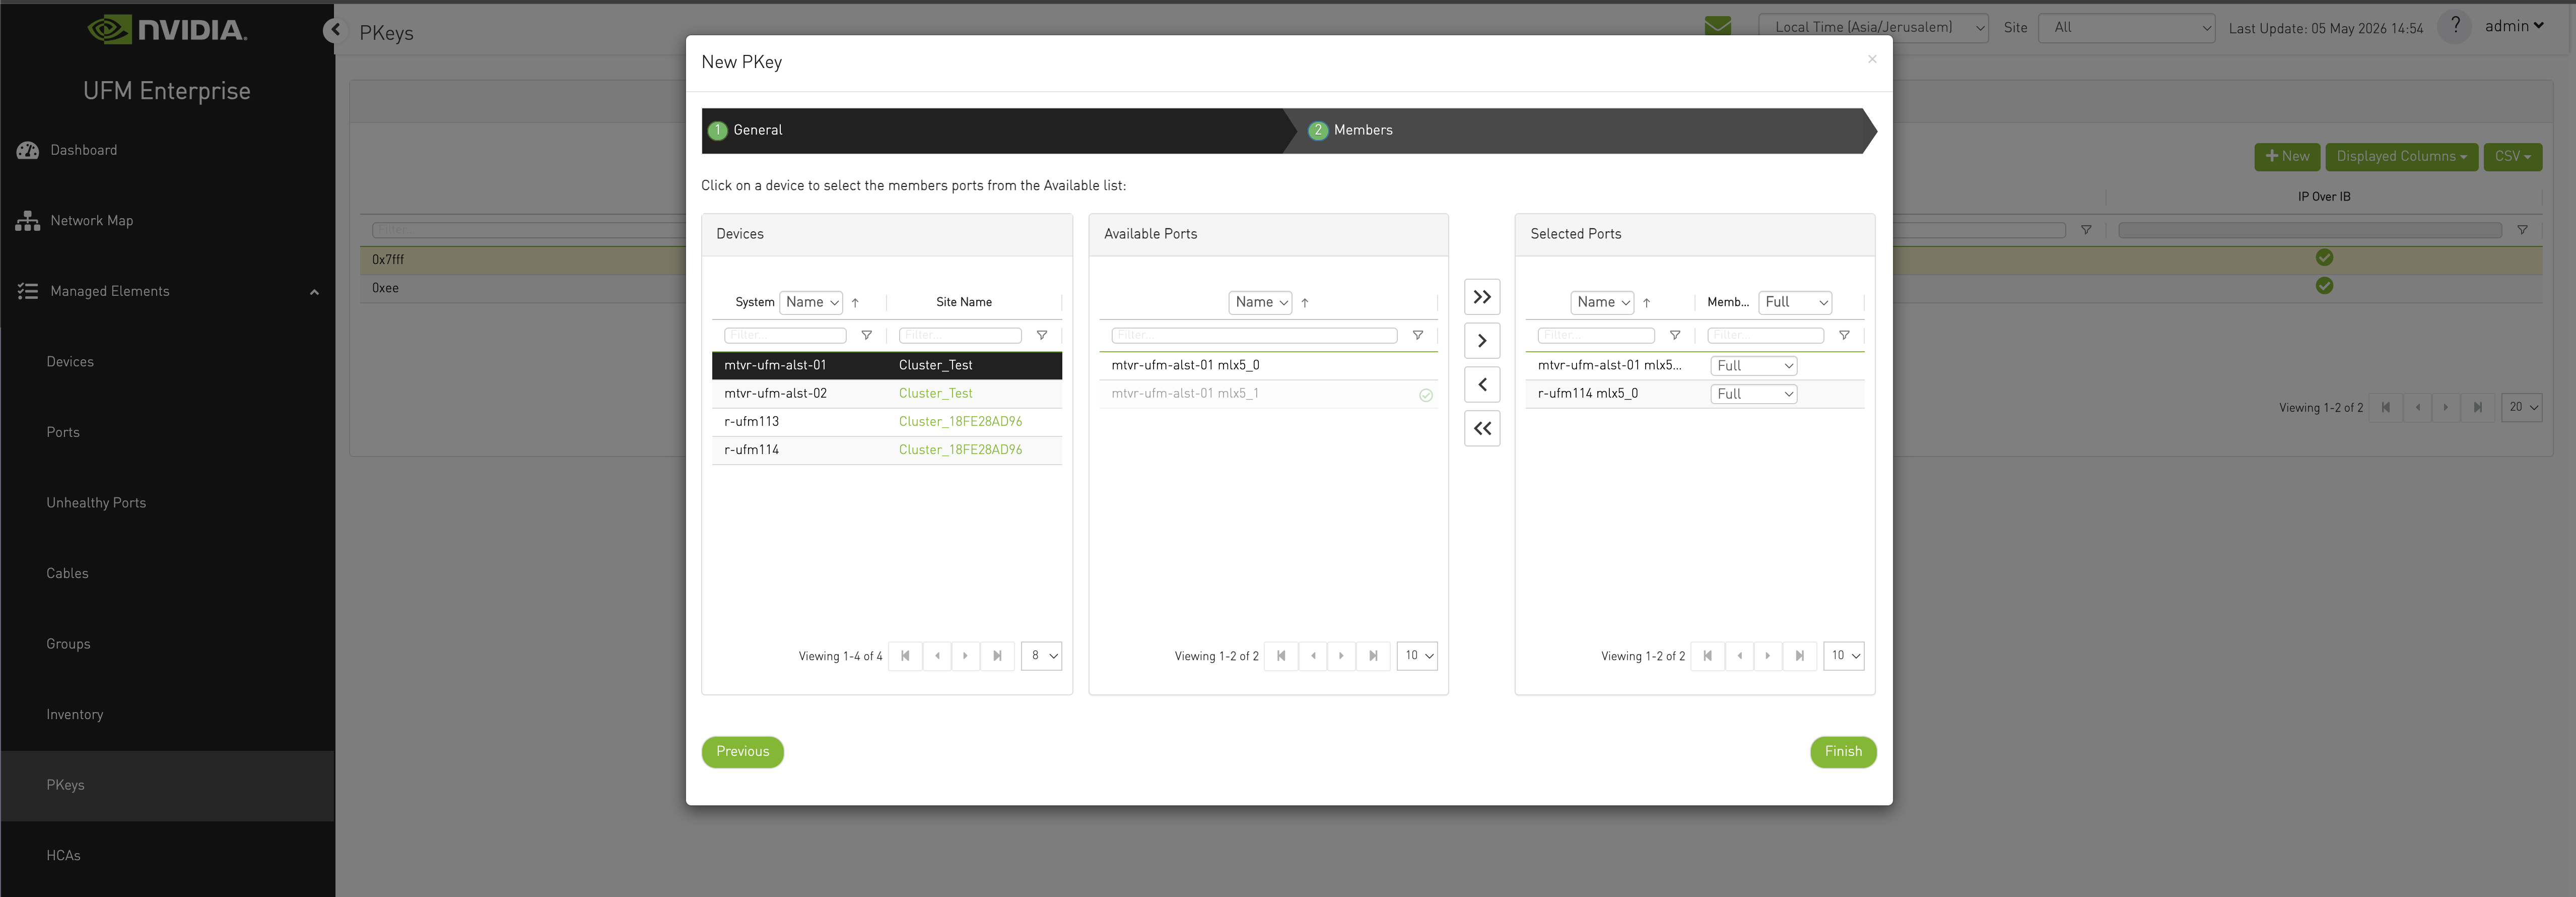
Create PKey dialog with the GUID picker open, showing GUIDs from at least two providers (Site Name column visible) and several GUIDs selected across providers. -
Click Finish.
The PKey is created on every provider that owns at least one of the selected GUIDs; providers with no selected GUIDs are not affected.
To Modify (Add or Delete) Member GUIDs of an Existing PKey
-
From the Managed Elements > PKeys window, right-click an existing PKey and open the Edit PKey dialog by clicking Modify Members.
-
In the Members pane of the Edit PKey dialog, make your modifications to the Selected Ports list.
Add GUIDs to PKey dialog with selected GUIDs spanning two or more providers (Site Name column visible in the picker). -
Click Finish.
The PKey on each provider is updated to include the selected GUIDs owned by that provider. If a provider does not yet have the PKey, it is created on that provider as part of the operation.
To Delete a PKey Across Providers
-
From the Managed Elements > PKeys window, right-click the desired PKey and click Remove.
-
In the confirmation dialog, click Yes.
The PKey is removed from every provider that owns it.
Delete PKey confirmation dialog showing the list of providers from which the selected PKey will be removed.
Last updated: