Introduction
This document describes the guidelines for inspection, cleaning, and replacement of the External Laser Source (ELS) modules and ELSFP connectors during debug or replacement procedures for the Q3450-LD systems.
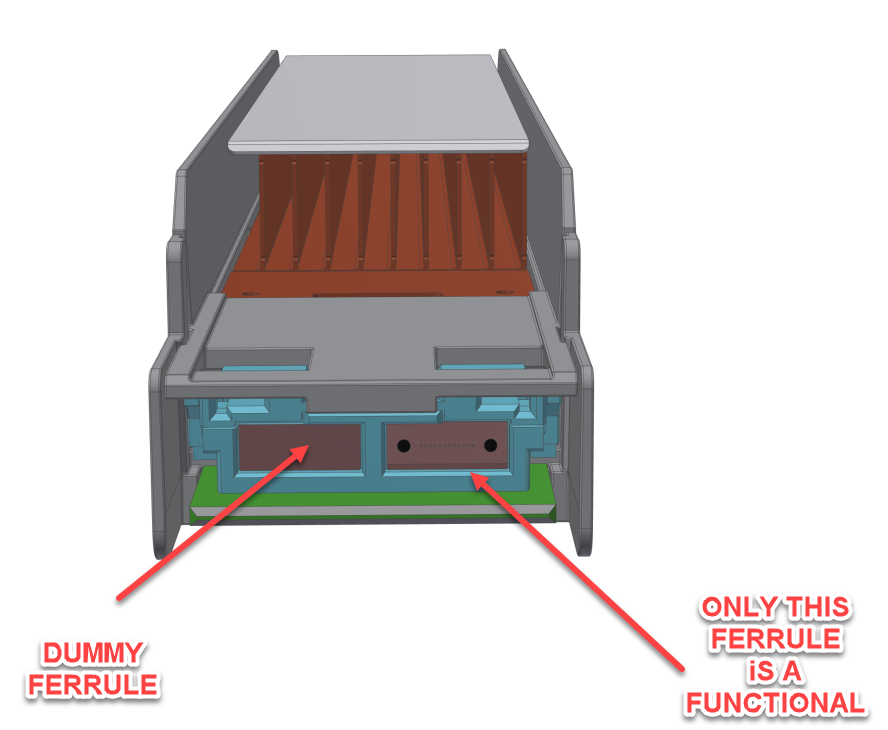
Note: As shown in the illustration above, in the Quigon tool, only one optical ferrule is functional.
-
The recommended process for ELS replacement is: inspection --> cleaning if necessary --> inspecting again to ensure cleanliness --> repeating if needed (2-3 time). If the process fails, use another ELS unit.
-
If the inspection tools are not available, clean both sides of the optical connectors.
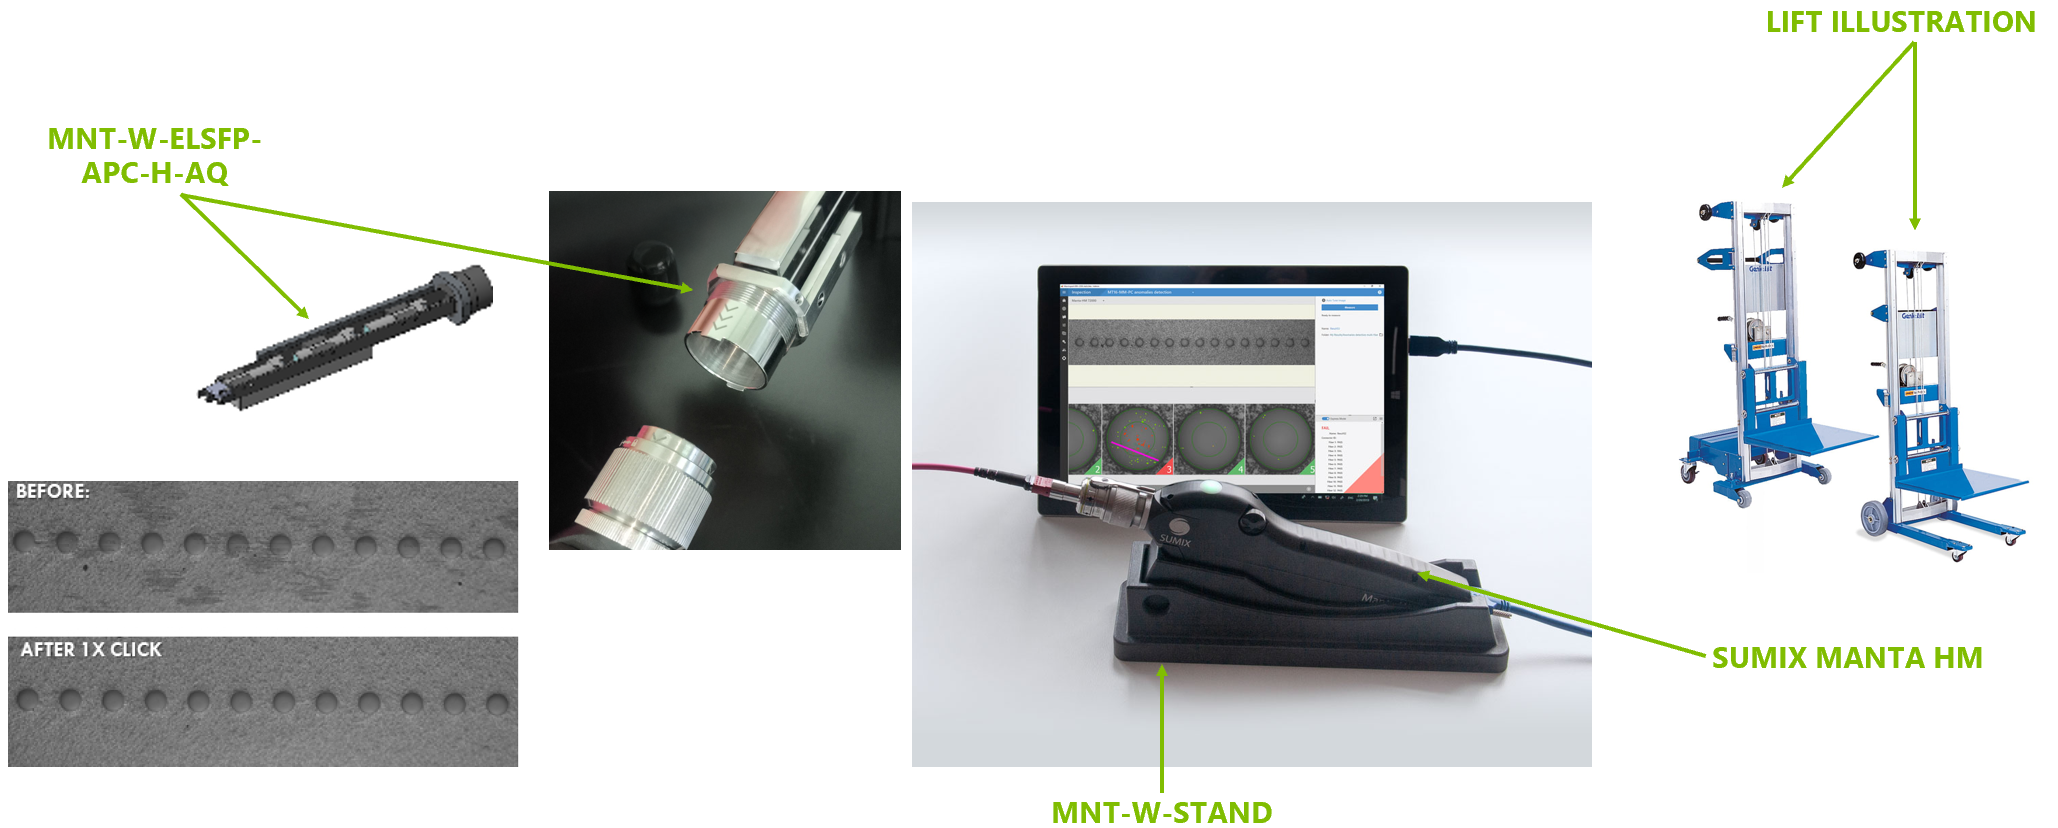
Required Equipment
|
Item |
OPN |
Description |
Quantity |
Illustration |
|---|---|---|---|---|
|
1 |
920-9B36M-00MX-XXX |
Q3450-LD top assembly |
1 |
N/A |
|
2 |
692-9IAG1-0100IH |
Quigon 2.0 TV IHS |
1 |

|
|
3
|
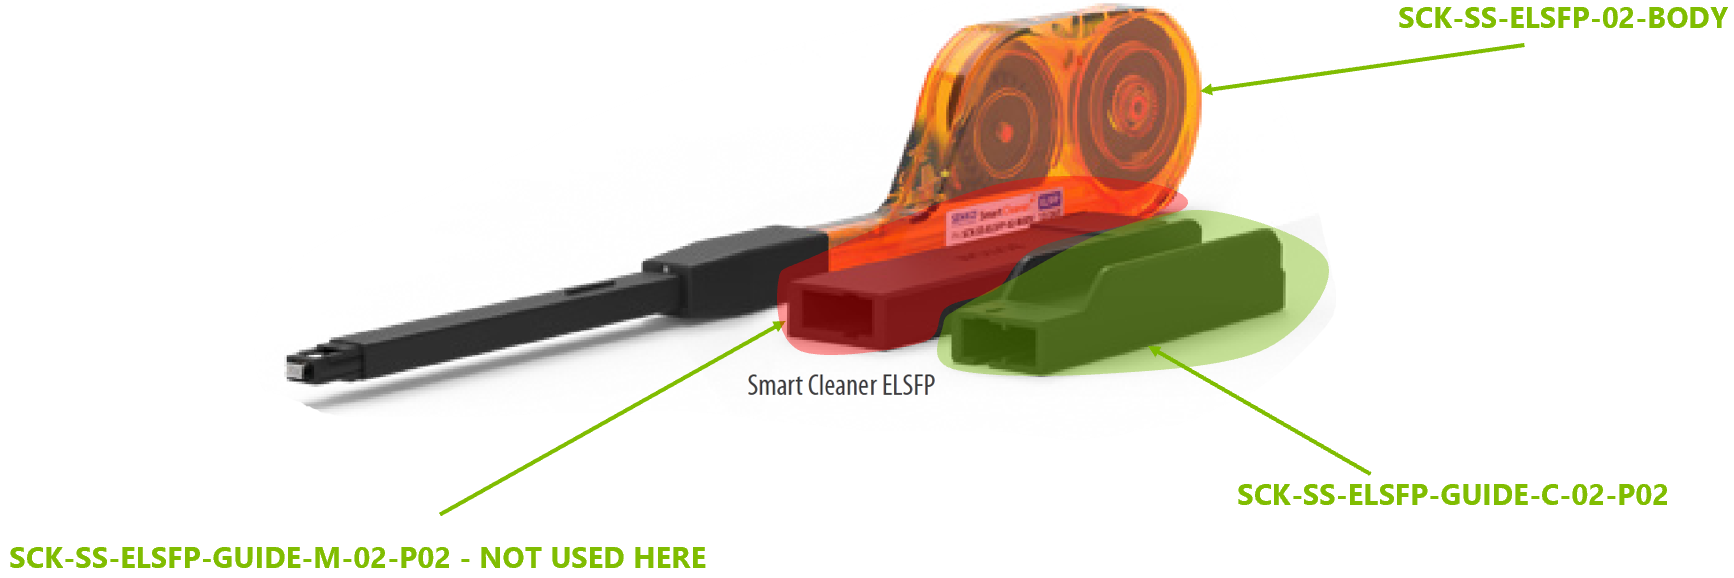
930-9SECK-00MX-00A Cleaning Kit, including: |
|||
|
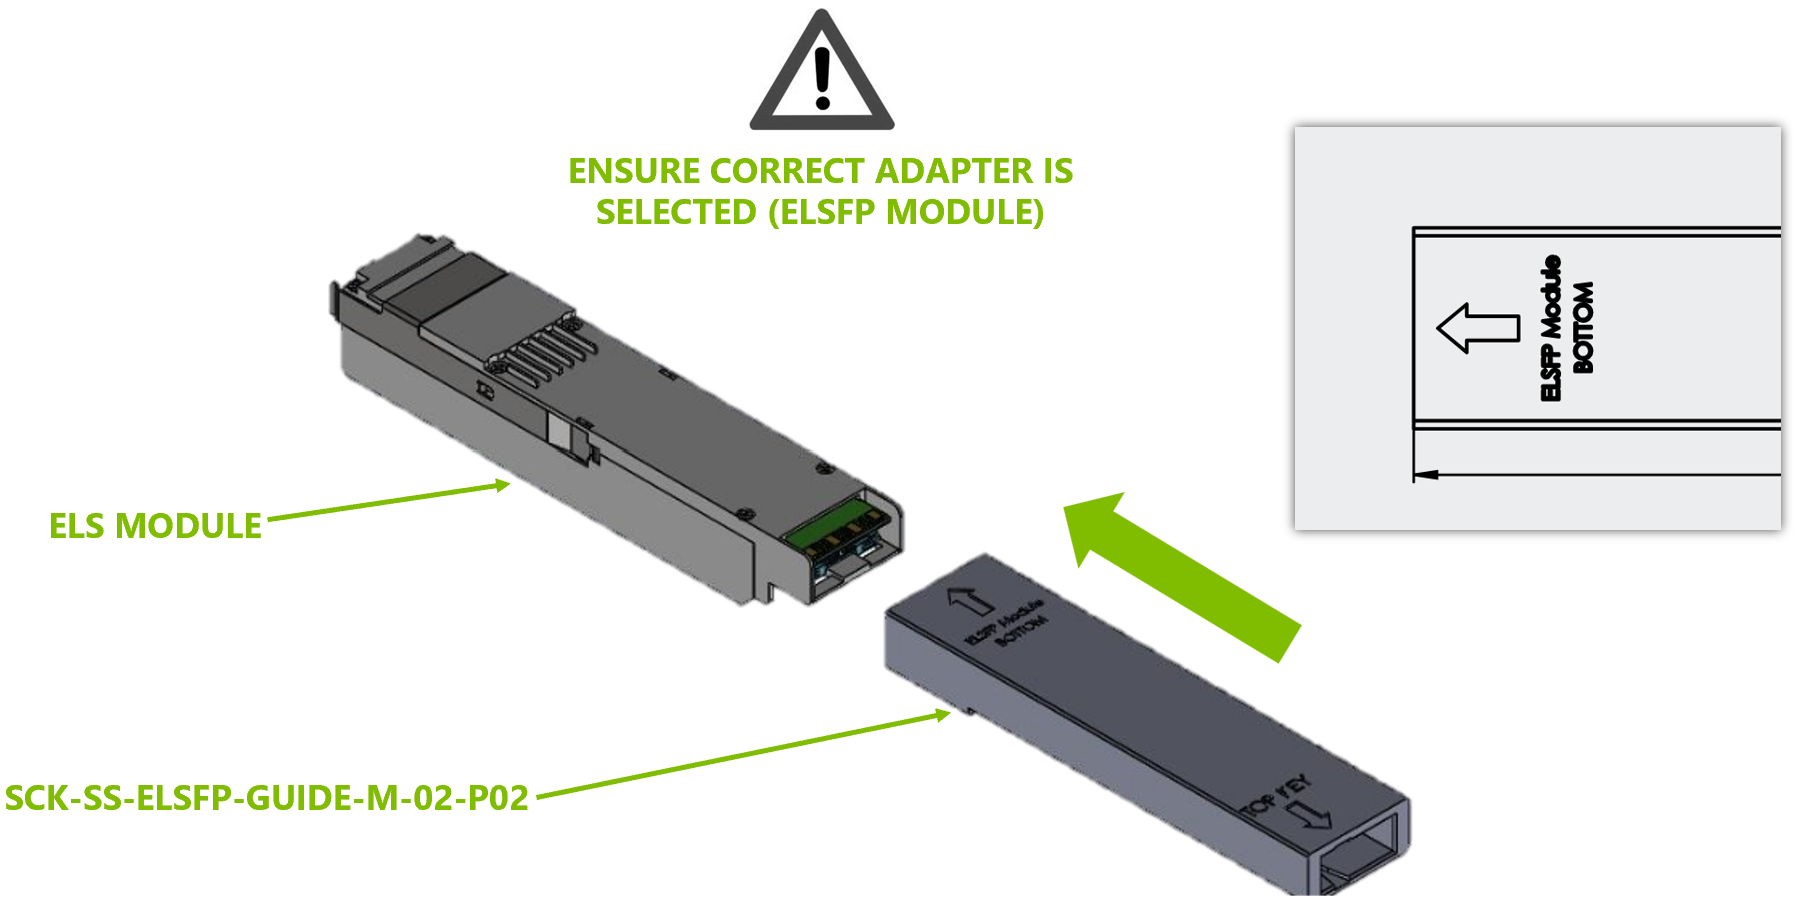
SCK-SS-ELSFP-02-BODY |
ELSFP Gen2 Cleaner Body |
1 |
|
|
|
MTCJ6245 |
L Extraction Tool |
1 |
|
|
|
SCK-SS-ELSFP-GUIDE-M-02-P02 |
ELSFP Guide for Quigon Module |
1 |
|
|
|
SCK-SS-ELSFP-GUIDE-C-02-P02 |
ELSFP Guide for Quigon Cage |
1 |

|
|
|
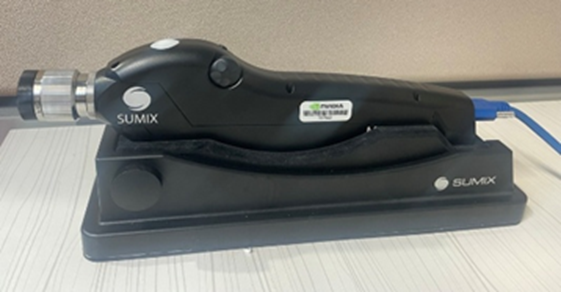
4 |
SMX-Manta-HM |
Sumix Manta HM |
1 |
|
|
5 |
MNT-W-Stand |
Stand (cradle) for desktop use of Manta W+ and Manta HM probes |
1 |
|
|
6 |
MNT-W-ELSFP-APC-M-NV |
Quigon camera adapter |
1 |
|
|
7 |
MNT-W-ELSFP-APC-H-AQ |
ELSFP with cage camera adapter |
1 |
|
The required equipment may be ordered from the following vendors:
-
Cleaning: SalesSupport@senko.com
-
Inspection: salesteam@sumix.com
Equipment and Software Installation
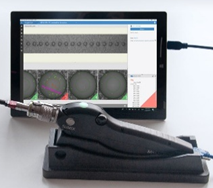
Sumix Inspection Tool Setup
-
Install the MaxInspect™ analytical software.
-
Update the software to the latest version.
-
Place the Sumix device in the stand on a stable surface.
-
Connect the device to the computer.

MaxInspect Task Configuration
Export and import the inspection task for the ELSFP connectors.
|
Q3450-LD Connectors |
Task Name |
|---|---|
|
Quigon/ELSFP Cage |
NV00-Q3450-LD-Quigon/cage _MT12-SM-APC anomalies detection |
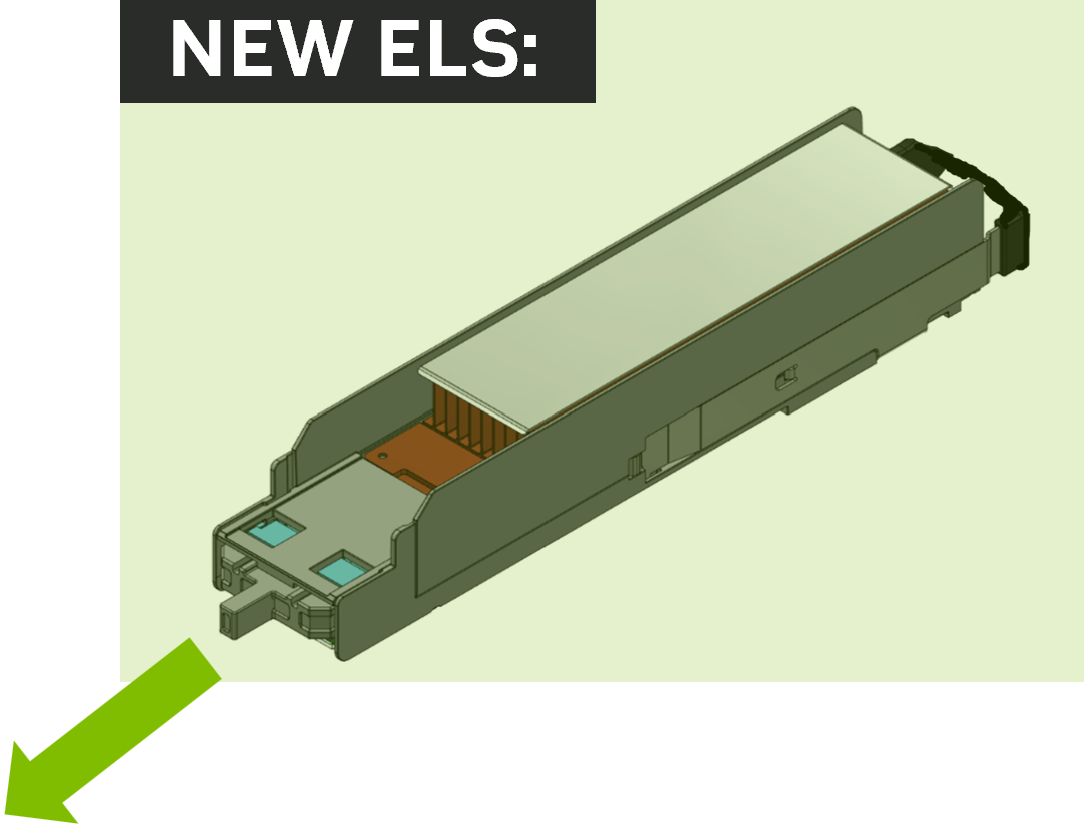
ELS Module Replacement Instructions
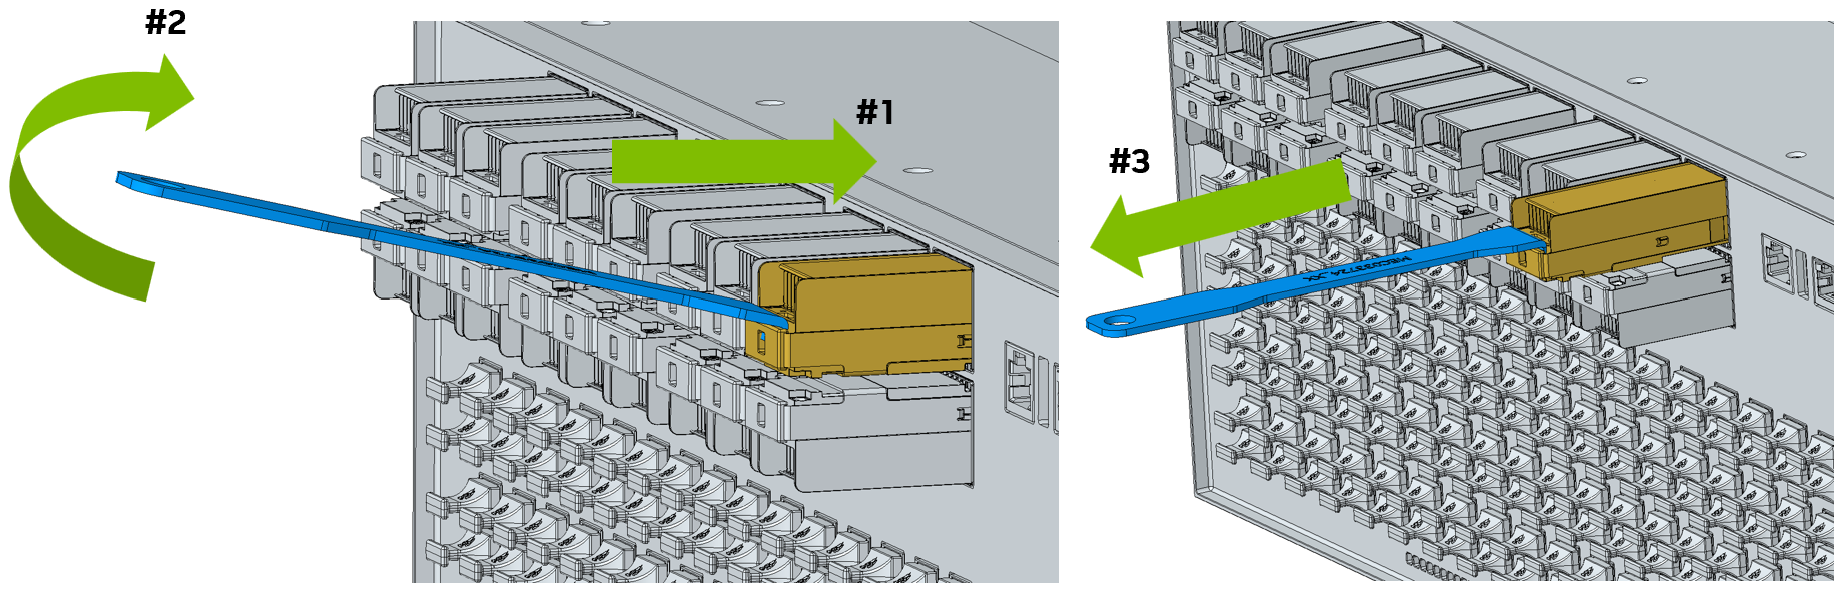
Disassembly
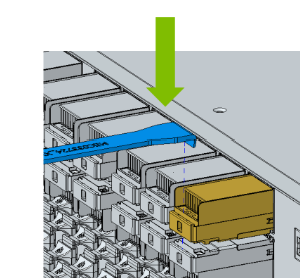
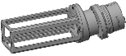
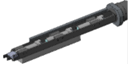
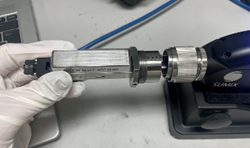
Place the extraction jig (MTCJ6245) on the ELS module.
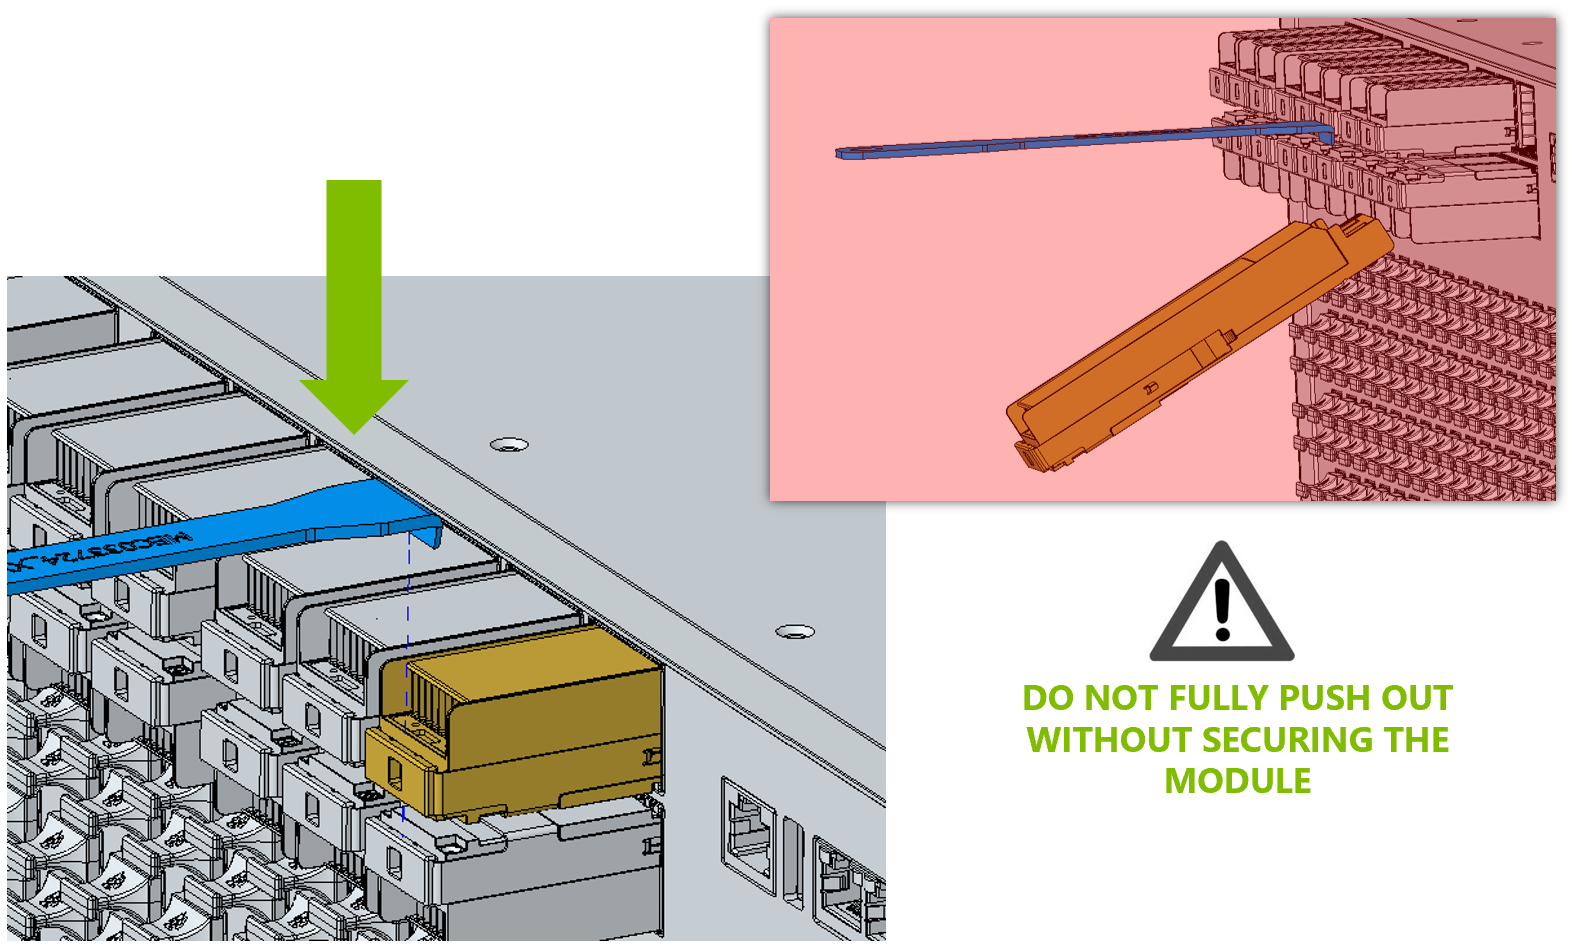
Module Removal
-
Gently push the ELS module inward.
-
Twist the jig slightly upward while pushing to release latch.
-
Pull the module out completely.
-
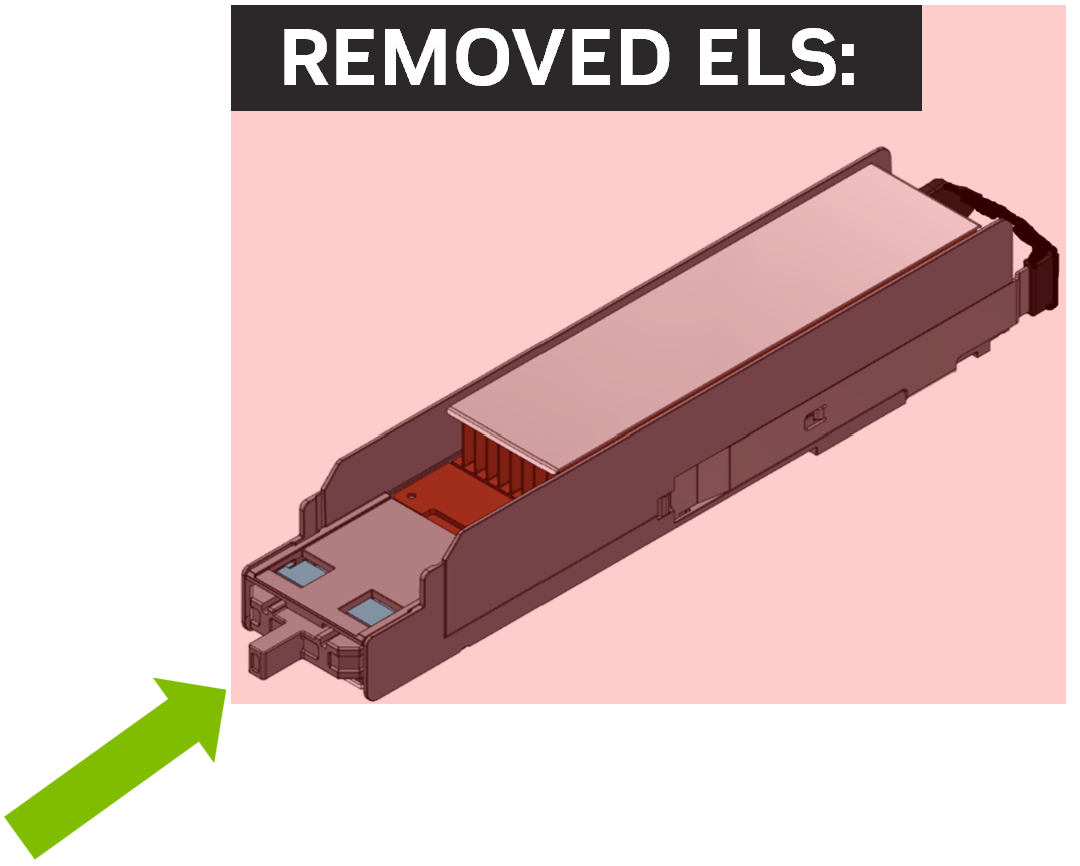
Assemble the dust cover onto the removed ELS module.
Do not leave a running system unplugged from the ELS module for longer than 30 minutes.
ELS Cage Inspection and Cleaning
Cage Inspection
-
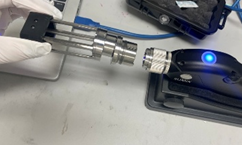
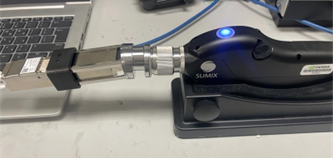
Prepare the Sumix Manta HM with a cage adapter and mount it on stable platform or lift.
-
Plug and screw the dedicated tip into the Sumix device, ensuring the arrows are aligned correctly.
-
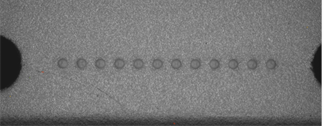
Open the MaxInspect software.
-
Enter a name to save the data.
-
Auto-tune the image; the fibers should be clearly visible.
-
Perform the measurement while maintaining device stability.
-
Save the inspection report.
Cage Cleaning
-
Prepare the cage adapter and one-clicker.
-
insert the cage adapter into the ELSFP cage.
-
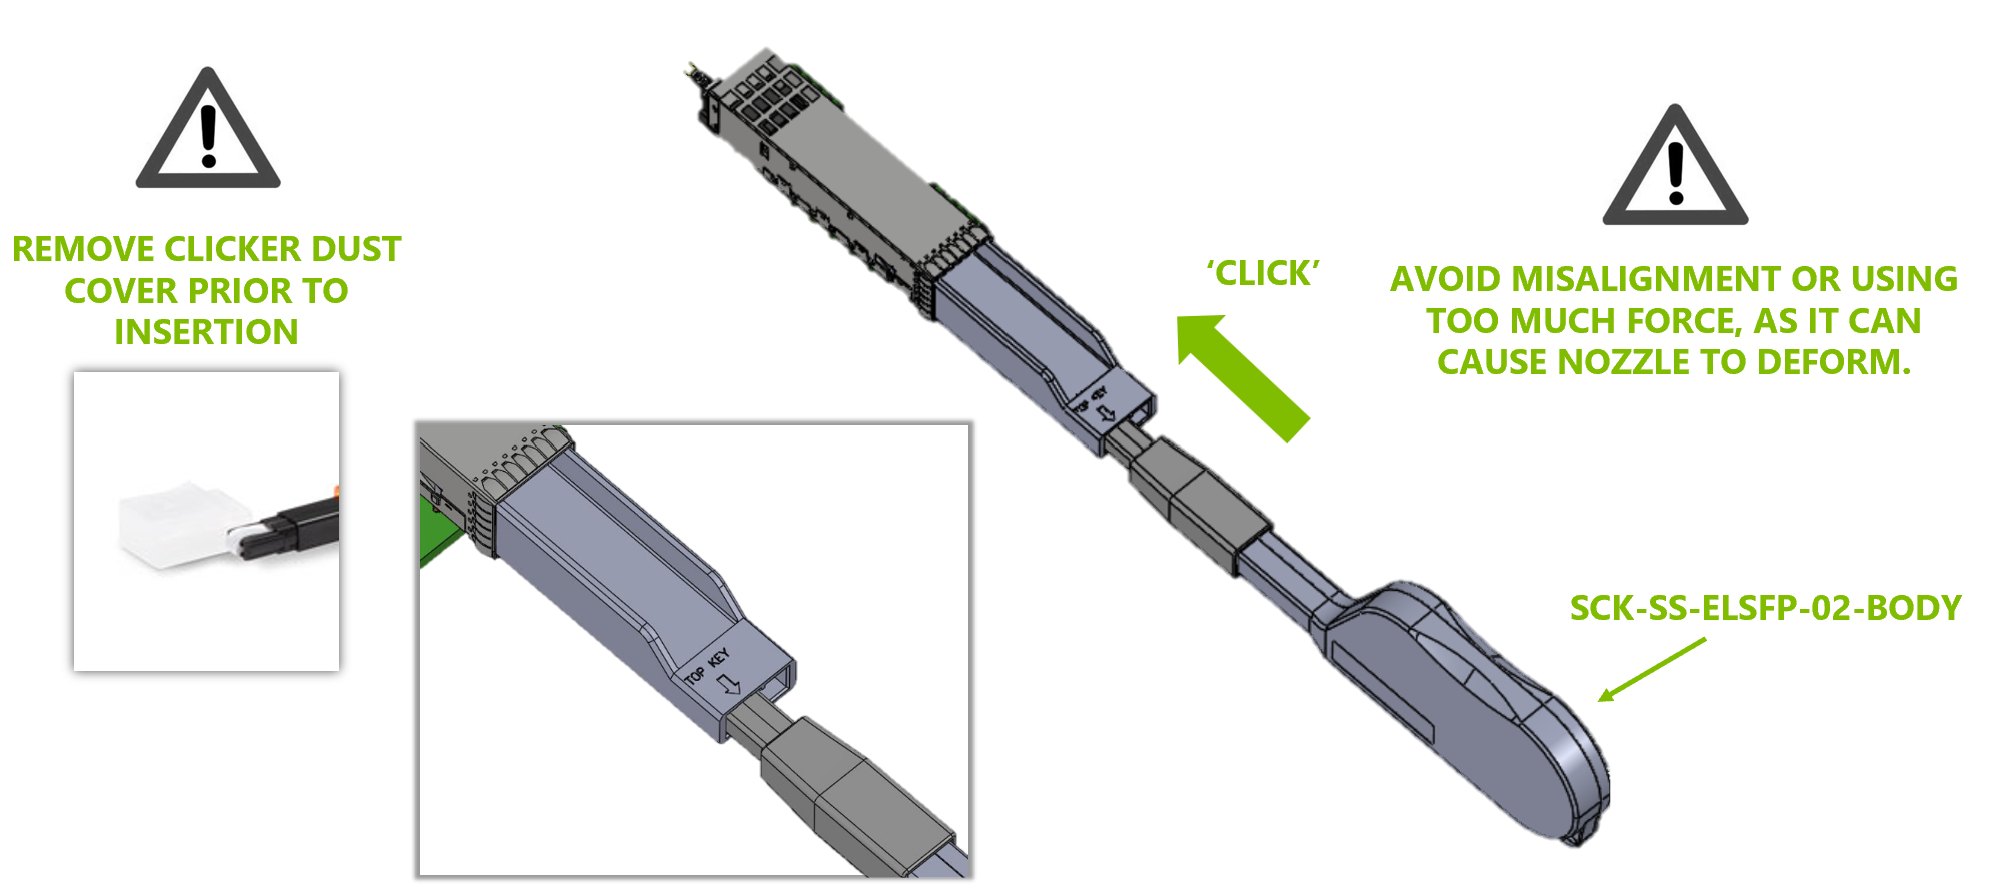
Insert the clicker tool, push until an audible click is head, then remove it.
-
Make sure the cleaning process was completed successfully, or repeat it if needed.
New ELS Module Assembly
-
Remove the dust cover from new ELS module.
-
Plug and screw the dedicated tip into the Sumix device, ensuring the arrows are aligned correctly.
-
Insert the Quigon tool into the tip or the ELSFP cage tip into the cage.
-
Open the MaxInspect software.
-
Enter a name to save the data.
-
Auto-tune the image; the fibers should be clearly visible.
-
Perform the measurement while maintaining device stability.
-
Save the inspection report.
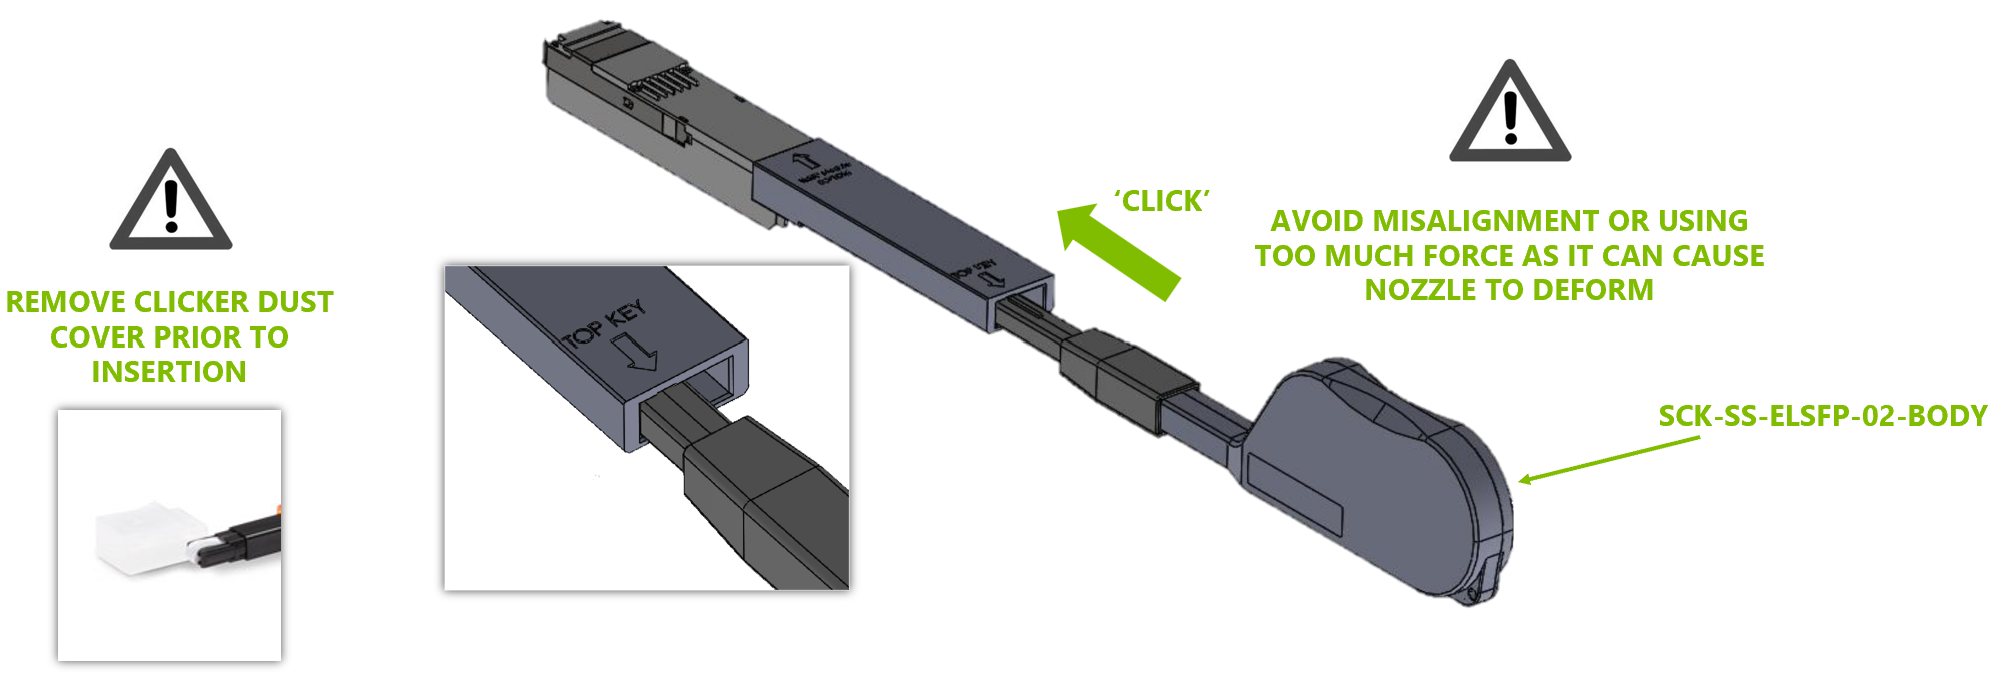
New ELS Module Cleaning
-
Plug the adapter into the one-clicker tool correctly.
-
Insert the Quigon device or ELSFP cage as applicable.
-
Insert the clicker tool, push until an audible click is heard, then remove it.
-
Make sure the cleaning process was completed successfully, or repeat it if needed.
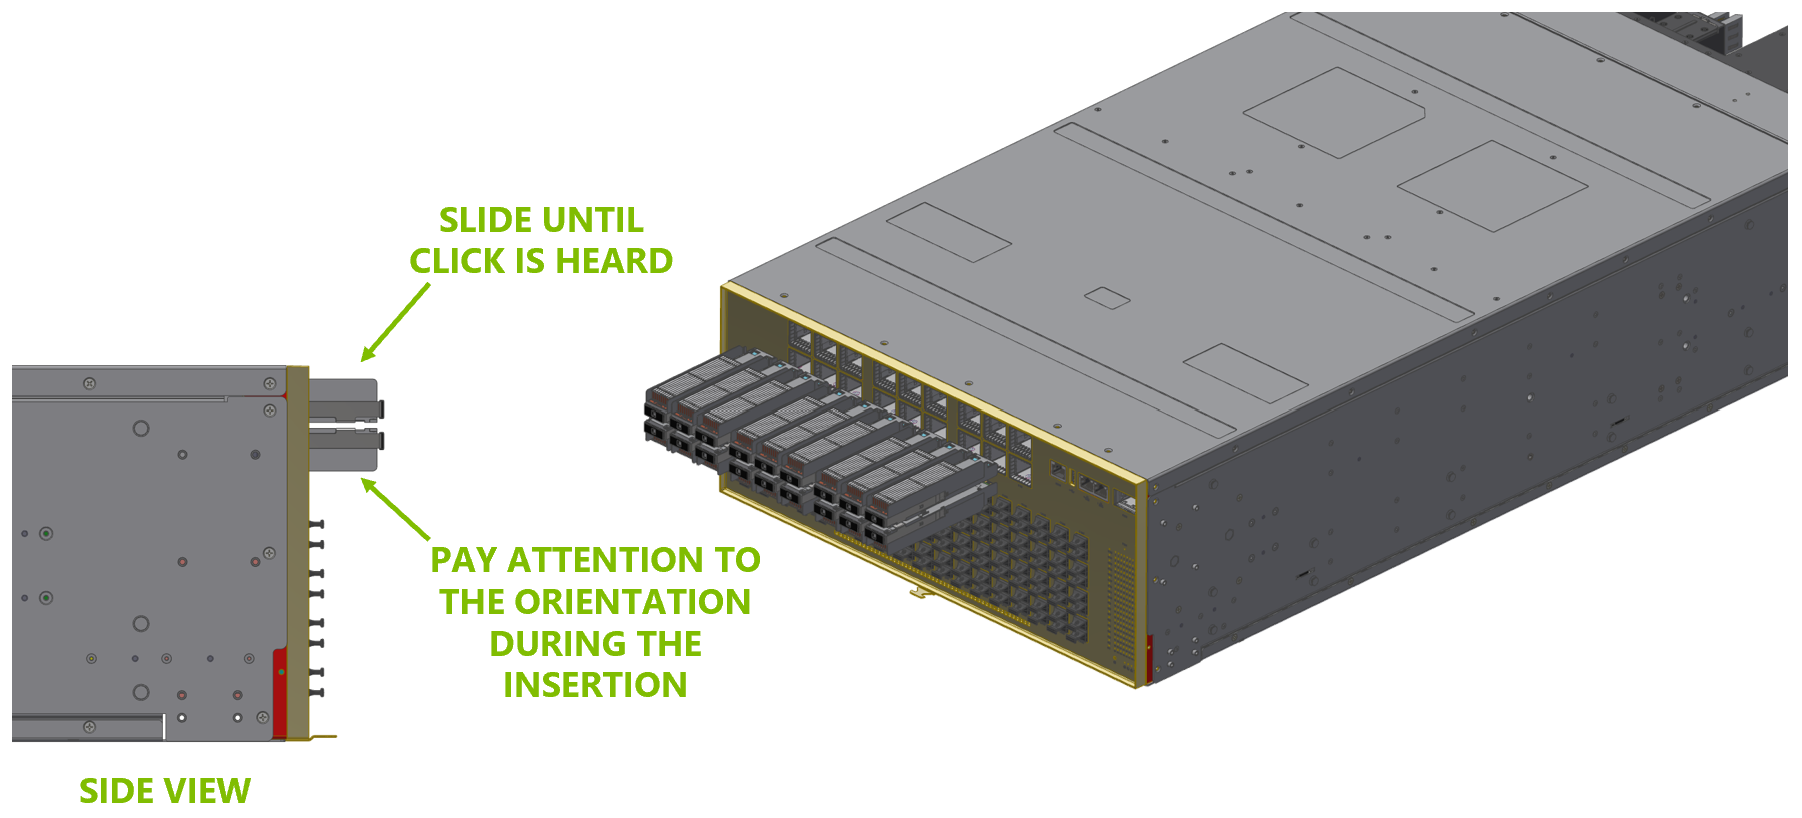
New ELS Module Installation
The system may remain powered-on during the replacement.
Do not leave the system without an ELS module installed for longer than 30 minutes.
Align and gently slide the new ELS module into its slot until it is fully seated.
Last updated: