
Auto correlation groups anomalies and events across the cluster using dimensional or topology-based logic. It reduces notification noise by grouping repeated events together and aids root-cause analysis by building a single timeline of related events.
Create a Correlation Namespace
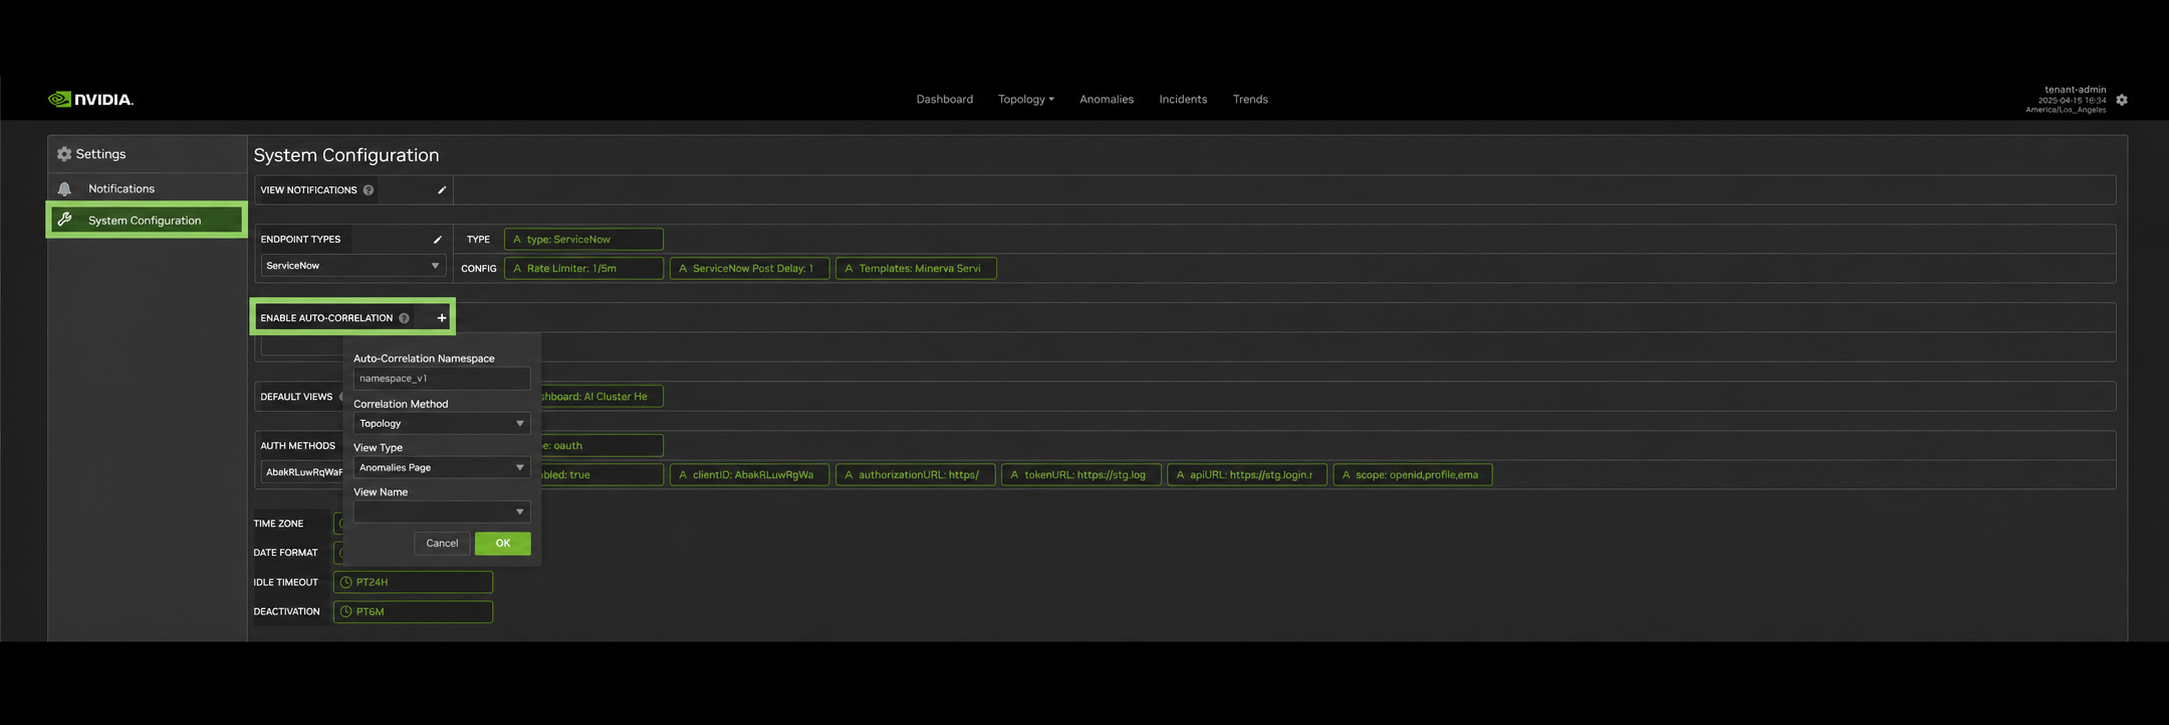
A correlation namespace defines the logic used to group anomalies or trends. To create one:
-
In the upper-right corner, click

-
Navigate to the System Configuration tab.
-
Next to Enable Auto-Correlation, click +.
-
Configure the new namespace:
-
Auto-Correlation Namespace: the name of the namespace. An auto-generated prefix is added based on your tenant and user.
-
Correlation Method: select Dimensions to group events by shared metadata (for example, matching
RackorjobIdvalues), or Topology to group events by network fabric relationships. The default is Topology. -
View Type: select Anomalies Page or Trends Page to list that page's views in View Name.
-
View Name: select the views to include in this namespace. A view can belong to only one namespace, so views that are already in another namespace aren't listed. If you use Dimensions, select the settings icon next to each selected view to choose the dimensions to correlate on for that view.
Adding a view to a namespace turns on Auto-Correlation for that view, and removing the namespace turns it off. To change or remove a namespace later, use the edit (pencil) or remove (X) icon next to it.
-
Set Up a Correlation Endpoint
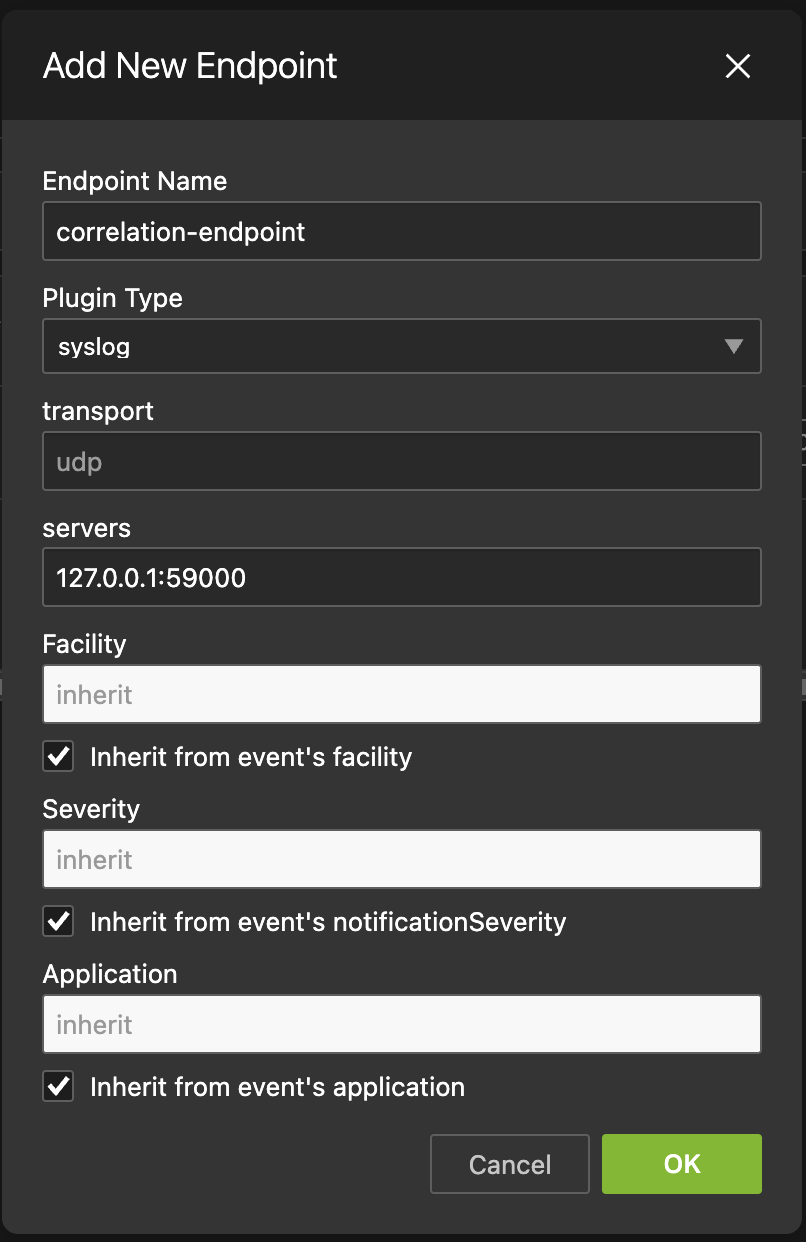
Next, set up the correlation endpoint to receive notifications:
-
From Settings, navigate to the Notifications tab.
-
Under Actions, click Add new endpoint.
-
Use the following configuration settings for the endpoint:
-
Endpoint name:
correlation-endpoint -
Plugin Type:
syslog -
Transport:
udp -
Servers:
127.0.0.1:59000 -
Facility: select Inherit from event's facility
-
Severity: select Inherit from event's notificationSeverity
-
Application: select Inherit from event's application
-
Configure Views for Correlation
After you have configured a namespace and endpoint, enable auto correlation on each Trends and Anomaly view you selected in the namespace:
-
Navigate to a view.
-
Click the settings icon: in Trends views this is in the View Name section; in Anomaly views it is to the right of the View Selection dropdown.
-
Confirm Auto-Correlation is On to verify that this view was included in the namespace.
-
Set Notifications to Enabled and click the settings icon next to the dropdown.
-
Select
correlation-endpointfrom the Select Notification Endpoints list. Use dedicated auto correlation views that notify only to the correlation endpoint.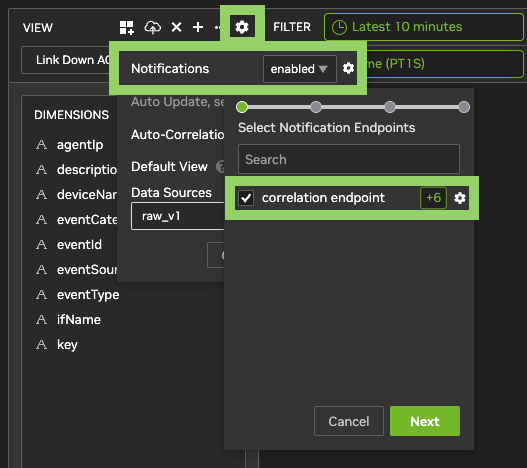
-
Confirm that no deduplication dimensions are selected.
-
Click OK.
-
Repeat for all views included in the namespace.
Last updated: